This article was co-authored by wikiHow Staff. Our trained team of editors and researchers validate articles for accuracy and comprehensiveness. wikiHow's Content Management Team carefully monitors the work from our editorial staff to ensure that each article is backed by trusted research and meets our high quality standards.
There are 7 references cited in this article, which can be found at the bottom of the page.
This article has been viewed 77,527 times.
Learn more...
Honeywell makes a wide variety of quality thermostats. To use your Honeywell thermostat, start by reading through the instruction manual. Spend some time looking over the keypad and display. Enter in any personalized settings or programs that you wish. If you experience any problems, reach out to Honeywell customer service or contact an HVAC expert.
Steps
Familiarizing Yourself with Your Thermostat
-
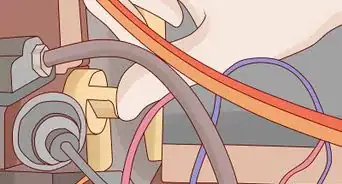
1Decide on professional or DIY installation. Depending on the type of thermostat that you choose, you may get to select an installation preference. However, if you choose personal installation, you’ll want to follow the directions very carefully as some thermostats require direct wiring into high voltage connections.[1]
- Other Honeywell thermostats have certain technological requirements, another aspect that a HVAC expert can manage. Find a local HVAC expert by entering “HVAC technician” and your location into a search engine.[2]
-
2Read the instruction manual. A paper manual will come with your thermostat. But, you can also order a paper copy or download a digital copy from the Honeywell website, available in the Resources Section at https://yourhome.honeywell.com/en/support. Some of the new thermostats have a downloadable app available for guidance, too.[3]
- Before you call for professional assistance, make sure to check your instruction manual. You may find answers in the troubleshooting section, in particular.
Advertisement -
3Download any required apps. Some Honeywell thermostats require that you download and use an app for day-to-day operations. Your instruction manual will tell you if this is the case. Lyric thermostats, for example, suggest that you use Apple’s HomeKit for installation and control of the unit. There is also a generic Lyric app available.[4]
- You may want to consider what devices you own prior to choosing a thermostat. The Lyric app, for example, does not work on Blackberry phones.
-
4Check out the preprogrammed settings. The majority of Honeywell thermostats come preprogrammed with factory specifications. You’ll want to look these over to see which ones you’d like to change and which settings are fine as is. For example, the day/time, fan setting, system, setting, various schedules, and temp controls may already be activated and awaiting modification by you.[5]
-
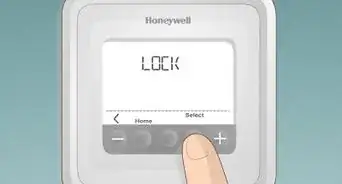
5Identify all of the button controls. Look over the control pad of your thermostat and pay close attention to the buttons that are visible right away, as well as any buttons that are hidden under a cover or plastic flap. You will likely see at least one button for temperature adjustments, a hold button, an override button, and various function buttons.[6]
-
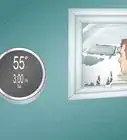
6Understand the display screen read outs. As you press any buttons, the changes will be registered and displayed via the digital screen, if your thermostat has one. Your display will also show any programmed schedule changes as they happen. You will want to get in the habit of checking your display for any warnings as well, such as a battery replacement alert.[7]


Personalizing the Settings
-
1Set the time and day, if needed. This is an important adjustment to make right away, as many of your thermostat’s settings will follow the clock. Look at your instruction manual and follow its directions regarding making this change. You will likely need to press a “Set Clock” button, scroll to the proper numbers, and then approve the changes by pressing a “Done” button.[8]
-
2Select your fan setting, if needed. You will generally have two choices of fan settings: Auto or On. If your thermostat is set to “Auto,” this will lead to your fan running only as necessary when connected to the heating or cooling system. If your thermostat is set to “On,” then your fan will keep running, regardless of the heat/cool settings.[9]
-
3Adjust the general system settings. Your general choices in this section are: Heat, Cool, Off, or Auto. The “Heat” button activates the heating system, whereas the “Cool” button will turn on your AC. The “Off” setting turns all temperature systems off. The “Auto” setting is only available on certain thermostats and regulates the temperature systems according to your program schedule settings.[10]
- Be aware that turning your setting to “Cool” can damage your system if the outside temperature is lower than 50 degrees Fahrenheit (10 degrees Celsius).
-
4Set program schedules. Depending on which Honeywell thermostat you own, there are a wide variety of schedules that you can choose from or personalize. You can set your system to come on at certain time periods each day, or choose different temperature settings for certain days. You can also set-up energy-savings mode, where your system operates at a lower level when you are not in the home.[11]
- Some people can save as much as 35% by activating the energy savings program settings on their Honeywell thermostats.
-
5Learn how to override program settings. You can generally override a program in place by pressing the up or down button on the control panel. This will make the temperature warmer or cooler, depending on which button you choose. If you want to cancel the entire schedule, then you will need to go into program settings and follow the directions on your thermostat’s instructional manual.[12]
-
6Command with voice control. With certain types of Honeywell thermostats, including the Lyric, you are able to communicate directly with the control panel via your Amazon Echo. You enable the connection between the two devices via your SmartHome app and then simply speak any commands to Echo.[13]
- For example, you might say, “Alexa, please raise the temperature by ten degrees.”
-
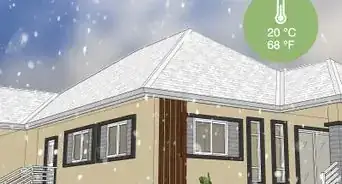
7Set up geofencing. To set this up you will need a thermostat that is Wi-Fi enabled and can connect to your smartphone. You can then follow the manufacturer’s instructions to set up a geofence around the perimeter of your home. When you step outside of this perimeter, your thermostat will then change your temperature settings to away.[14]


Addressing Any Concerns or Problems
-
1Be prepared to go manual, if necessary. If your power goes out, then you will lose many of the “smart” settings on your thermostat. Be aware that most Honeywell thermostats will automatically continue to operate in manual mode in the event of a power loss. They will draw power from their battery and operate according to preprogrammed settings.[15]
-
2Look at the troubleshooting guidelines. Flip to the back of your paper manual, or visit the Honeywell website, and read the FAQs and troubleshooting section. These areas will help you if you run into any troubles with your system. Both guides cover a wide variety of problems, such as what to do if your display does not power up.[16]
-
3Pay attention to maintenance reminders. Your system will generally show an announcement on the keypad when certain maintenance items are due. You will likely need to replace batteries yearly and your heating or cooling filters even more often. Keeping up with regular maintenance will make your thermostat and overall system last longer.[17]
-
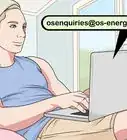
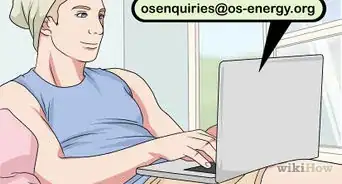
4Visit online support. You can live chat with Honeywell on their website or you can call Customer Care directly at 1-800-468-1502. To get better assistance, make sure that you have the model number of your thermostat handy. Any other details that you can provide regarding the problems you’ve experienced will prove helpful as well.[18]
- If you are experiencing a problem with your thermostat, you could also watch one of the many troubleshooting videos that Honeywell has posted online.[19]
-
5Seek out professional assistance. If you just can’t seem to manage working your thermostat, it may be a good idea to contact an HVAC expert for help. You can find a technician in your area by entering your city and “HVAC technician” into a search engine. Make sure to choose one with recent, positive reviews.[20]


Warnings
- Make sure to pay attention to the terms of your warranty when handling your thermostat. Most Honeywell thermostats come with a limited 1 year warranty.[22]⧼thumbs_response⧽


References
- ↑ https://yourhome.honeywell.com/en/products/thermostat/lyric-thermostat
- ↑ https://yourhome.honeywell.com/en/products/thermostat/lyric-thermostat
- ↑ https://yourhome.honeywell.com/en/products/thermostat/lyric-thermostat
- ↑ https://yourhome.honeywell.com/en/products/thermostat/lyric-thermostat
- ↑ http://pdf.lowes.com/useandcareguides/085267573672_use.pdf
- ↑ http://pdf.lowes.com/useandcareguides/085267573672_use.pdf
- ↑ http://pdf.lowes.com/useandcareguides/085267573672_use.pdf
- ↑ http://pdf.lowes.com/useandcareguides/085267573672_use.pdf
- ↑ http://pdf.lowes.com/useandcareguides/085267573672_use.pdf
- ↑ http://pdf.lowes.com/useandcareguides/085267573672_use.pdf
- ↑ http://pdf.lowes.com/useandcareguides/085267573672_use.pdf
- ↑ http://pdf.lowes.com/useandcareguides/085267573672_use.pdf
- ↑ http://www.androidcentral.com/how-set-and-control-smart-thermostats-using-amazon-echo
- ↑ https://yourhome.honeywell.com/en/products/thermostat/lyric-thermostat
- ↑ http://www.pcadvisor.co.uk/how-to/digital-home/what-happens-smart-heating-when-wi-fi-or-power-is-down-3588749/
- ↑ https://customer.honeywell.com/resources/techlit/TechLitDocuments/68-0000s/68-0280.pdf
- ↑ https://customer.honeywell.com/resources/techlit/TechLitDocuments/68-0000s/68-0280.pdf
- ↑ http://pdf.lowes.com/useandcareguides/085267573672_use.pdf
- ↑ https://www.youtube.com/user/honeywellhome
- ↑ https://yourhome.honeywell.com/en/products/thermostat/lyric-thermostat
- ↑ https://play.google.com/store/apps/details?id=com.honeywell.android.lyric&hl=en
- ↑ http://pdf.lowes.com/useandcareguides/085267573672_use.pdf
About This Article

To use a Honeywell thermostat, start by setting the correct time and date, since many of your thermostat settings will follow the clock. Next, adjust your general setting to "Heat" if you want the heater turned on, "Cold" if you want AC, and "Off" to switch off the system. Then, choose a program schedule for when you want your system to turn on and off. You can also override the existing settings on your system by pressing the up or down button on the control panel. For tips on how to control your Honeywell thermostat with voice controls, keep reading!