This article was co-authored by wikiHow staff writer, Hunter Rising. Hunter Rising is a wikiHow Staff Writer based in Los Angeles. He has more than three years of experience writing for and working with wikiHow. Hunter holds a BFA in Entertainment Design from the University of Wisconsin - Stout and a Minor in English Writing.
There are 7 references cited in this article, which can be found at the bottom of the page.
Learn more...
You love how quick and convenient it is to brew a cup of coffee with your Keurig, but the cost of all those K-cups? Not so much. Rather than tossing out a K-cup every time you want more coffee, putting in a reusable filter lets you use any fresh grounds you have at home. Not only does a reusable K-cup cut costs at the grocery store, but it also prevents single-use cups from piling up in landfills. Even though there are multiple reusable K-cups out there, they all work the same way. Keep reading to find out how to fill, load, and clean your reusable K-cup so you can enjoy a hot cup of joe whenever you want.
Things You Should Know
- Fill your reusable K-cup with coffee grounds up to the fill line for the coffee size you’re brewing.
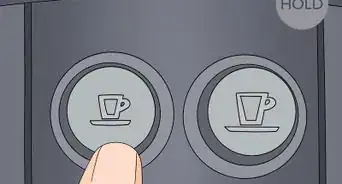
- Secure the lid and place the K-cup into the holder on your Keurig machine. Close the lid and press the button to start brewing your coffee.
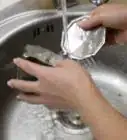
- Empty out the grounds and rinse the reusable K-cup under warm water.
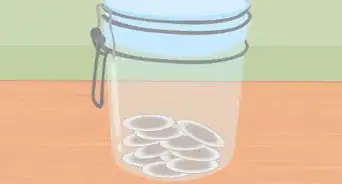
- Wash your K-cup weekly with soapy water or in your dishwasher’s top rack.
Steps


Warnings
- If your Keurig has problems dispensing coffee, the K-cup may be overfilled. Empty some coffee from the filter, but be careful since it could contain very hot water.[9]⧼thumbs_response⧽
- Clean your Keurig every few months to help prevent clogs.[10]⧼thumbs_response⧽


References
- ↑ https://www.manualslib.com/manual/1486968/Keurig-My-K-Cup-2-0.html#manual
- ↑ https://youtu.be/vfbSqHfsSt4?t=65
- ↑ https://www.keurig.com/medias/K300-400-500-My-K-Cup-UCG.pdf?context=bWFzdGVyfGFjY2Vzc29yaWVzLXVzZXItZ3VpZGUtcGRmc3w1NzAyMDkxfGFwcGxpY2F0aW9uL3BkZnxhY2Nlc3Nvcmllcy11c2VyLWd1aWRlLXBkZnMvaDA3L2gxYi8xNjc1OTcwMDQ4ODIyMi5wZGZ8ZmE4MmJiMDEyNmI2MzY2Y2RmZDY0ZDJkZmU2YzAzMmVjNTZlZGI3OTMyMjgzNmQ4MzUzMzA3MjE5MDA2YmU4NA
- ↑ https://youtu.be/-GMZLKybbd4?t=144
- ↑ https://youtu.be/tFCNqo2C1es?t=75
- ↑ https://www.manualslib.com/manual/1486968/Keurig-My-K-Cup-2-0.html#manual
- ↑ https://www.keurig.com/medias/K300-400-500-My-K-Cup-UCG.pdf?context=bWFzdGVyfGFjY2Vzc29yaWVzLXVzZXItZ3VpZGUtcGRmc3w1NzAyMDkxfGFwcGxpY2F0aW9uL3BkZnxhY2Nlc3Nvcmllcy11c2VyLWd1aWRlLXBkZnMvaDA3L2gxYi8xNjc1OTcwMDQ4ODIyMi5wZGZ8ZmE4MmJiMDEyNmI2MzY2Y2RmZDY0ZDJkZmU2YzAzMmVjNTZlZGI3OTMyMjgzNmQ4MzUzMzA3MjE5MDA2YmU4NA
- ↑ https://youtu.be/bV95udLcnwg?t=251
- ↑ https://www.manualslib.com/manual/1486968/Keurig-My-K-Cup-2-0.html#manual
About This Article