This article was co-authored by wikiHow staff writer, Nicole Levine, MFA. Nicole Levine is a Technology Writer and Editor for wikiHow. She has more than 20 years of experience creating technical documentation and leading support teams at major web hosting and software companies. Nicole also holds an MFA in Creative Writing from Portland State University and teaches composition, fiction-writing, and zine-making at various institutions.
The wikiHow Tech Team also followed the article's instructions and verified that they work.
This article has been viewed 321,252 times.
Learn more...
This wikiHow teaches you how to create and manage virtual sticky notes on your Mac. Just like the sticky-backed Post It notes you can attach to your desk or monitor, the Stickies app can help you remember bits of information like phone numbers, appointments, and URLs.
Things You Should Know
- Open the Stickies app on your Mac to get started.
- Start a new note from the File category on the Menu bar.
- Customize the note by changing the color, font, and visibility options!
Steps
Creating a Sticky Note
-
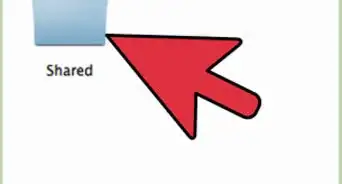
1
-
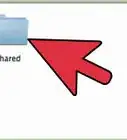
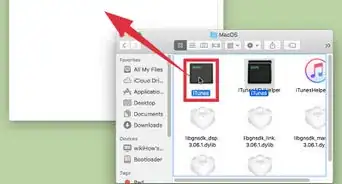
2Click the Applications folder. It's in the left panel.Advertisement
-
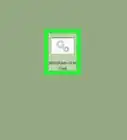
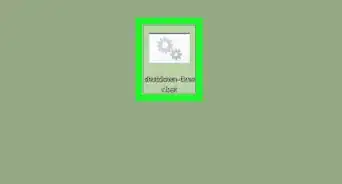
3Double-click Stickies. It's in the right panel. This opens the Stickies app.
-
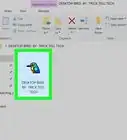
4Drag Stickies to your Dock (optional). If you think you'll be using the Stickies app a lot, it'll be helpful to add its icon to your Dock. When the icon is on your Dock, you can quickly open Stickies by clicking it rather than accessing it through Finder.
- This should create a new note automatically. If you don’t see a new note, or you just want to create another note, read on.
-
5Click the File menu. It's at the top-left corner of the screen.
-
6Click New note on the menu. This creates a blank sticky note.
- You can also create a new sticky note by pressing Cmd + N on the keyboard.
- You can have multiple stickies open at once.
- To move a sticky, click and drag it from the horizontal bar at the top of the note.


Customizing Sticky Notes
-
1Change the color of the note. You can make your sticky note yellow, blue, green, gray, pink, or purple. Here's how:
- Click an existing note or create a new one.
- Click the Color menu at the top of the screen.
- Select a color for your note.
- If you want to make the note more see-through, click the Window menu at the top of the screen and select Translucent.
-
2Use a different font in your sticky note. You can change the font used on your sticky note to any of the regular Mac fonts. You can also make text bold, italic, change its size, and more. Here's how:
- To change text you've already typed into a sticky note, highlight it first.
- Click the Font menu at the top of the screen.
- To select a different font, click Show Fonts and make your selection.
- Click Bigger to make text bigger, and Smaller to make text smaller.
- Use the Kerning menu to determine how close together the letters are.
- Use the Ligatures menu to determine whether to display special combined characters in fonts that support this feature.
- The Baseline menu contains options for using Subscript or Superscript.[1]
-
3Make a sticky note float on top of other windows. If you want a certain sticky note to stay visible on the screen when you're using other apps (including those that are full-screen), you can make the sticky "float":
- Click an existing note or create a new one.
- Click the Window menu at the top of the screen.
- Click Floating Window.
-
4Collapse a note. You can use the Collapse feature to "roll up" your sticky note when you don't need it to be visible:
- Click the sticky note you want to collapse.
- Double-click the horizontal bar that runs along the top of the window to collapse it.[2] Only the bar will be visible.
- Double-click the bar again to expand the sticky note.
- You can also press Cmd + M to quickly collapse and reactivate notes.
-
5Create a list in your sticky note. You can create a bulleted list in a sticky note:
- Click the place in your note where you'd like the list to begin.
- Press the Option + Tab keys at the same time.
- Type the first item in your list and press Return.
- Continue typing list items.
- To add another level to your list, click the beginning of a line and press the Tab key. To go up a level, press Shift + Tab.
- When you're finished with your list, press Return twice to end it.
-
6Delete a sticky note. If you don't need a note anymore, you can delete it:
- Click the note you want to delete.
- Click the box at the top-left corner of the note.
- Click Delete note.


Community Q&A
-
QuestionHow do I get more than two stickies?
 Community AnswerUnder "File" in your tool bar at the top of the screen, select "New Note" and another sticky will show up.
 -
QuestionI can type the Sticky Note with no problem, but how do I get it to go to the Desktop?
 Community AnswerYou have to have Stickies open for it to stay on your desktop. If you quit it you won't be able to see it but your work/info will be saved and still be there when re-opened.
 -
QuestionHow do I get rid of a sticky note?Community AnswerClose the sticky window. You'll be asked if you want to save the note, and you can just select "Don't Save."


References
About This Article

1. Open Finder.
2. Click the Applications folder.
3. Double-click the Stickies app.
4. Go to File > New to create a new note.
5. Use the Color menu to change the note color.
6. Use the Font menu to change the text style.