This article was co-authored by Laura M. Johnson. Laura M. Johnson is a Mural Artist and the Owner of Laura Margo Murals & Custom Art in St. Paul, Minnesota. She has over five years of experience in the industry and has worked professionally across venture capital, communications, the arts, and beyond. She helps empower small and growing businesses to find their voices, share their stories, and grow their impact. Laura received her Master of Business Administration from the University of Minnesota - Carlson School of Management, and her Bachelors in Journalism and Communication Studies with a minor in Fine Arts from the University of Oregon.
wikiHow marks an article as reader-approved once it receives enough positive feedback. This article received 49 testimonials and 100% of readers who voted found it helpful, earning it our reader-approved status.
This article has been viewed 820,559 times.
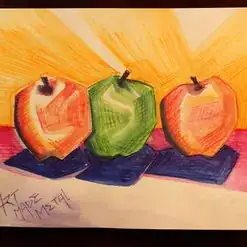
Watercolor pencils can help you create beautiful watercolor works of art without having to use paints. Draw with your pencils on watercolor paper or thick papers that will hold water. You can then apply water by brushing it on or spraying your drawing. You can also layer pencil colors and water to intensify the watercolor effect. Feel free to experiment to see which effects you like best!
Steps
Sketching Your Design and Base Colors
-
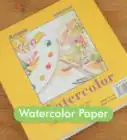
1Sketch a rough outline with a regular pencil on watercolor paper. Before you begin filling with color, you'll need a rough sketch of your drawing. Don't worry about being too precise or adding too much detail—that's something you'll do later as you layer color.[1]
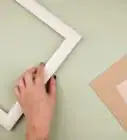
- Because watercolor pencils eventually require the application of water, you’ll want to draw on material thick enough that it won’t tear. Watercolor paper or heavy board are great choices.
-
2Add base colors to your sketch. Once you've got a rough sketch, you can fill it in with base colors. Don't use the watercolor pencils as you would a regular color pencil, filling in your sketch completely. Instead, apply the pencil in the general shape and direction you would with regular pencils, but leave some white space in between.[2]
- Although you don't need a lot of detail at this stage, be careful about the direction of your strokes as you add base colors. Once activated with water, the directions of the strokes will still show through.[3]
Advertisement -
3Skip adding color to areas where you want the lightest shade possible. Because you'll be blending the colors with water later, areas that are white in your sketch will eventually pick up the lightest possible shade of the nearby colors. Leave areas where you want the lightest colors blank as you add your base colors.[4]

Blending Your Sketch Colors with a Wet Brush
-
1Apply water to your rough sketch and base color. The size of the brush will depend on the size of your drawing and where you want the watercolor effect. Thinner brushes are better for precise, detail work. Thicker brushes are better for more abstract looks. Dip the brush into a small bowl of clean water, then wipe it gently on the rim of the bowl.[5]
-
2Gently brush water onto your pencil work. Use smooth strokes as you use the brush to spread the pigment from the watercolor pencils. As you apply the water, mimic the shape and direction of the pencil strokes. This will feel the most like watercolor painting, except that instead of dipping your brush into watercolor paint, you're using water to spread pigment already on the paper. Dip the brush back in the water when it feels dry against the paper.[6]
-
3Let the first layer dry before applying a second. You can layer on water to create an even stronger watercolor effect. Let the first application of water dry completely before applying a second. Use your fingertip to test the paper – it should feel completely dry when you press down on it gently. Test your painting every five minutes or so.[7]
- How long it will take the layers to dry will depend on how much water you used and how much space you covered.
Adding Depth and Detail with Layers of Pencil and Water
-
1Add another layer of pencil. This is your chance to deepen the colors of your painting. Once the first water application has dried, you can either add more of the same color to deepen your base color, or you can add another color for a layer effect.[8]
- For example, if you're adding shading to your painting, use blue and brown watercolor pencils layered on top of each other. Once the water is applied and the pigments blend, they'll create a true black.
-
2Apply another layer of water. What brushes you use for your second application of water will depend on what sort of layering work you did. If you worked on small areas for deepening color, use a smaller brush. Larger areas can take a larger brush.[9]
-
3Dampen the tip of the pencil before drawing detail. Dampening the tip of your watercolor pencil will create a brighter pigment when it's applied to paper. Dip the tip of your pencil into a bowl of water, and then trace the contours of your painting to add detail and definition. You can also use dampened pencils to add detail on top of painted areas.[10]

Using Watercolor Pencils with a Spray Bottle Instead
-
1Draw your complete picture. Since you’ll only be applying 1 layer of water, make sure your picture is completed in watercolor pencil first. You can layer all of the colors you want and add as much detail as you like.[11]
-
2Fill a spray bottle with clean water. You don’t need to fill the spray bottle up all the way. A few ounces should do, unless you’ve created a huge work. Then you might need the whole bottle![12]
-
3Spray your drawing with water. You should use enough water so that you see the colors begin to bleed into each other. Spray slowly and gently, since spraying too much water too fast can cause the colors to completely mix on the paper.[13]
- How close you hold the bottle to the paper is up to you. Holding it close will cause the colors to bleed a lot and lose a lot of their definition. Holding it further away will result in less bleeding and more definition.
-
4Let the painting dry for 1 hour. If your drawing is larger than 8.5 in (22 cm) by 11 in (28 cm), it may take longer than an hour to dry. Test the painting with your fingertip, pressing down lightly. You shouldn’t feel any moisture under your finger.[14]
-
5Add detail with watercolor pencil. If you want, you can add detail after the painting has dried. You can clarify borders, add wording, and do anything that requires clarity and detail. Or you can leave your painting as is![15]
- If you want your detail to be very pigmented, dip the tip of your pencil into a bit of water before you begin drawing.


Community Q&A
-
QuestionCan you erase regular pencil marks under a watercolor painting?
 wikiHow Staff EditorThis answer was written by one of our trained team of researchers who validated it for accuracy and comprehensiveness.
Staff AnswerwikiHow Staff EditorStaff AnswerIt can be difficult to get rid of pencil lines on a watercolor painting. To make it easier, use a hard pencil and apply the lines lightly so that you’re not getting as much graphite on the paper (or making grooves where the paint can settle in). Try to erase the lines as you go so that they don’t get covered up completely with paint, which can make them harder to erase. Choose a gentle eraser, such as a white vinyl eraser, to avoid damaging your paper and paint. -
QuestionCan you use regular colored pencils as watercolor pencils?wikiHow Staff EditorThis answer was written by one of our trained team of researchers who validated it for accuracy and comprehensiveness.
Staff AnswerwikiHow Staff EditorStaff AnswerUnfortunately, no. Many colored pencils are formulated to be water-resistant, while others simply don’t react to water the way a watercolor pencil does. The pigments won’t dissolve and spread in water the way watercolor pencil pigments do, so you won’t get the same paint-like results. -
QuestionCan I use watercolor pencils dry?wikiHow Staff EditorThis answer was written by one of our trained team of researchers who validated it for accuracy and comprehensiveness.
Staff AnswerwikiHow Staff EditorStaff AnswerYes, watercolor pencils can produce beautiful, vivid results even if you use them without water. Simply use them like normal colored pencils.
Things You'll Need
- A pencil
- A set of watercolor pencils.
- A cup or bowl of water
- Watercolor paintbrushes
- Drawing or watercolor paper

References
- ↑ https://www.craftsy.com/blog/2014/01/mixed-media-painting-technique-watercolor-pencil/?_ct=rbew&_ctp=83697
- ↑ https://www.craftsy.com/blog/2014/01/mixed-media-painting-technique-watercolor-pencil/?_ct=rbew&_ctp=83697
- ↑ http://thevirtualinstructor.com/watercolorpencils.html
- ↑ https://www.craftsy.com/blog/2014/01/mixed-media-painting-technique-watercolor-pencil/?_ct=rbew&_ctp=83697
- ↑ http://thevirtualinstructor.com/watercolorpencils.html
- ↑ http://thevirtualinstructor.com/watercolorpencils.html
- ↑ http://thevirtualinstructor.com/watercolorpencils.html
- ↑ http://thevirtualinstructor.com/watercolorpencils.html
- ↑ http://thevirtualinstructor.com/watercolorpencils.html
- ↑ https://www.craftsy.com/blog/2014/04/watercolor-pencil-techniques/
- ↑ https://www.craftsy.com/blog/2014/01/mixed-media-painting-technique-watercolor-pencil/?_ct=rbew&_ctp=83697
- ↑ https://www.craftsy.com/blog/2014/01/mixed-media-painting-technique-watercolor-pencil/?_ct=rbew&_ctp=83697
- ↑ https://www.craftsy.com/blog/2014/01/mixed-media-painting-technique-watercolor-pencil/?_ct=rbew&_ctp=83697
- ↑ https://www.craftsy.com/blog/2014/01/mixed-media-painting-technique-watercolor-pencil/?_ct=rbew&_ctp=83697
- ↑ https://www.craftsy.com/blog/2014/01/mixed-media-painting-technique-watercolor-pencil/?_ct=rbew&_ctp=83697
About This Article

To use watercolor pencils, start by sketching a rough outline of your drawing in regular pencil on a piece of watercolor paper. Then, fill in parts of your drawing with watercolor pencils, skipping over the parts you want to have the lightest shade. When you're finished, dip a paintbrush in some water and gently brush it over the watercolor pencil marks to spread the color around. Finally, let your drawing dry completely before moving or displaying it. To learn how to use watercolor pencils with a spray bottle, scroll down!