This article was co-authored by Adam Kealing. Adam Kealing is a Professional Photographer based in Austin, Texas. He specializes in general wedding, destination wedding, and engagement photoshoots. Adam has over 11 years of photography experience. His work has been featured in Green Wedding Shoes, Style Me Pretty, Once Wed, and Snippet Ink. His work has won numerous awards with Fearless Photographers and Masters of Wedding Photography.
This article has been viewed 102,167 times.
A monopod is similar to a tripod, which is used to stabilize items like cameras and binoculars. However, while a tripod has three adjustable legs to steady and level your equipment, a monopod has only one. This means that you trade some stability for ease of use, because a monopod is quicker to set up and move. Monopods are often used by wildlife photographers, sports photographers and birdwatchers.
Steps
Picking a Monopod Position
-
1Use your monopod and your own legs to form a tripod. First, extend your monopod so that your camera is a few inches above your eye level. Stand with your feet apart at a comfortable width, facing your subject, and position the bottom of the monopod between and in front of your feet. Lean it toward you until the viewfinder is at eye level, and hold it steady.[1]
- This stance works well on soft surfaces, such as grass. For smooth surfaces, especially slanted ones, the foot of the monopod will probably slide too much.
-
2Steady your monopod against your leg. Stand with your feet apart at a comfortable width, facing your subject. Set the bottom of the monopod a few inches behind one of your feet. Allow the shaft to rest against the inside of your thigh, and move the monopod and your foot until the top of the monopod is in the proper position in front of you.[2]
- This is a versatile position that works on both soft and hard ground. Resting the shaft against your leg adds stability, though on particularly slippery surfaces, the foot might not be stable enough.
Advertisement -
3Set the monopod against your instep and steady it with your foot. This is called the Archer Stance. Stand with your feet apart about shoulder width. Then place your left foot forward about a foot, and turn your right foot so that it points a little to the right. Place the bottom of the monopod snugly against the inner side of your right foot. Angle the top toward your center until it's in the right position for use. You may have to move your feet father apart or lean to one side.[3]
- This is the best position for hard, slippery surfaces, such as smooth concrete.
-
4Collapse the monopod and place the bottom into a stabilizer pouch. If you wear a utility belt to hold your equipment, you can add a pouch to the front. This allows you to use your body to steady the monopod.
- This position may be helpful when the ground is particularly soft and unstable, such as snow or mud.


Using the Monopod Effectively
-
1Hold the monopod properly. Grab the shaft with your left hand, near where it connects to your camera. Use your right hand to operate the camera as you normally would. Tuck your elbows into your body when operating the camera, to reduce side-to-side movement.[4]
-
2Push the monopod into the ground when using it to stabilize a shot. With your left hand, put some downward pressure on the monopod. This will help stabilize your camera as you shoot. It doesn't require a lot of pressure, just enough to keep the foot of the monopod securely in place.[5]
- The heavier your camera and lens are, the more pressure you'll need to keep them stable.
-
3Use a head when using the monopod at an angle. If you've got your monopod leaning at an angle, such as with the tripod position, you'll probably need a head attachment so that you can angle your camera. For most shots, a swivel head is all that's needed, as the monopod can be pivoted left and right easily. A ball head can also be used, and works well for wide angle shots.[6]
- Some monopods come with heads, but some do not, so you may need to purchase them separately.
-
4Use the wrist strap to improve stability. Most monopods come with a wrist strap that's primarily used to carry the monopod around. However, you can also use this strap while you're shooting to both keep the camera from moving around on the head, and to push the foot of the monopod into the ground with ease. Just put your left hand into the strap as you hold onto the shaft.[7]


Knowing When to Use a Monopod
-
1Mount your camera lens on a monopod to lessen shake when using a long lens. A monopod will also reduce the fatigue you may experience when holding a heavy camera or using heavy lenses. Fatigue in such situations can be significantly reduced with a monopod, especially when you have long periods of time in between each shot.[8]
- You may need to purchase a tripod mount ring to attach your monopod to your lens if your monopod didn't come with one.
-
2Use a monopod when you don't have time to set up a tripod. Monopods can be set up with a few simple motions. If you are photographing a fast-moving sporting event or want to observe wild animals that will be frightened away by too much noise or movement, a monopod will give you an advantage over a tripod.[9]
- This is especially true when you're photographing on slanted grounds, because a tripod's legs will need to be readjusted every time you move.
-
3Take low-light photographs using a monopod. You will have more freedom with aperture and shutter speed if you steady your camera with a monopod, as opposed to just holding it. A tripod, which keeps the camera completely still, is still the best method of taking photographs in these conditions.[10]
- The biggest benefit of a monopod over a tripod in these such conditions is its ease of use and portability.
-
4Use a monopod in crowded situations. Bring a monopod instead of a tripod when you know you will be working in crowded conditions. Monopods require far less width than tripods.
-
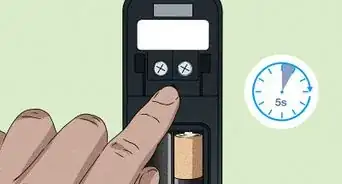
5Use the monopod as a reach extender for high up shots. Set the timer on your camera, and then hold the monopod with two hands and raise it up. In situations when you want to get a shot from a higher position, such as a dance floor, a large crowd, or a bird nest, this can be an effective way to do so.[11]


Expert Q&A
-
QuestionWhat is a monopod good for?
 Adam KealingAdam Kealing is a Professional Photographer based in Austin, Texas. He specializes in general wedding, destination wedding, and engagement photoshoots. Adam has over 11 years of photography experience. His work has been featured in Green Wedding Shoes, Style Me Pretty, Once Wed, and Snippet Ink. His work has won numerous awards with Fearless Photographers and Masters of Wedding Photography.
Professional PhotographerSince monopods are so easy to set up, they're great for when you need to move around a lot to get shots.


References
- ↑ http://www.photographymad.com/pages/view/how-to-hold-a-monopod
- ↑ http://www.photographymad.com/pages/view/how-to-hold-a-monopod
- ↑ http://www.photographymad.com/pages/view/how-to-hold-a-monopod
- ↑ http://www.photographymad.com/pages/view/how-to-hold-a-monopod
- ↑ http://www.photographymad.com/pages/view/how-to-hold-a-monopod
- ↑ https://photographylife.com/how-to-use-a-monopod
- ↑ https://photographylife.com/how-to-use-a-monopod
- ↑ https://www.youtube.com/watch?v=1KfR8mM4dtI
- ↑ http://www.photographymad.com/pages/view/how-to-hold-a-monopod
About This Article

To use a monopod on hard or soft surfaces, stand with your feet apart at a comfortable width, facing your subject. Set the bottom of the monopod a few inches behind one of your feet, allow the shaft to rest against the inside of your thigh, and move the monopod and your foot until the top of the monopod is in the proper position in front of you. Steady the shaft with your left hand and use your right hand to operate the camera. For tips on using a monopod on slippery surfaces, read on!