This article was co-authored by wikiHow Staff. Our trained team of editors and researchers validate articles for accuracy and comprehensiveness. wikiHow's Content Management Team carefully monitors the work from our editorial staff to ensure that each article is backed by trusted research and meets our high quality standards.
There are 13 references cited in this article, which can be found at the bottom of the page.
This article has been viewed 135,187 times.
Learn more...
The NuWave Air Fryer is a great way to cook your favorite foods without the unhealthy oil. To use your NuWave Air Fryer, you'll need to familiarize yourself with the digital touch screen. You can set the temperature and time settings by using the up and down arrow buttons. The NuWave Air Fryer even has a preheat option, allowing you to put in your food after the fryer reaches the desired temperature.
Steps
Setting up the Air Fryer
-
1Clean the appliance and accessories before using them. Use a mild dish soap and clean water to rinse off all of the accessories, such as the basket and base tray, before using them. Use a damp cloth to wipe down the appliance — you don’t want to submerge this in water.[1]
-
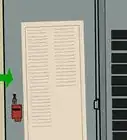
2Set up the air fryer on a stable, heat-resistant surface. When choosing a spot for your air fryer, place it on an even surface that’s heat resistant, most likely in your kitchen. Keep it away from large amounts of water, like the sink. Make sure the air vent isn’t blocked or covered.[2]Advertisement
-
3Place the base tray and basket in the air fryer. To get your air fryer ready for use, fit the fry pan basket into the base tray. Now slide both the base tray and the basket into the air fryer.[3]
-
4Plug the air fryer into a standard wall socket. Find the nearest outlet and plug in your air fryer. The air fryer comes with a 4 feet (120 cm) cord, making it easier to reach the outlet.[4]


Operating the Air Fryer
-
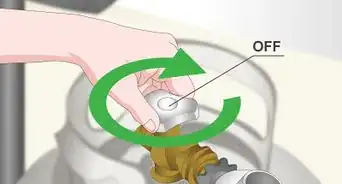
1Press the On/Off button to turn the air fryer on. Pressing the On/Off button on the digital touch screen will turn on the air fryer, lighting up the controls. The control panel should read “0,” showing that you haven’t selected a cooking temperature or time yet.[5]
- To turn the air fryer off, simply press On/Off again.
-
2Place the food inside the base tray. Slide the base tray out using the handle and put your chosen food onto the tray. Once all of your food is set on the tray, slide the tray back into the air fryer.[6]
-
3Press Start/Pause to begin cooking on the default setting. Once your food is in the air fryer, press the Start/Pause button to enable the default setting. This will begin cooking your food at 360 °F (182 °C) for 10 minutes.
- Changing the temperature and time settings manually is talked about in the next section.
-
4Use the Start/Pause button to pause the cooking process. If you need to momentarily stop the air fryer, press the Start/Pause button while it’s cooking. This should pause the cooking process, allowing you to remove the base tray, if necessary.[7]
- Press the Start/Pause button to resume cooking.
- If you press Pause and don’t hit any other buttons within 5 minutes, the time and temperature settings will be cleared.
-
5Use the On/Off button to clear all of the settings. If you pause the air fryer to remove your food before the timer is done and you don’t want to put the food back in, press the On/Off button. This should clear all of the settings and turn off the fryer.[8]


Setting the Cooking Temperature and Time
-
1Find out the temperature and time you’ll need to set for your food. You NuWave Air Fryer should come with an instruction booklet containing a few recipes. Look at the chart to find out how long to cook your chosen food, as well as at what temperature.[9]
- For example, if you’re making homemade fries, you would set the temperature to 360 °F (182 °C) for 18-30 minutes.
- You can find many air fryer recipes online that will tell you the temperature and time settings.
-
2Press the Temp/Time button once to set the cooking temperature. Find the Temp/Time button on the digital touch screen at the bottom left of the screen. Press the Temp/Time button 1 time to activate the temperature controls.[10]
- The “Temp” button should be flashing, and the default setting of 360 °F (182 °C) should be showing as well.
-
3Adjust the temperature using the up and down arrow buttons. After the temperature settings pop up, you can use the up and down arrows on the right of the screen to set the desired temperature. The temperature will change by 5 °F (−15 °C) each time you press an up or down arrow.[11]
- Hold the arrow down to adjust the temperature in 50 °F (10 °C) increments.
- If you need to change the temperature while the food is already cooking, you can use this same process.
-
4Press the Temp/Time button twice to set the cooking time. While you pressed the Temp/Time button once to change the temperature setting, pressing the Temp/Time button twice will allow you to set the timer. This should bring up the time settings, showing you the digital clock.[12]
- ”Time” should be flashing, and the default setting of 10 minutes should be displayed.
-
5Press the up and down arrows to adjust the time by 1 minute. The arrows on the right of the screen can be used to set the desired cooking time. Pressing on an arrow will increase or decrease the time by 1 minute. If you want to speed up the settings, you can hold down the arrow button, adjusting the time in 10-, 20-, and then 30-minute increments.[13]
- If you're cooking between 100 °F (38 °C) and 345 °F (174 °C), the air fryer can cook for up to 99 hours and 59 minutes.
- If you're cooking between 350 °F (177 °C) and 390 °F (199 °C), the air fryer can cook for up to an hour.
-
6Place your food in the basket immediately to start cooking. Unlike preheating, you can place your food into the air fryer right after you’ve chosen the temperature and time. Slide the base tray and basket back into the air fryer carefully once it contains your food.[14]
- There’s no need to wait for the air fryer to warm up — it will start cooking as soon as you press start.
- Don’t fill the basket more than ⅘ full.
- Don’t use the base tray without the basket in it.
-
7Press Start/Pause to begin the timer. Once your food is in the air fryer, press the “Start” button. This will allow the timer to start counting down, and your food will begin cooking.[15]


Preheating the Air Fryer
-
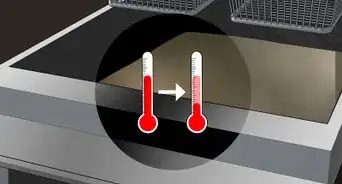
1Use the “Preheat” button for crispier foods. Preheating the air fryer before putting your food in will allow it to get to the perfect temperature first. Once you use the Preheat setting, the air fryer will notify you once it’s ready for you to insert the food.[16]
- The Preheat option is great for foods like chicken tenders, fries, or frozen appetizers.
-
2Preheat the air fryer using the preheat button. After you’ve turned the air fryer on using the On/Off button, press “Preheat.” Then, press the Temp/Time button once to set the cooking temperature, and then press the Temp/Time button again to choose the right cooking time.[17]
- If you’d rather use the default setting of 360 °F (182 °C) for 10 minutes, stop after pressing the Preheat button.
-
3Press Start/Pause to begin the preheating process. Once the temperature and time have been keyed in, hit Start/Pause on the digital touch screen. This will cause the air fryer to begin preheating.[18]
- When you press start, the screen will display the current temperature, so don’t worry if it’s not the same as the one you’re preheating the air fryer to.
-
4Wait for the beep and "Ready" signal. When the air fryer has reached your desired temperature, it will beep and the screen should say “Ready.” Once the fryer beeps, you need to insert your food within 5 minutes.[19]
- The time that you set for the food to cook won’t start counting down until the air fryer has preheated.
-
5Insert the food into the fryer to begin cooking. Once you insert the basket into the air fryer after it has preheated, the timer will automatically begin counting down. There’s nothing that you need to press to start the cooking process.[20]
- Make sure you don’t fill the basket all the way up with food.
- Don’t use the base tray by itself in the air fryer.
-
6Press the Start button twice to add food before it’s preheated. If you pressed Preheat but want to insert your food before the air fryer has reached the desired temperature, press the Start button twice. This will start the timer immediately so that your food will cook for the set time.[21]
- Note that you don’t need to preheat the air fryer if you’ve just cooked something — it will still be hot.


Removing the Basket or Grill Pan
-
1Pull the basket and base tray straight out for removal. To take the basket or grill pan out of the air fryer, hold onto the handle and pull straight out. This should remove the basket/grill pan and base tray. Be careful not to press the demounting button on the handle when you’re pulling them out.[22]
-
2Place the base tray on a heat resistant surface. Once you’ve removed the basket/grill pan and base tray, set the base tray down on a surface that won’t be damaged by the heat. This could be a potholder, silicone pad, or any other type of heat resistant surface.[23]
-
3Remove the basket from the base tray, if necessary. If you want to pour your food onto a plate or bowl from the basket, you can remove the basket from the base tray to get rid of unwanted weight. Lift the safety cover on the handle and press the demounting button. This will allow you to lift the basket from the base tray.[24]
- You can repeat the same process using the grill pan accessory.
-
4Interchange the basket and grill pan, when necessary. Both the basket and grill pan can be inserted into the base tray. Both accessories fit into the base tray and can be removed by pressing the demounting button.
- The basket is best used with foods such as fries, onion rings, or other snacks. The grill pan can be used to cook steak, hamburger, and other meat.
-
5Unplug the air fryer to let it cool. Before cleaning the air fryer, you’ll want to unplug the unit. Allow it to cool completely, waiting at least 15 minutes before checking to see if it’s still hot.[25]
- Place the basket and base tray on a heat resistant surface once they’re removed from the air fryer to let them cool down faster.
-
6Clean the air fryer and accessories after each use. After the air fryer has cooled, use a damp cloth to wipe down the appliance, making sure not to submerge it in water. You can clean the base tray and accessories using a mild soap with water, being careful to use a soft sponge so that they don't get scratched.[26]
- Submerging the appliance in water will cause damage.
- Your air fryer and accessories need to be cleaned each time you use them.
- If there’s food residue in the base tray, fill it with hot water and let it soak for 10 minutes before trying to clean it.


Community Q&A
-
QuestionWhat do I do if my fryer doesn't work and keeps saying "Open"?
 Community AnswerThe back of the basket isn't making a connection to the machine. Remove the basket and loosen the two screws on the back of the basket (about the thickness of your fingernail). The fryer should work now. If this continues to be a problem, remove the screws and add a small washer.
 -
QuestionHow can I obtain an user manual?Community AnswerPutt the name of your fryer and its exact serial number into an online search engine like DuckDuckGo, Bing or Google. There should be a search return with the manual and pictures. If not, email the manufacturer directly for a PDF of the manual.
-
QuestionWe received a Nuwave air fryer as a gift, but there was no user manual. How can I obtain one?
 Community AnswerLook online, using the name of the fryer and its serial number. One will return that includes images to help you.
Warnings
- Make sure the vent of the NuWave Air Fryer is clear — having anything obstructing it could cause safety hazards.⧼thumbs_response⧽
- Don't fill the base tray, basket, or grill pan with oil unless specifically instructed in the recipe.⧼thumbs_response⧽


References
- ↑ https://www.brandsmartusa.com/pdfs/manuals/20211819.pdf
- ↑ https://www.brandsmartusa.com/pdfs/manuals/20211819.pdf
- ↑ https://www.brandsmartusa.com/pdfs/manuals/20211819.pdf
- ↑ 4 feet (120 cm) cord
- ↑ https://www.youtube.com/watch?v=s9XvLIxmr94#t=30s
- ↑ https://www.brandsmartusa.com/pdfs/manuals/20211819.pdf
- ↑ https://www.youtube.com/watch?v=s9XvLIxmr94#t=42s
- ↑ https://www.youtube.com/watch?v=s9XvLIxmr94#t=1m
- ↑ https://www.brandsmartusa.com/pdfs/manuals/20211819.pdf
- ↑ https://www.youtube.com/watch?v=YFX0Vw4hg_A#t=1m52s
- ↑ https://www.youtube.com/watch?v=YFX0Vw4hg_A#t=1m52s
- ↑ https://www.youtube.com/watch?v=YFX0Vw4hg_A#t=2m17s
- ↑ https://www.youtube.com/watch?v=YFX0Vw4hg_A#t=2m17s
- ↑ https://www.brandsmartusa.com/pdfs/manuals/20211819.pdf
- ↑ https://www.brandsmartusa.com/pdfs/manuals/20211819.pdf
- ↑ https://www.brandsmartusa.com/pdfs/manuals/20211819.pdf
- ↑ https://www.youtube.com/watch?v=YFX0Vw4hg_A#t=3m3s
- ↑ https://www.youtube.com/watch?v=YFX0Vw4hg_A#t=3m15s
- ↑ https://www.youtube.com/watch?v=YFX0Vw4hg_A#t=3m27s
- ↑ https://www.youtube.com/watch?v=YFX0Vw4hg_A#t=3m38s
- ↑ https://www.youtube.com/watch?v=YFX0Vw4hg_A#t=3m50s
- ↑ https://mynuwavebrio.com/content/NB22W01/howitworks.asp
- ↑ https://mynuwavebrio.com/content/NB22W01/howitworks.asp
- ↑ https://mynuwavebrio.com/content/NB22W01/howitworks.asp
- ↑ https://www.brandsmartusa.com/pdfs/manuals/20211819.pdf
- ↑ https://www.brandsmartusa.com/pdfs/manuals/20211819.pdf
About This Article

A NuWave Air Fryer is a great way to cook food without using unhealthy oil, and it’s relatively easy to set up and operate. Once you turn the fryer on, place your food inside the base tray. Press the “Start / Pause” button to cook on the default setting, which will fry your food at 360 degrees Fahrenheit for 10 minutes. Alternatively, manually set your unit to cook your food perfectly. To put in your own settings, press the “Temp / Time” button once and use the up and down arrow buttons to adjust the temperature. Hit this button twice and use the same arrows to adjust the cooking time. You can find air fryer recipes and instructions online. Also, look at the instruction booklet for select recipes and a chart for cooking times and temperatures. To learn how to preheat the air fryer, keep reading!