X
wikiHow is a “wiki,” similar to Wikipedia, which means that many of our articles are co-written by multiple authors. To create this article, 15 people, some anonymous, worked to edit and improve it over time.
wikiHow marks an article as reader-approved once it receives enough positive feedback. In this case, 98% of readers who voted found the article helpful, earning it our reader-approved status.
This article has been viewed 73,733 times.
Learn more...
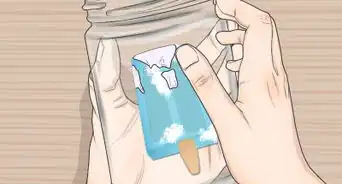
Pot Melt is a technique where Bullseye Glass scraps or other COE 90 scraps can be used to create interesting fused glass color combinations and visual effect by mixing and melting together various colors and shades of glass in a container.
Steps
-
1Learn about Pot Melt. It is a technique where Bullseye Glass scraps or other COE 90 scraps can be used to create interesting fused glass color combinations and visual effect by mixing and melting together various colors and shades of glass in a container. Then let the resulting mixture heat so high that it “dribbles” from the opening in the base of the container to a prepared tray or kiln shelf. Due to the glass's surface tension, the glass will pour less like water and more like a syrup, this can often result in spiral or circular patterns. The process produces a colorful premixed glass disk. The random patterned disk may be used whole or sliced up then used in countless ways in glass fusing work.
-
2Get started. This project uses 3 colors of Bullseye Glass: deep cobalt blue (0147), tekta clear, white opaque white (0013). 5.5 ounces of each color is used to create a 7" diameter disk.Advertisement
-
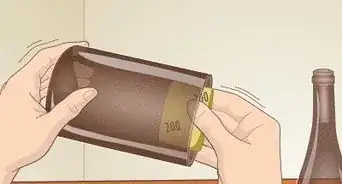
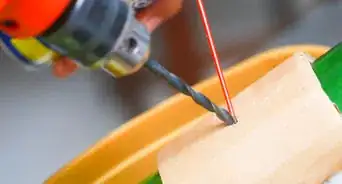
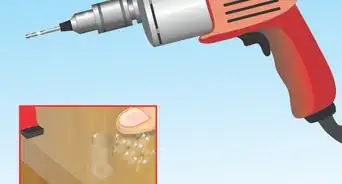
3Create and make the opening in the base of the pot larger with a hammer and chisel or even a heavy duty screwdriver. The hole can be rectangular, round, or any style you like. The size does not need to be exact, or edges perfectly smooth. Keep in mind that if the hole is small, the glass will flow out very slowly. A hole over 7/8" diameter is recommended as a minimum. In this image you can see the hole chipped away.
-
4Put the glass into the pot. You may find that experimentation is the key in the placement, as different results are produced depending on how you place the glass. Also be aware that some colors may overwhelm other colors during a pot melt. For example, avoid using too much black as it will mask other colors. As a guide, 3 lbs of Bullseye glass produces a disk approximately 11" in diameter. This demo uses 1 lb to make a 7" disk in this project.
-
5Do NOT kilnwash the pot prior to the melt, this runs the risk of kilnwash particles in the resultant melt. Of course, the pot will have some glass stuck to it, however it is possible to re use the same pot for similar colors.
-
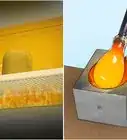
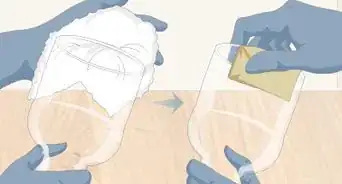
6Coat a tray such as the base of the terracotta pot, a kiln shelf or a square salad plate mold in 3 coats of kilnwash. This will be where the dribbled Bullseye glass is collected. Use a piece of Bullseye Thinfire over the kilnwash. This will keep the kilnwash from sticking to the glass and requiring lots of work to remove. Easy to clean is Always more fun!
-
7Place the pot in the center of the kiln, making certain that the glass doesn't reach the thermocouple. You can coat the kiln furniture with kilnwash and also the kiln's firebrick bottom just in case of overflow or other accident.
-
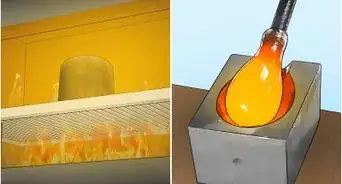
8Notice that with a round hole, the molten glass dribbles out in a spiral or circular pattern, and with a hole of rectangular shape, the dribbled glass folds on itself.
-
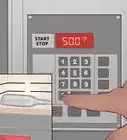
9Ramp this project in 4 segments.
- SEG 1: 600 dph (degrees per hour) to 1700
- Don't get the flower pot you are using too hot too fast. If it breaks and the pot melt falls apart in your kiln you could be really sorry!
- Hold the temp at 1700 for 90 minutes. This should be more than enough time to melt all the glass on to the mold below.
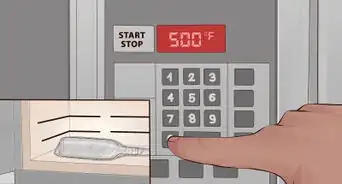
- SEG 2: Drop the temp AFAP (as fast as possible) to 1500 and hold for 45 minutes. This will allow the glass to flow to a completely flat surface, and if some air has been trapped it will allow some time for the bubbles to rise to the surface and pop. Try opening the lid of your kiln to assist in AFAP cooling. This should be done with great care for obvious reasons. A blast of 1700 degree air can cause quite a nasty burn not to mention what a heat wave like that does to your eyes. Always wear eye protection and heat protection if you try that.
- SEG 3: Drop the temp AFAP again to 960. This is the last time you will open the kiln until your pot melt is complete. Try holding a project this size for 2 hours. Longer is always better at annealing temp.
- SEG 4: Drop the temp 200dph to 600 degrees
- SEG 1: 600 dph (degrees per hour) to 1700
-
10Turn it off and leave it closed till the temp is below 175 degrees. 125 is better. Your pot melt will look better in one piece.
- Note: Be very cautious of opening a 1700F kiln and avoid if possible. Wear eye protection, shield your face, protect your hands with high temperature gloves. Synthetic clothing fabrics can be very dangerous at high temperatures, wear cotton. Synthetic fabrics can melt or burst into flames causing serious burns to your skin.


Advertisement
Community Q&A
-
QuestionIn step 9, how long do I hold at 600 degrees?
 T. ChinsenTop AnswererThere is no specific time given, as the oven is tuned off once the temp hits 600 degrees. This is the final step in the annealing process of the glass. Annealing ensures that there is uniformity in the physical structure of the glass.
Advertisement
Warnings
- Note: Be very cautious of opening a 1700F kiln and avoid if possible. Wear eye protection, shield your face, protect your hands with high temperature gloves. Synthetic clothing fabrics can be very dangerous at high temperatures, wear cotton. Synthetic fabrics can melt or burst into flames causing serious burns to your skin.⧼thumbs_response⧽
Advertisement


References
- More at http://www.coe90.com
About This Article
Advertisement