This article was co-authored by Jesse Kuhlman. Jesse Kuhlman is a Master Electrician and the Owner of Kuhlman Electrician Services based in Massachusetts. Jesse specializes in all aspects of home/residential wiring, troubleshooting, generator installation, and WiFi thermostats. Jesse is also the author of four eBooks on home wiring including "Residential Electrical Troubleshooting" which covers basic electrical troubleshooting in residential homes.
There are 7 references cited in this article, which can be found at the bottom of the page.
This article has been viewed 67,644 times.
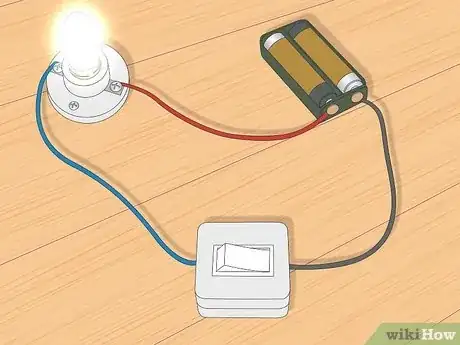
Whether you are doing diagnostics or just learning about circuits, knowing the current is an important part of electrical work. Current is the measure of the flow of electricity through a circuit in amperes (amps) by a device known as an ammeter.[1] You can check amperage by wiring an ammeter into the circuit (also called “in-series”), or you can detect current by clamping an induction meter around a wire.
Steps
Setting an In-Series Ammeter and Breaking the Circuit
-
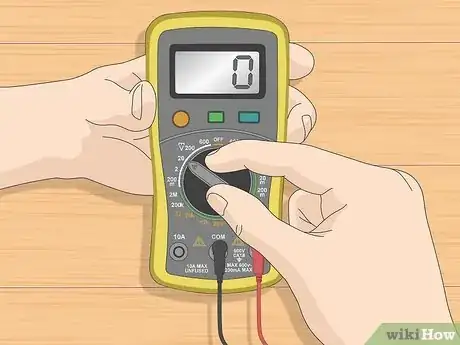
1Set the ammeter current type and range. If your ammeter divides the range of current into settings, choose the highest setting. Next you should select the kind of current you’ll be measuring: AC (Alternating Current) or DC (Direct Current).
- Choosing the highest setting on your ammeter from the outset will prevent you from blowing the meter’s internal fuse if the amperage is too high.[2]
- Battery powered circuits run on DC. Other power supplies may be AC or DC, and some can alternate between both. Check the power supply manual or label to determine its current type.[3]
-
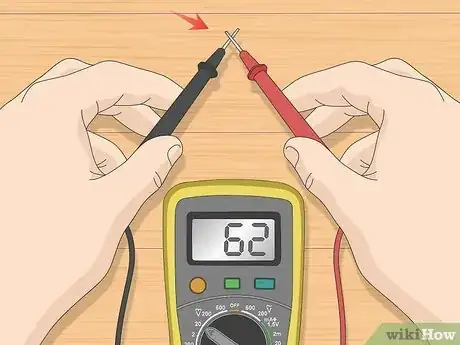
2Test the internal fuse of your ammeter. This will only take you a second and it will save you some time wasted on false readings. Your ammeter should have two leads: an input (+) and an output ( - ). Hold these together with your ammeter on. If the resistance rating is low, your fuse is good.[4]
- The resistance reading of your ammeter will be indicated on a display on the front of the meter. You may have to adjust the power range before it can read the low level of a working fuse.
- Most ammeter fuses can be easily replaced or reset, though this process will vary according to your brand and model. Consult your ammeter’s manual to learn how to fix blown fuses.
- If you adjusted the power range lower to check the fuse, reset the range to its maximum to prevent the fuse from blowing when taking the actual amperage.
Advertisement -
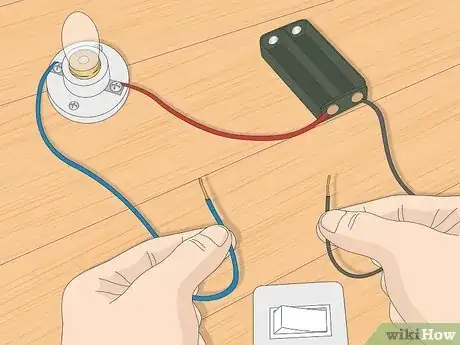
3Break the circuit. But before you do, make sure the power is off and all batteries are removed to prevent getting zapped. Now you need to create a break in the wiring between the negative ( - ) terminal of the power source and the power input for the item receiving power.
- The ammeter will be tied into the circuit at this break so that electricity passes through the meter on its way to the item being powered, allowing the meter to take a reading.
- You may be able to “break” your circuit by loosening the fasteners connecting wiring to the power source’s negative ( - ) terminal or at the power input for the item receiving power.
- If you can’t create a break in the circuit at the negative ( - ) terminal or power input, you can cut, strip, and then resplice the wire.
Tying in an In-Series Ammeter to Take a Reading
-
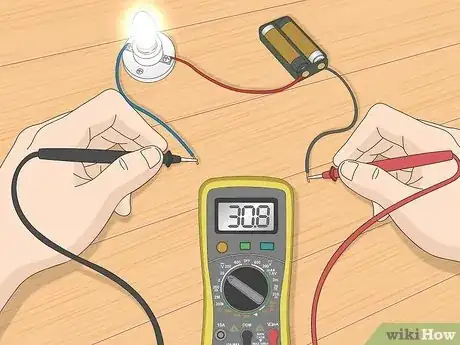
1Connect the ammeter leads to the circuit. This process will depend on your model of ammeter. Essentially, the negative ( - ) end of your ammeter will connect to the power source side of the broken circuit. The positive end (+) will connect to the opposite side, so that the ammeter bridges the break.
- Most ammeters use color coding to indicate positive and negative ends of a circuit. This may be different from country to country, but in many cases, red will represent positive and black negative.[5]
- The most commonly used ammeters have clamps that allow them to easily attach to wires.[6] Other models may use metal probes that you'll wrap the wire around.
- You can also simply hold the leads of your ammeter to the bare wires of the broken circuit. Prevent exposed wire from touching anything while the circuit is engaged.[7]
- Be sure to only test one wire at a time.[8]
-
2Restore power to the circuit and take the reading. Switch the power source back on or reinsert the batteries for the circuit. Electricity will now pass through the meter, causing it to display the amperage of the current.[9]
- Depending on the strength of the circuit you’re testing, you may need to reduce the range for the power gauge until the display registers activity.
- Bare wires shouldn’t touch anything while the circuit is powered. Doing so could cause the circuit to short, an electrical fire, or a false reading.[10]
-
3Cut power and return the circuit to normal. Now that you have your reading, you can turn off power to the circuit once again. Remove the ammeter and refasten the circuit’s wiring or splice back together wire that’s been cut.[11]
Using an Induction Ammeter
-
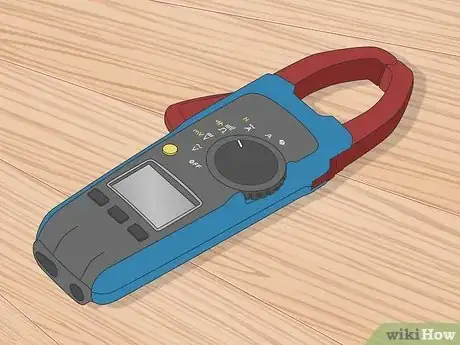
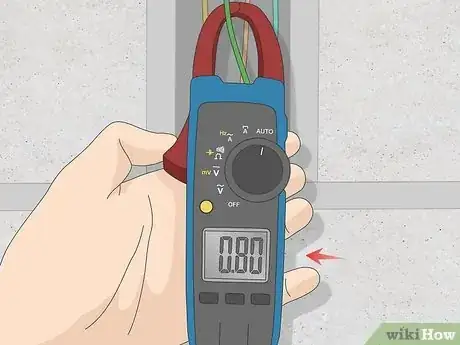
1Identify induction sensors. Induction ammeters are different from in-series ones in that induction units won’t have leads or probes. Instead, they’ll have a single clamp or ring through which a wire will pass. The induction sensor reads current through the electromagnetic field given off by the electricity.[12]
-
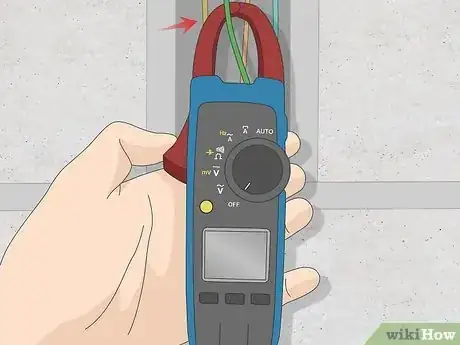
2Position the sensor around the power input wire. Locate the negative ( - ) terminal for the power source. The wire that runs between this and the item being powered is your power input line. Open the clamp and enclose it around the power input wire.
- Because of the way electricity is distributed in a circuit, if you clamp two different wires together, it will throw off the meter’s reading.[13]
-
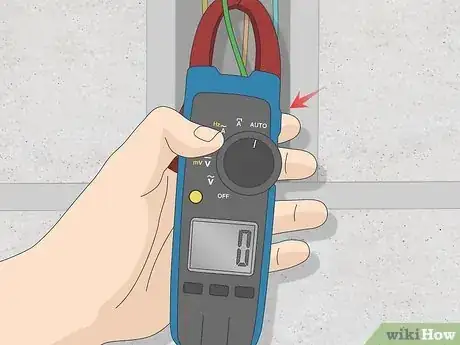
3Set the ammeter to auto. Setting the ammeter to auto will allow the meter to automatically adjust the range it is measuring. This will prevent you from blowing a fuse in the meter. If you need to adjust any other settings, this is the time to do it.[14]
-
4Take the reading and remove the ammeter. Depending on your model, there may be a button you need to push, like a trigger, before it starts taking a reading. Other units might take a reading as soon as they are set to auto. Unclamp the ammeter, turn it off, put it away, and you’re done.[15]
Expert Q&A
Did you know you can get expert answers for this article?
Unlock expert answers by supporting wikiHow
-
QuestionHow do you use an ammeter in a circuit?
 Jesse KuhlmanJesse Kuhlman is a Master Electrician and the Owner of Kuhlman Electrician Services based in Massachusetts. Jesse specializes in all aspects of home/residential wiring, troubleshooting, generator installation, and WiFi thermostats. Jesse is also the author of four eBooks on home wiring including "Residential Electrical Troubleshooting" which covers basic electrical troubleshooting in residential homes.
Master Electrician
Things You’ll Need
- Ammeter
- Wire snips (optional)
- Wire strippers (optional)
References
- ↑ http://www.physicsclassroom.com/class/circuits/Lesson-2/Electric-Current
- ↑ http://sciencing.com/use-ammeters-2383.html
- ↑ http://sciencing.com/connect-ammeter-6029800.html
- ↑ https://www.allaboutcircuits.com/textbook/experiments/chpt-2/ammeter-usage/
- ↑ https://www.allaboutcircuits.com/textbook/experiments/chpt-2/ammeter-usage/
- ↑ Jesse Kuhlman. Master Electrician. Expert Interview. 30 June 2020.
- ↑ http://sciencing.com/connect-ammeter-6029800.html
- ↑ Jesse Kuhlman. Master Electrician. Expert Interview. 30 June 2020.
- ↑ http://sciencing.com/use-ammeters-2383.html
- ↑ https://www.allaboutcircuits.com/textbook/experiments/chpt-2/ammeter-usage/
- ↑ https://www.allaboutcircuits.com/textbook/experiments/chpt-2/ammeter-usage/
- ↑ https://www.electrical4u.com/ammeter/
- ↑ http://itstillworks.com/use-digital-clamp-meter-5020050.html
- ↑ https://www.electrical4u.com/ammeter/
- ↑ http://itstillworks.com/use-digital-clamp-meter-5020050.html
