wikiHow is a “wiki,” similar to Wikipedia, which means that many of our articles are co-written by multiple authors. To create this article, 16 people, some anonymous, worked to edit and improve it over time.
This article has been viewed 25,923 times.
Learn more...
Ultrasound imaging is a commonly used medical procedure used to capture live images of the human body. It works by transmitting high frequency sound waves through the tissue and absorbing the waves that bounce back. This is a commonly used procedure by many medical professionals as there is no harmful ionizing radiation involved. The most popular use is for monitoring fetuses during pregnancy. Professionals take these images with ease and you can too! Capturing the best image might be a little tricky, but with some advice and training, it is easy to do.
Steps
Preparing the Device
-
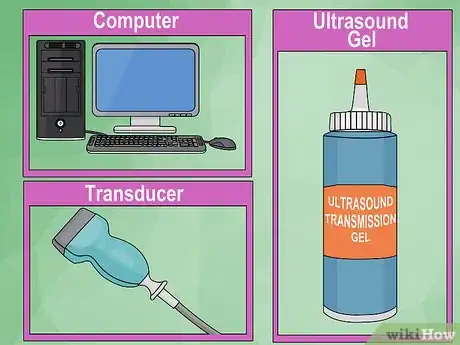
1Collect all the components to acquire an ultrasound image. This includes a transducer, computer, ultrasound gel and the object to image.[1]
- Gather all of your items at first so that you will not have to run around trying to find things.
- Wash your hands if they are dirty.
-
2Turn the machine on and load the software. This might be on a PC, laptop or a medical imaging computer. The software is where you will see the image.[2]
- Different machines have different techniques. Get to know your machine and where things are placed.
- There are many different software to run an ultrasound. For research purposes, MATLAB is very common.
Advertisement -
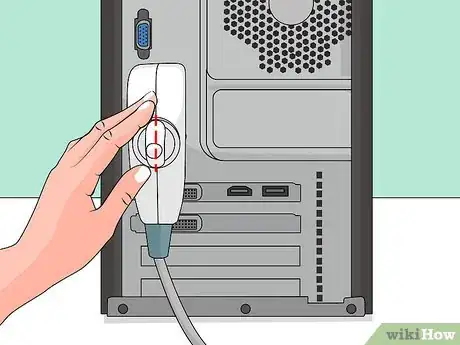
3Connect the transducer to the machine. Insert the transducer into the transducer port and lock it by turning the knob vertically. This locks the transducer into place. In order to remove the transducer, simply turn the knob horizontally and remove.[3]
- Freeze the screen on your program before you do this.
- Push a little harder or wiggle it around if the transducer does not go into the port perfectly.
-
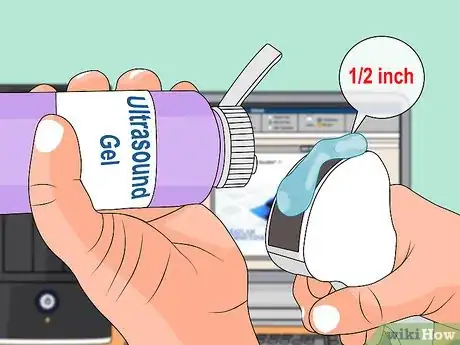
4Prepare the probe. Ultrasound gel is always used between the head of the probe and the object being imaged. The gel makes it easier to see the image.[4]
- Apply a gracious, half a centimeter thick layer over the top surface.
- There is never too much gel, only too little.
Taking the Image
-
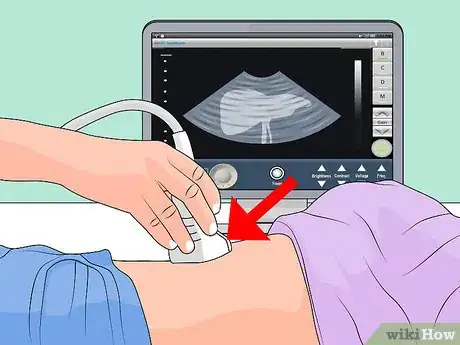
1Lightly press the transducer onto the surface of the tissue. The gel might feel cold to the patient but does not do any harm. Unfreeze the frame on the computer once the transducer is touching the object.[5]
- Move the transducer around while looking at the image on the computer.
- Locate the place you want to take the image. Zeroing in on your focal point might take some time. Be sure to practice so that you can find what you are looking for faster.
-
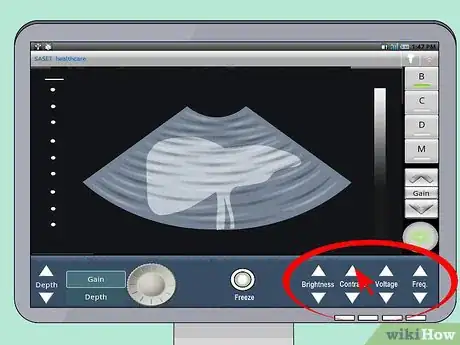
2Adjust the image. Increase or decrease the brightness or contrast in order to obtain a clearer picture. Play around with the settings on your device. Some settings might be better to use than others; it really depends on what you are imaging.[6]
- You know that it is a good image if the focal point is in the middle of the frame and there is a good contrast between light and dark areas.
-
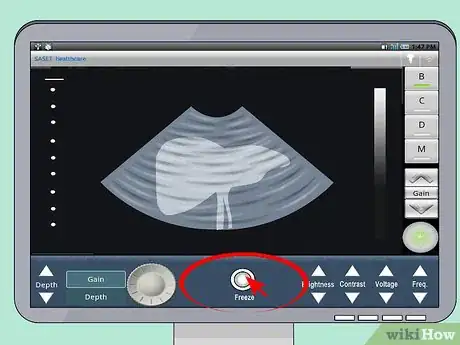
3Freeze the image. This is the same button you used to freeze the image before firing the transducer. Congrats! You created an ultrasound image!
-
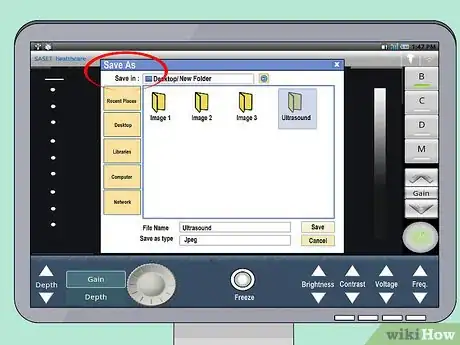
4Save the image. In order to save the image you took, find the save button and save the image onto a certain place on your computer for easy access later.
- Patients might want a copy of their ultrasound. To to this, find the print button and send the image to a printer.
-
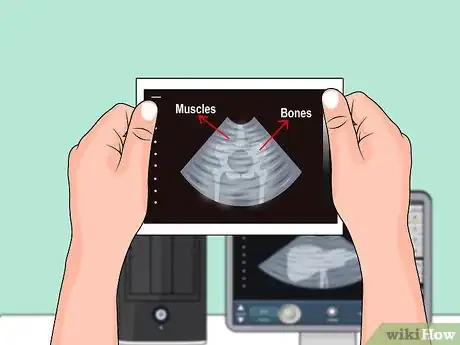
5Interpret the image. Look at the color differences.[7]
- Ultrasound is usually black and white.
- The white is solid tissues like bones because they reflect more light.
- The blacker area is less dense and can be liquids or lumen like a uterus.
Storing the Probe
-
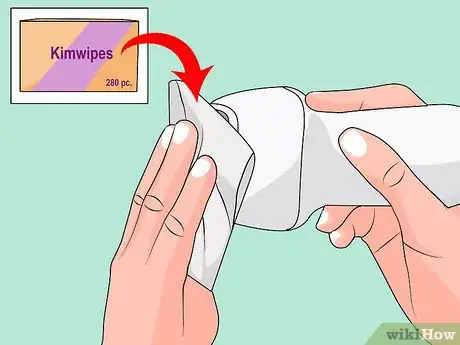
1Wipe the gel off of the transducer. Use a delicate wipe such as a tissue.
- There are ultrasound tissues that you may buy which will provide minimal scratching on the head of the transducer.
- Wipe softly but firmly.
- Make sure all the gel is off before getting ready to store it.
-
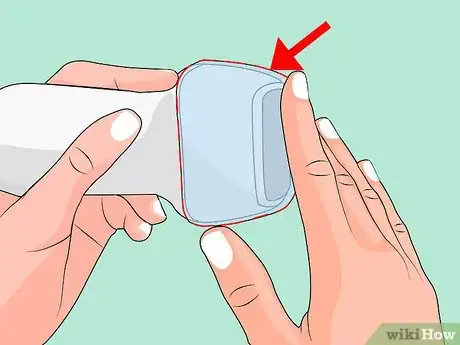
2Put the plastic cover back onto the transducer. This will help to protect anything that may accidentally fall on the head.
- The top surface of the transducer is very soft and any scratch or spill might damage the quality of the image.
-
3Store in a safe place. This includes a place that is safe from knocking the probe down.[8]
- The probe should always be cool and dry.
- If other people are sharing the probe, make sure they also know safe storage protocols.
Warnings
- Never fire the transducer into the open air as this will damage the transducer. Make sure the image is paused or the machine is off when the probe is not touching any tissue.⧼thumbs_response⧽
- Turn off the transducer when not in use. When talking to a patient or setting up your experiment, the probe need not be running.⧼thumbs_response⧽
Things You'll Need
- Ultrasound transducer
- Ultrasound machine
- Computer
- Ultrasound computer software
- Ultrasound gel
- Tissues
- Object to image
- Plastic cover
References
- ↑ https://dghtechnology.com/auriga/wp-content/uploads/2020/08/8000CE-INS-UMENG-R0-DGH-8000CE-Scanmate-B-Users-Manual.pdf
- ↑ https://us.medical.canon/download/disinfection-guide-ultrasound
- ↑ https://www.mindraynorthamerica.com/wp-content/uploads/2017/12/H-046-001134-00-Ultrasonic-Transducer-Operators-Manual-25.0.pdf
- ↑ https://www.mindraynorthamerica.com/wp-content/uploads/2017/12/H-046-001134-00-Ultrasonic-Transducer-Operators-Manual-25.0.pdf
- ↑ https://www.ncbi.nlm.nih.gov/pmc/articles/PMC3063344/
- ↑ https://dghtechnology.com/auriga/wp-content/uploads/2020/08/8000CE-INS-UMENG-R0-DGH-8000CE-Scanmate-B-Users-Manual.pdf
- ↑ https://www.ncbi.nlm.nih.gov/pmc/articles/PMC3063344/
- ↑ https://www.mindraynorthamerica.com/wp-content/uploads/2017/12/H-046-001134-00-Ultrasonic-Transducer-Operators-Manual-25.0.pdf



Medical Disclaimer
The content of this article is not intended to be a substitute for professional medical advice, examination, diagnosis, or treatment. You should always contact your doctor or other qualified healthcare professional before starting, changing, or stopping any kind of health treatment.
Read More...