X
This article was co-authored by wikiHow staff writer, Jack Lloyd. Jack Lloyd is a Technology Writer and Editor for wikiHow. He has over two years of experience writing and editing technology-related articles. He is technology enthusiast and an English teacher.
This article has been viewed 22,356 times.
Learn more...
This wikiHow teaches you how to set up and use your Apple iMac computer. The iMac is Apple's desktop version of its popular MacBook series.
Steps
Part 1
Part 1 of 6:
Setting up Your iMac
-
1Place your iMac monitor on your desk. Your iMac's monitor actually contains all of the hardware needed to run your iMac (e.g., the processor, hard drive, and so on), so you don't need to set up a tower like you might need to with a Windows PC.
-
2Place your keyboard and mouse in front of the iMac. Both the keyboard and the mouse that come included with your iMac are already paired with the computer, so just position them a comfortable distance from the monitor.Advertisement
-
3Attach the keyboard to the iMac. You'll use the included Lightning to USB cable to do so: plug the smaller Lightning end of the cable into your keyboard's USB-C port, then plug the other end of the cable into one of the rectangular USB ports on the back of your iMac.[1]
- This cable is used to charge your keyboard and your Magic Mouse, but you can use it initially to ensure that your keyboard will work properly.
-
4Plug your iMac into an electrical outlet. Attach one end of the included power cable to the three-pronged plug on the back of the iMac monitor, then plug the other end of the cable into an electrical outlet.
-
5Turn on the Magic Mouse and the keyboard. The Magic Mouse's switch is on the bottom of the mouse, while the keyboard's switch is on its back. If you see green displaying below the switch, the item is on.[2]
-
6
-
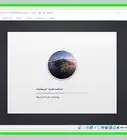
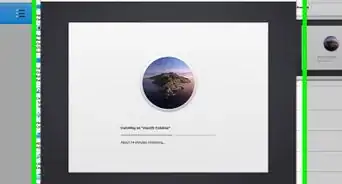
7Follow the setup instructions. Upon starting your new iMac for the first time, you'll be prompted to set up a few items and log into your Apple ID account. Once you've finished the initial setup section, you'll arrive at your iMac's desktop where you can begin learning about your iMac.
- If you don't have an Apple ID, you'll need to make one.


Advertisement
Part 2
Part 2 of 6:
Learning iMac Basics
-
1Charge your keyboard and your mouse. Both the Magic Mouse and the keyboard must be charged occasionally via the USB-C to Thunderbolt 3 cable. You can use the keyboard while it is charging, but the mouse cannot be used while charging.[3]
- It's important to keep both of these items charging when not in use.
-
2Connect to a Wi-Fi network. If you didn't already select a wireless network during the iMac setup process (or you want to select a different one), you can do so from the Wi-Fi menu in the upper-right side of your iMac's screen.
- You can also use an Ethernet cable to connect your iMac directly to your router. You'll find the square Ethernet port on the back of your iMac's monitor.
-
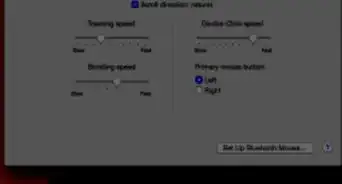
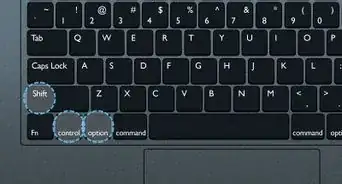
3Know how right-clicking works. To right-click with your iMac's Magic Mouse, you'll have to hold down the Control key in the lower-left side of your keyboard while clicking an item.
-
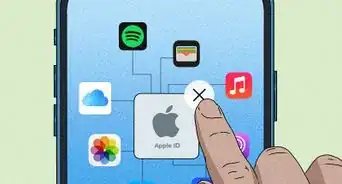
4Locate the Dock. The Dock is your iMac's list of default programs. You'll find this bar at the bottom of the screen, though you may have to move your iMac's mouse cursor to the bottom of the screen in order to see the Dock.
- You can add or remove programs from the Dock as well—you aren't restricted to using what's listed in the Dock upon startup.
-
5Review your available programs. Your iMac comes with a huge number of programs installed by default, but there are a few programs you should know about from the start:
- Finder — Your iMac's file explorer. Finder's menu options are open by default whenever you're on the desktop.
- Photos — Used to view any photos or videos on your iMac. If you have an iPhone or iPad, you can synchronize your photos and videos to your iMac via Photos.
- System Preferences — The Settings app for your iMac. You can use this program to view and change your iMac's settings (such as display brightness, language, and accounts).
- Launch Pad — Your iMac's list of installed applications lives here. Opening Launch Pad will bring up a window full of apps, each of which you can launch by clicking the appropriate icon.
- Safari — The default Internet browser for your iMac. Safari can be used like any other web browser, and you can also use it to download different browsers (e.g., Chrome).
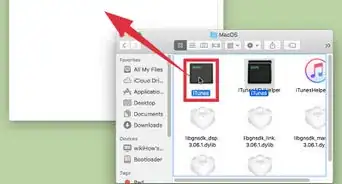
- iTunes — Your iMac's default music player. You can use iTunes both to play music and to back up your iPhone or iPad if you have one.
- Trash — The Mac equivalent of the Windows Recycle Bin. This is where you'll place files and applications which you want to delete from your iMac.
-
6Use Spotlight to search for files and programs. Spotlight is an invaluable tool which allows you to search your iMac for anything. To use it, click the Spotlight icon in the top-right corner of your iMac's screen, then type in your search item in the search bar which appears in the middle of the screen.
- You can also bring up the Spotlight search bar at any time by pressing ⌘ Command and the spacebar at the same time.
- When searching for a program or file in Spotlight, you'll have to double-click the program or file name to open it.
-
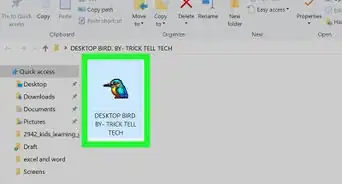
7Create a folder. Folders allow you to organize your iMac's content as you please:
- While on the desktop, click the File button in the upper-left corner of your iMac's screen.
- Click New Folder in the drop-down menu.
- When the new folder appears on the desktop, type in whatever you want to name the folder.
- Press the ⏎ Return key to save the name change.
- You can open your folder by double-clicking it, or you can move files into it by clicking and dragging the files onto the folder icon and then releasing them there.
-
8Learn keyboard shortcuts. While you can accomplish most tasks on your iMac by using the mouse, keyboard shortcuts will significantly speed up your iMac operation, especially when used in conjunction with minor tasks like copying and pasting text.
-
9Review your iMac's ports. On the back of your iMac's monitor, there are several different ports which you can use to house various types of equipment:[4]
-
2 Thunderbolt 3 (USB-C) ports — Narrow, vertical, oval ports. Used for any lightning connectors (e.g., your Magic Mouse and keyboard charger) as well as Mac-exclusive cables and equipment.
- These ports can also carry Internet and audio.
- 4 USB 3.0 ports — Rectangular ports. These can be used for flash drives and most external equipment (e.g., keyboards, CD drives, USB hubs, chargers, etc.).
- 1 Ethernet port — A square port on the right-most side of the row of ports. You can use this port to plug in an Ethernet cable, which can be used to connect your iMac directly to your router.
- 1 SD card port — A narrow, horizontal port. Used to house large SD cards (e.g., the types found in cameras) or microSD card adapters.
- 1 Headphone port — This circular, 3.5 millimeter jack is on the left-most side of the row of ports. You can use this output to listen to your iMac's audio via headphones, or you can plug in a set of computer speakers.
-
2 Thunderbolt 3 (USB-C) ports — Narrow, vertical, oval ports. Used for any lightning connectors (e.g., your Magic Mouse and keyboard charger) as well as Mac-exclusive cables and equipment.
-
10Unlock menus when needed. Some menus, such as sensitive ones found in System Preferences, contain information or settings which are locked for editing. You can unlock such menus by clicking the padlock icon in the lower-left or lower-right corner of the menu and entering your Mac's password when prompted.
- Not all menus are locked.
- You can re-lock the menu by clicking the lock icon again once you've finished with the menu.


Advertisement
Part 3
Part 3 of 6:
Using the Menu Buttons
-
1Locate the menu bar. This grey bar is at the top of your iMac's screen, and will always be available regardless of what's on-screen.
- The menu bar will hide itself if you place a window in full-screen mode, but you'll be able to cause it to reappear by placing your mouse cursor at the top of the screen.
-
2Find the menu buttons. You should see several menu items in the left-hand side of the menu bar; these buttons will change depending on the currently open program, but a few will always be available:
- Apple Menu — Contains menu options regarding your iMac. The Apple menu won't change to reflect your currently open program.
- File — Contains options for things like creating folders and viewing file information. The File menu shares options with the right-click menu.
- Edit — Contains options for things like copying and pasting text, as well as a shortcut to the Emoji & Symbols menu.
- View — Contains various options for different windows, the menu bar, and so on.
-
3Click a menu button. Clicking any one of the menu buttons in the menu bar will prompt a drop-down menu.
-
4Read through the options. In the drop-down menu, you'll see several options which may change depending on your currently open program. If you're ever confused about how to perform a specific task in a program, clicking each of the menu buttons and reading their options may provide a solution.
-
5Use the menu bar to see program-specific options. If you open a program (e.g., Finder), you'll see the program's name in the menu bar. Clicking this menu item will prompt a drop-down menu with various options for the program in question.
- For example, if you have Finder open, you can click the Finder menu item in the upper-left side of the screen to see Finder-specific options.
-
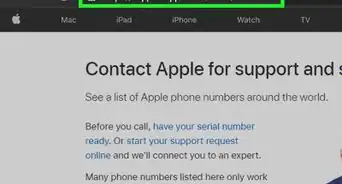
6Use the Apple Menu to see your iMac's information. You can view a list of your iMac's attributes by clicking the Apple menu and then clicking About This Mac.
- This is useful if you ever need to register your iMac with Apple Support, as you can find your iMac's serial number in this menu.
-
7Open System Preferences from the menu bar. System Preferences is a program which allows you to see and change your iMac's settings. To open it from the menu bar, click the Apple menu , then click System Preferences... in the drop-down menu.
- You can also open System Preferences by clicking the System Preferences app icon, which resembles a grey box with gears in it, on your iMac's Dock.
-
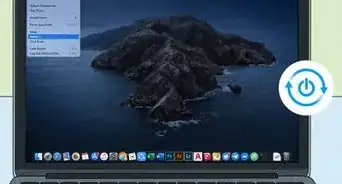
8Turn off or restart your Mac. In the Apple menu, you'll see options such as Restart... and Shut Down.... These options can be used to restart and shut down your iMac, respectively.


Advertisement
Part 4
Part 4 of 6:
-
1
-
2Review the Finder folders. On the left side of the Finder window, you'll see a column of different items; this is a list of the main folders on your computer.
- You may also have an option entitled All My Files at the top of the column. This option shows a comprehensive list of your computer's files without including the files' folders.
-
3Select a folder. Click a folder you want to open to view it in the main Finder window.
-
4Use the menu buttons to interact with Finder items. The menu buttons can be used to alter or move any file you've selected (e.g., clicked on).
-
5Double-click a folder to open it. This will cause the folder's contents to display in the main Finder window as well.
-
6View a list of your browser downloads. By default, anything you download from the Internet will appear in the "Downloads" folder, which you can view by clicking Downloads on the left side of the Finder window.
-
7Use the Go menu item. At the top of the screen, you should see a Go menu item; this will appear whenever Finder (or the desktop) is open. Clicking it prompts a drop-down menu with your Finder's list of folders.
- You can also use the Go menu to access the Utilities folder, which is a system folder that contains applications used to perform advanced actions.
-
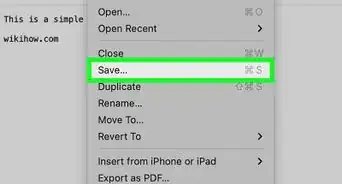
8View a file's information. If you want to see more information about a file, click the file once, then click File and click Get Info in the resulting drop-down menu.
- You can also do this on the desktop by clicking an item (e.g., a folder) and then clicking File and selecting Get Info, or by Control-clicking the item and clicking Get Info.
- The keyboard shortcut ⌘ Command+I can be used to open a selected file's information window.


Advertisement
Part 5
Part 5 of 6:
Installing Programs
-
1Open the App Store. Click the App Store app icon, which resembles a white "A" on a blue background, in your Mac's Dock.
-
2Search for a program. In the text box that's in the upper-right corner of the App Store window, type in the name of the app or program you want to install and then press ⏎ Return.
- If you don't know the specific name of a program, you can browse the home page, or you can type in a general phrase (e.g., "word processor").
-
3Find a program to download. Scroll through the list of results until you find the program which you want to download.
-
4Click GET. It's below the app.
- If your selected app is a paid one, this button will be a price instead.
-
5Click INSTALL APP. You'll find this green button below the app. Doing so will prompt the app to begin installing.[5]
-
6Enter your Apple ID password if prompted. If asked for your Apple ID password, type it in and press ⏎ Return to confirm that you want to download the app.
- You may also need to enter payment details here if your app isn't free.
-
7Access the app. You can open your newly downloaded app in a variety of ways:
- Launch Pad — Click the rocket ship-shaped Launch Pad app icon in the Dock, then find and click your app.
- Spotlight — Click in the top-right corner of the screen, then type in your app's name. Double-click the app's name to open it.
- Finder — Click Finder, click Applications on the left side of the window, and double-click the app you want to open.
-
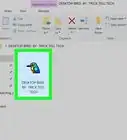
8Install non-App Store programs. Much like its Windows counterparts, your iMac can download and install software from the Internet in either "DMG" (disk image) or "PKG" (package) format. You'll install these files in different ways:
- DMG — Double-click the DMG file, verify the download if prompted, click and drag the app icon onto the "Applications" folder icon in the DMG's window, and follow any on-screen instructions.
- PKG — Double-click the PKG file, verify the download if prompted, and then follow any on-screen instructions including entering your Mac's password if prompted.


Advertisement
Part 6
Part 6 of 6:
Updating Your iMac
-
1Understand the different types of updates. There are two main types of updates you'll encounter on your iMac:
- Software updates — Updates for your installed apps.
- Operating system updates — Updates for your iMac's entire operating system.
-
2Open the App Store. Click the App Store app icon, which resembles a white "A" on a blue background, in your Mac's Dock.
-
3Click the Updates tab. It's in the top-right corner of the App Store window.[6]
-
4Review the available apps. Once a list of the apps which need updates appears at the top of the page, you can look through the apps to determine which ones you want to update.
- If an operating system update is available, you'll usually see it at the top of the App Store window.
-
5Click UPDATE ALL. It should be near the top of the App Store window. Your app(s) will begin updating.
- If you'd prefer to update an individual app, click UPDATE to the right of the app you want to update.


Advertisement


References
About This Article
Jack Lloyd
wikiHow Technology Writer
This article was co-authored by wikiHow staff writer, Jack Lloyd. Jack Lloyd is a Technology Writer and Editor for wikiHow. He has over two years of experience writing and editing technology-related articles. He is technology enthusiast and an English teacher. This article has been viewed 22,356 times.
How helpful is this?
Co-authors: 8
Updated: June 18, 2020
Views: 22,356
Categories: Mac
Advertisement