This article was co-authored by wikiHow Staff. Our trained team of editors and researchers validate articles for accuracy and comprehensiveness. wikiHow's Content Management Team carefully monitors the work from our editorial staff to ensure that each article is backed by trusted research and meets our high quality standards.
There are 13 references cited in this article, which can be found at the bottom of the page.
wikiHow marks an article as reader-approved once it receives enough positive feedback. In this case, 91% of readers who voted found the article helpful, earning it our reader-approved status.
This article has been viewed 31,828 times.
Learn more...
Walking sticks are really helpful for keeping your balance and distributing more of your bodyweight to your arms. You can use walking sticks if you have an injured leg or for hiking. Whichever kind of walking stick you use, make sure that you adjust it to the proper length so that you can walk comfortably.
Steps
Using a Cane with a Hurt Leg
-
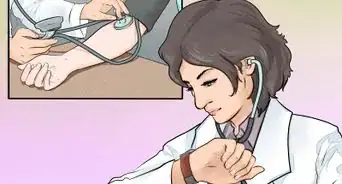
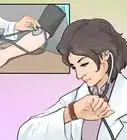
1Ask a doctor if a walking stick is right for your particular injury. If you have an injured hip, knee, or leg, your doctor may recommend that you use a walking stick (cane). Sometimes, doctors will recommend other assistive devices, such as walkers or crutches. If you get a prescription for a cane from your doctor, you can usually get the cost covered by health insurance, though you’ll have to get the cane yourself.[1]
- The choice of assistive device depends on your injury, strength, fitness, and balance level.
- Medicare covers canes if both your doctor and the cane supplier are enrolled in Medicare.[2]
-
2Adjust your cane or walking stick so that it comes up to your wrist. Stand up straight and let your arms fall down at your side. Adjust the height of the cane so that is comes up to your wrist, or have someone else adjust it for you. When the cane comes up to your wrist, you won’t have to hunch over to use it, but it should also be low enough that you can put weight on it.[3]
- Selecting the right height will help take pressure off your shoulders and wrists.
- A physical therapist can help you adjust the cane to the right height.
Advertisement -
3Hold your walking stick in the opposite hand as your hurt leg. Many people think that the cane is supposed to go on the same side as your injury, but it actually works far better when you hold it on the opposite side. If your left leg is hurt, you should hold the cane in your right hand, while if your right leg is hurt, you should it in your left hand.[4]
- This will shift more of your body weight to the stronger side of your body.
-
4Move the walking stick at the same time as your injured leg. As you step forward with your injured leg, plant your cane in front of you. It doesn’t have to be way in front of you, but should be more like 2 inches (5.1 cm) ahead of you. Take a small step with your injured leg and cane, and then step forward with your good leg.[5]
- This way, your walking stick and injured leg will share the load.
- It may take some time to get used to moving the cane and your leg at the same time, but it will get easier with practice.
-
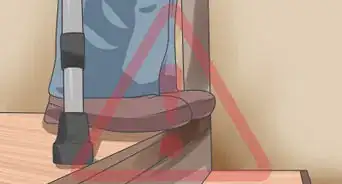
5Climb stairs with your good leg first. Make sure your walking stick is in the opposite hand as your injured leg, as always. Hold on to a handrail with the other hand, if possible. Step up with your good leg, and then follow with your injured leg and the cane.[6]
- Remember to move your injured leg and cane at the same time.
-
6Descend stairs starting with the cane. Put your cane on the step below you. Then, step down with your hurt leg. Step down onto the same step with your good leg. If there’s a handrail, you can hold it for additional support.[7]
- Make sure to take stairs slowly to avoid falling.
-
7Remove trip hazards from your home. If you use a walking stick around the house, make sure that the stairs are clear and that the furniture is arranged so that you can easily move around. Move (or ask someone to move) electrical cords, throw rugs, and boxes so that your cane doesn’t get caught on them.[8]
- You might also want to put a grab bar in the shower and use a rubber mat, so that you’re less likely to slip.


Hiking with a Walking Stick
-
1Decide whether you want to use one or two walking sticks. Most people prefer to hike with two walking sticks or hiking poles so that they can balance easier. However, the single walking stick can be useful for more gentle terrain where you aren’t as worried about balance.[9]
- If you do decide to use just one walking stick, you might want to switch hands every now and then.
-
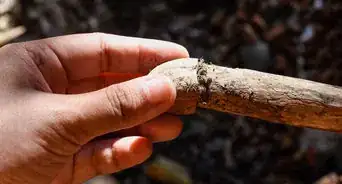
2Get a walking stick that rises 6 to 8 in (15 to 20 cm) above your elbow. While the height of a walking stick is a personal preference, many people like to use a stick that comes up about 6 to 8 inches (15 to 20 cm) higher than their elbow, so that they can grip the stick part way down. If you’re making your own, trim it to the appropriate length. If you’re buying a walking stick, hold it in your hand check if the height feels right.[10]
- You can always trim a wooden walking stick down more, so aim for it to be a little too long if you’re not sure.
-
3Hold your elbow at a right angle and grip your walking stick with your hand. If you find you prefer to hold the stick a little higher or a little lower than a right angle, that’s fine too. You can hold the walking stick in whichever hand you like, though many people prefer to use their dominant hand.[11]
- If you’re using a hiking pole with a loop, put your hand up through the loop from below and then hold the handle.[12]
-
4Move your walking stick at the same time as the opposite foot. This will let your arms swing in a natural walking rhythm and help distribute your weight evenly. For example, if you hold the walking stick in your right hand, you should move it forward at the same time as you step forward with your left foot.[13]
- This way of moving should feel more natural than moving the foot and hand on the same side of the body at the same time.
-
5Brace the walking stick against the stream bed for stream crossings. When you’re walking on rocks across a stream, plant the walking stick so that it touches the bottom of the stream. If you accidentally step on a loose or slippery rock, the firmly planted walking stick will help you keep your balance.[14]
- You can also use the stick to test the depth of the water.


References
- ↑ https://www.aafp.org/afp/2011/0815/p412.html
- ↑ https://www.medicare.gov/coverage/canes
- ↑ https://www.arthritis.org/living-with-arthritis/pain-management/joint-protection/cane-tips.php
- ↑ https://youtu.be/AhsCqUKuuhg?t=4
- ↑ https://www.arthritis.org/living-with-arthritis/pain-management/joint-protection/cane-tips.php
- ↑ https://www.arthritis.org/living-with-arthritis/pain-management/joint-protection/using-a-cane.php
- ↑ https://www.arthritis.org/living-with-arthritis/pain-management/joint-protection/using-a-cane.php
- ↑ https://orthoinfo.aaos.org/en/recovery/how-to-use-crutches-canes-and-walkers/
- ↑ https://youtu.be/_7dj6MAWsrc?t=100
- ↑ https://boyslife.org/outdoors/ask-the-gear-guy/1813/ask-the-gear-guy-7/
- ↑ https://www.backpacker.com/skills/how-to-adjust-trekking-poles-for-efficiency-on-varying-terrain#&gid=ci0202d6adb00e2641&pid=trekkingpoles-adjust-6-3509-8-268x400-27564
- ↑ https://youtu.be/7q2YwOE4okA?t=202
- ↑ https://youtu.be/7q2YwOE4okA?t=215
- ↑ https://youtu.be/kUMfxbeDXGA?t=253


Medical Disclaimer
The content of this article is not intended to be a substitute for professional medical advice, examination, diagnosis, or treatment. You should always contact your doctor or other qualified healthcare professional before starting, changing, or stopping any kind of health treatment.
Read More...