This article was co-authored by Tiffany Pate. Tiffany Pate is a Licensed Cosmetologist and the Owner and CEO of Pretty Professional Hair based in Tampa, Florida. With more than 17 years of experience, she specializes in wig, weave, and hair extension installation. Additionally, she provides care that maintains healthy hair.
This article has been viewed 228,473 times.
Hair weaves are a popular way of adding luster and length to your natural hair. Your weave may be made of synthetic material, or even natural hair itself. While adding a weave to your mane might be easy, it's important not to underrate the cleaning a weave requires. In truth, hair weaves often require greater care than your regular hair.
Steps
Washing a Sew-in Weave
-
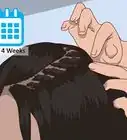
1Clean your hair every 2 weeks. Normally, you might want to wash your hair a few times a week. However, the lengthy time it takes to wash hair with a weave in makes it impractical to do more than once a week, and a weave may be damaged with excessive cleaning.
- Washing your hair every other week should be sufficient, but ask your stylist for advice if you feel like you need a wash more or less often.[1]
-
2Get any existing tangles out of your hair. Using a wide-toothed comb or your fingers, get any snags out of your hair. Hair weaves can be notorious when it comes to tangling, so delicately smoothing it out is necessary for a proper cleaning. Start by gently working out the tangles at the ends of your hair, and slowly work your way up to the roots.[2]
- Be very delicate and meticulous; natural hair is very easy to untangle compared to a weave, and any extra force runs the risk of permanently damaging the fixture.[3]
- Avoid combing your weave while it is wet, since this may cause damage.
- Wide-toothed combs are your best bet for detangling a weave. If you have any major knots, try to work the knot out with your fingers before gently combing through the hair with your comb.[4]
Advertisement -
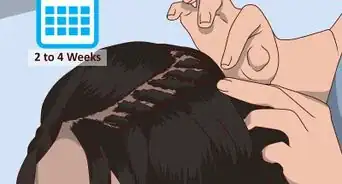
3Give your hair a warm rinse. Pouring warm water on your head and parting your hair from the center will make it easy to identify the wefts (individual parts of the weave) in your hair. That way, you'll have an easier time trying to figure out which parts of your head you should be focusing on the most.[5]
-
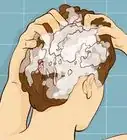
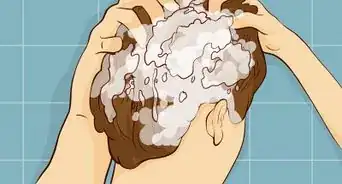
4Give your hair some shampoo. Weaves tend to need more attention and meticulous care than your natural hair, as they're not being regularly supplied with the same oils from your scalp. Rub some of your favorite shampoo into your scalp; from there, you can gradually tease the weave with the shampoo, stroking it downward.
- Make sure not to use the traditional circular rubbing method with your weave, as it will encourage tangling. The way you touch the hair should go from root to tip. Be patient and gentle.
-
5Add some conditioner to your hair, following the shampoo. There's a good chance you would use conditioner following shampoo as part of any hair routine; because your hair’s natural oils don’t easily work their way down your extensions, however, conditioner becomes that much more important. Start from the top of your weave and work it downwards. Avoid putting conditioner on your natural roots.
- Because an excess of conditioner can result in tangling, it's recommended you find a leave-in conditioner for this purpose.
-
6Spray your hair lightly with an anti-bacterial spray while it's drying. Many people who use hair weaves have complained of a smell that comes after it's been wet for too long. This is usually caused by a build-up of mold or bacteria. Buy a relatively inexpensive anti-bacterial hair spray (such as the Salon Pro 30 Second Spray) and give your hair a spritz while you're waiting for it to dry.
-
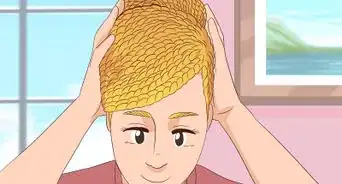
7Dry your hair lightly. Making sure to dry your hair thoroughly is very important when you're using a weave. Otherwise, a weave left wet runs the risk of acquiring mold, which will leave your hair smelling far worse than before. At the same time, you want to dry it lightly enough that you don't run the risk of causing heat damage. There are a few ways to do this:
- Sitting in front of an oscillating fan and letting the air do its work is time-consuming, but it's ultimately the safest way to dry your sew-in weave and natural hair.
- Hair dryers come with the risk of heat damage, but hooded dryers can alleviate some of the cons. Start with the ends and work your way up to the scalp.
- Using a diffuser attachment on your hair dryer can also reduce heat damage and allow you to dry your hair more gently.


Cleaning a Glue-in Weave
-
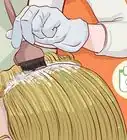
1Clean your hair with dry shampoo. A glue-in weave, sometimes called a quick weave, is a type of extension in which the wefts are glued into your natural hair. Glue-ins require special care, or the glue holding them in place will wash out. Your safest bet is to use dry shampoo to get rid of excess oils and grime in your hair.[6]
- Dry shampoo comes in the form of a spray or powder that you can apply to the roots of your hair and massage through. Let the shampoo sit on your roots for the time recommended on the bottle.
- Once you’re done, gently brush the excess powder out of your hair with a bristle brush. If you’re worried about damaging your weave, blow-dry the powder out on a cool setting instead of brushing.
-
2Keep wet washing and styling products away from the glue. If you must wash or treat your weave with anything other than dry shampoo, be sure to use those products only on the lower parts of the extensions. Many shampoos, conditioners, styling products, and hair oils can dissolve or weaken the glue.[7]
- If your weave is shoulder-length or longer, you can safely wash or apply styling products to the wefts from about the mid-point down.
- If you want to wash your hair under a shower, use a shower cap to keep the glue tracks dry.
-
3Deep-condition the ends of your weave. Your glued-in weave may benefit from deep conditioning. Dampen the ends of your extensions, then gently work through a deep conditioning product with your fingers. Apply only from the mid-point down, and be very careful not to get conditioner on the glue.[8]
- Wrap the ends of your extensions in a towel and leave the conditioner in for up to 2 hours, or the length of time recommended on the package. Carefully rinse it out when you’re done, taking care not to get water on the glue.
- You can also lightly spritz on a leave-in conditioner from the midpoint of your extensions to the tips.
Cleansing a Clip-in Weave
-
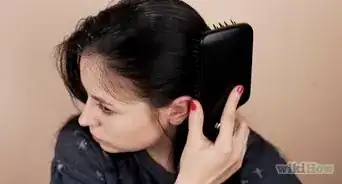
1Brush your hair thoroughly. If you're looking to take your hair weave out, you're first going to want to make sure it's as untangled as possible. Otherwise, taking it out could pull at your natural hair and cause pain. With a brush or a comb, gently brush through, smoothing out all the kinks. Start from the top, and gently brush downward in a slow, fluid motion.
-
2Get your hair wet with warm water. With your hands or a shower faucet, wash your head, letting the water pour down the middle. This way, the wefts will become easier to distinguish from the rest of your hair.
-
3Remove each weft carefully. Now that your hair is detangled, it's time to meticulously remove the weave from your scalp. Pick them apart from your head, checking for damage as you set them aside.
-
4Mark and label each weft before cleaning. Knowing where each weft goes on your head beforehand can take a lot of the guesswork out after the fact. Make a basic system, giving a number (1, 2, 3 etc.) to a corresponding part of your head where it's supposed to go (leftmost weft, center-left weft etc.). That way, once you've gotten it all nice and clean, you'll be able to put it all back perfectly.
-
5Wash your weave with a dab of shampoo. Clean your weave in the sink or in a steel pot. Use warm water and a dab of shampoo the size of your finger. Next, clean it gently, moving your fingers from the root to the stem of the piece. Much like cleaning a sew-in weave, try to refrain from rubbing in the traditional circular motion, as it's just going to increase the risk of getting tangles.
-
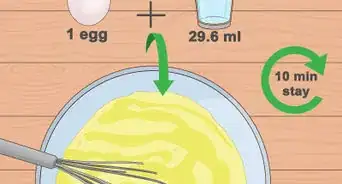
6Put your weave in a plastic bag with conditioner and microwave for 30 seconds. Once you've got the wefts nice and clean, it's time to add some oil and shine to them. Put them in a bag with some conditioner, and apply the same way you did the shampoo. Next, put the wet weave in the microwave and put it on for 30 seconds. That will speed up the drying process far more than letting it dry naturally.
- If you're against the idea of putting your hair in the microwave, you can dry them manually with a hooded dryer. Avoid towel-drying, as this runs the risk of matting.
-
7Re-attach your weave to your head. If you've marked down each piece to its corresponding part of your head, replacing them on your head should be an easy thing. If you haven't, you may have to do some guesswork. Try to remember where each weft was placed. It may take some trial-and-error, but you'll soon find a placement that suits you.
- If you're feeling particularly daring, you might try to try new combinations and placements, just to see how they complement your face and the rest of your hair!
-
8Give your hair an anti-bacterial spritz for good measure. While the drying process should have made your weave relatively dry and safe from the build-up of smells, it's nonetheless a smart idea to give your hair a quick spray. That way, you won't end up with the dreaded mold smell and have to repeat the process all over again!
-
9Replace your weave on a regular basis. Weaves will lose some of their luster over time, so it's generally good form to replace them around every three months. Even natural hair weaves are fairly inexpensive, so making purchasing a new set part of your routine is a great way to maximize your look!


Community Q&A
-
QuestionDo I have to wash the conditioner?
 Community AnswerYes. Leaving your conditioner on your scalp without washing it will cause more damage than good unless it is a leave-in conditioner.
 -
QuestionWhat do I apply after washing the weave?
 Community AnswerAfter washing and conditioning, apply a small amount of oil. Rub the oil into your hands and then finger comb it through the hair. Argan oil works well.
 -
QuestionCan unattached human hair wefts that were shampooed in a circular motion, causing severe matting, be detangled?
 Community AnswerPlace in a solution of water and mayonnaise to detangle.
Warnings
- Just because washing your natural hair with a weave in is considerably more difficult, doesn't mean you should forego cleaning the hair you grew yourself! Those who don't ultimately end up with weak, unhealthy hair by the time they stop using the weave, so make sure to be diligent in your washing efforts.⧼thumbs_response⧽
- Never go to sleep with wet hair! It'll result in a bad smell (from mold) and pretty serious matting. Protecting your hair with a soft satin scarf can help prevent tangling somewhat.⧼thumbs_response⧽


References
- ↑ https://www.hirerush.com/blog/sew-in-weave-burning-questions-answered/
- ↑ https://blog.mayvenn.com/hair/how-to-revive-weave/
- ↑ http://www.sallybeauty.com/beauty-hints/SOL_ExtensionCare,default,pg.html
- ↑ https://blog.mayvenn.com/hair/how-to-revive-weave/
- ↑ http://www.blackhairkitchen.com/how-to-wash-your-weave/
- ↑ http://www.the-complete-peruke-guide.com/glue-in-hair-extensions-04.html
- ↑ http://www.the-complete-peruke-guide.com/glue-in-hair-extensions-04.html
- ↑ http://www.the-complete-peruke-guide.com/glue-in-hair-extensions-04.html
About This Article

To wash a leave-in weave, begin by carefully using a looper brush or comb to get tangles out of your hair. Next, give your hair a warm rinse and part it from the center, which will make it easier for you to find the wefts in your weave. Then, apply some shampoo on your hair from top to bottom, bearing in mind that weaves need more attention because they’re not getting natural oils from your scalp. To finish, use a leave-in conditioner to avoid using too much, since this can lead to hair becoming tangled. To learn how to clean a leave-out weave, keep reading!