This article was co-authored by Frank Blaney. Frank Blaney is a Certified Qigong and Tai Chi Instructor with over 15 years of teaching experience. Passionate about making Qigong more accessible to people, Frank is the author of "Qigong: The Quick & Easy Start-Up Guide." He also holds a 2nd Degree Black Belt in Jujitsu and trains executives and staff of corporations, NGOs, and communities in self-care, personal performance and conflict resolution. He holds an MA in Negotiation, Conflict Resolution, and Peacebuilding from California State University Dominguez Hills.
There are 15 references cited in this article, which can be found at the bottom of the page.
This article has been viewed 34,740 times.
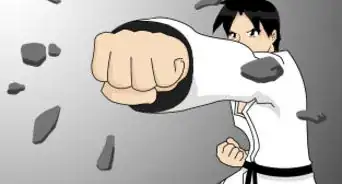
A gi (short for keikogi, or “practice clothes”) is a type of traditional training uniform worn when practicing karate and other Japanese martial arts. Karate gis are designed to provide comfort and full range of motion when performing kicks and other dynamic techniques. As a result, they tend to be lighter and more loose-fitting than gis worn for other styles. A standard karate gi consists of a pair of pants (shitabaki), a wrap-around top (uwagi), and a lengthy fabric belt (obi), which holds the top together and indicates the practitioner's rank.
Steps
Putting on Your Gi
-
1Step into the pants and pull them up to your waist. If you’re wearing traditional Shitabaki, make sure the ends of the drawstrings are threaded through both pairs of loops on either side of the central hem. Pull the drawstrings taut to cinch the waistband against your waistline, then tie them together with a shoestring knot to secure the pants.[1]
- Your gi pants should be snug, but not overly tight. You don’t want them to fall down while you’re sparring or practicing kata, but you also don’t want them to bite into your waist and cause discomfort.
- Some newer gi pants have both an elasticated waistband and a pull-style drawstring for a more custom fit.[2]
-
2Pull on the top and cross the left side over the right. Slip into your Uwagi the same way you would put on an ordinary button-up shirt or jacket. Once you've got it on, draw the right lapel across your body, wrap the left lapel over the right, and use one hand to pin the upper lapel to your body until you’re ready to begin tying your belt.[3]
- If your uwagi has ties along the lower portion, knot the one on each lapel to the one on the opposite hip to hold the top together during practice.[4]
Warning: In Japan, it’s customary to always cross the left lapel over the right one. Crossing right over left may be considered bad form in more traditional dojos.
Advertisement -
3Tie your belt by wrapping it around the front of your body. Place the center of the belt against your midline, just below your navel.[5] Pull the ends behind you and cross them at the small of your back, with the left side overlapping the right, before bringing them back in front of you. Cross the right end over the left and guide it up under the doubled material at your waist and out the top. Loop the end emerging from the top of the belt around the opposite end to complete the knot.[6]
- There are several ways to tie an obi, and different dojos sometimes use different methods. If you’re having trouble tying your belt or aren’t sure how to wear it correctly, ask your instructor for help.[7]
- If your belt has any other design elements on it, like colored ranking stripes or the name of your school in embroidery, start with them on your left side so that they’ll end up on your right side.[8]
-
4Adjust the sides of your uwagi to make sure it won’t restrict your movement. Take hold of your belt with your left hand and extend your right arm straight up overhead, leaning to the left slightly as you do. This will create a little slack in the material. Let go of your belt and repeat the process on your left side, holding the belt with your right hand and stretching your left arm up while leaning to the right.[9]
- This simple adjustment will ensure a full range of motion for punches, high blocks, and other hand techniques.
- Be careful not to lean too far in either direction. Doing so could result in a sloppy, bunched-up look, or even cause the bottom hem of your uwagi to pull free of your belt.
-
5Lean forwards and backwards to loosen up the back and front of the top. Once you’ve adjusted the sides of your uwagi, grip your belt with both hands and bend forward slightly at the waist as though you’re picking something up. Then, change directions and tilt back like you’re doing the limbo. Your uwagi should now be nice and relaxed.[10]
- You can also gently untuck the material at the front and back of your uwagi by hand, if you prefer.
- Take a moment to make sure that each part of your uniform is neat, symmetrical, and properly tied before you step onto the mat.


Adhering to Proper Uniform Etiquette
-
1Wear a standard kumite gi for regular training sessions. Karate gis come in two main styles: kata gis and kumite gis. Kumite gis have full-length sleeves and pant cuffs, and are made with a soft, flexible fabric that’s comfortable and easy to move in. If you're just practicing karate recreationally, you’ll most likely only need a standard kumite gi.[11]
- Avoid gis with bright colors, fancy patterns, or elaborate detail work unless your instructor tells you it’s okay to wear them. These sorts of uniforms are generally only worn for demonstration purposes.
- You won’t need to worry about choosing a gi yourself if your dojo supplies its students with uniforms, as many do.
-
2Acquire a separate kata gi if you think you might be competing. Compared to kumite gis, kata gis have shorter hems and are woven from a heavier material. If you plan on signing up for the kata event at an upcoming tournament, your instructor may advise you to wear a special kata gi to add some impact to your routine.
- Where as ordinary kumite gis usually weigh somewhere between 9 ounces (260 g) and 13 ounces (370 g), kata gis can weigh as much as 17 ounces (480 g). This extra weight will produce a nice snap when you execute certain techniques.
-
3Make sure your gi is the correct size. Unlike clothes you buy off the rack, most modern martial arts uniforms are sized using a number system. These sizes typically correspond to various height ranges. Even if you know how tall you are, it’s a good idea to try your gi on or review the size chart provided by the manufacturer to be confident that you’re getting the right fit.[12]
- The cuffs on a pair of shitabaki should come down no lower than your ankles, while the sleeves on your uwagi should fall just short of your wrists.
- Consider going one size up if you like a more relaxed fit or want to be able to put your gi through the dryer for more convenient cleaning.[13]
-
4Wear an undershirt to prevent your uwagi from being too revealing. It’s not uncommon for gi tops to loosen up, fall open, or come completely undone during spirited training sessions. To avoid a potentially embarrassing wardrobe malfunction, you may want to put on a T-shirt or tank top before you don your uwagi. Some dojos even make it a policy that all students must wear a shirt under their uniform tops.
- Ideally, you'll want to select a light-colored undershirt that fits close to your body and isn't long enough to be visible beneath your gi if it happens to come untucked.
- The thin, white fabric used to make karate gis has a tendency to become partially see-through when soaked with sweat. For this reason, it’s a good idea to pass up shirts with logos or slogans that may not be appropriate for the dojo.
-
5Apply any patches you receive according to your dojo’s guidelines. Anytime you’re awarded a new patch, ask your instructor where on your uniform it should go and how it should be arranged. When you get home, pin your patch to your gi in the specified position and sew around the edges to attach it. If possible, use a sewing machine to work more efficiently and make sure that the patch stays put.[14]
- Get your instructor’s permission before you cover your uwagi with patches. Not all schools allow modifications like patches, pins, or ranking stripes.[15]
- Patches can be used to indicate advanced or in-between ranks, show off special distinctions, or simply lend a sense of flair.
-
6Wash your gi after each class. Make it a point to wash, dry, and fold your uniform each and every time you train. It doesn’t take long, and it’s a very important habit to get into, as it reflects on your commitment as a student. Caring for your keikogi and maintaining a clean, tidy appearance shows that you have respect for the art, and for yourself.[16]
- You can also hang-dry your shitabaki and uwagi if you want to minimize wear-and-tear or you’re worried about either piece shrinking.
- A dingy, smelly gi isn’t just offputting to the people around you—it dishonors the spirit of karate.
Tip: If your gi is especially soiled, pre-soak it with warm water and a small amount of laundry detergent for 20-30 minutes to help release stubborn stains. Don't bleach it, however, as harsh chemicals can easily damage the fabric.[17]


Warnings
- Never wear your keikogi outside of the dojo. The only exception to this rule is if you’re attending a tournament, exhibition, fundraiser, or similar event that’s been organized by an instructor or superior.⧼thumbs_response⧽
- Avoid washing your gi with colored garments, especially if they’re new. The last thing you want is to show up to class with a tie-dyed uniform!⧼thumbs_response⧽


References
- ↑ https://www.sportsrec.com/put-karate-gi-4926782.html
- ↑ http://www.theemptyhand.com/uniform
- ↑ http://www.gorgekarate.com/program-schedule/gi-and-obi/
- ↑ http://www.theemptyhand.com/uniform
- ↑ Frank Blaney. Certified Tai Chi & Qigong Instructor. Expert Interview. 28 September 2021.
- ↑ https://www.youtube.com/watch?v=fnA-Skin4FA&feature=youtu.be&t=26
- ↑ Frank Blaney. Certified Tai Chi & Qigong Instructor. Expert Interview. 28 September 2021.
- ↑ http://www.dojoupdate.com/wado-ryu-katas/karate-resources/how-to-tie-karate-belt/
- ↑ https://www.youtube.com/watch?v=6En96J3J3WA&feature=youtu.be&t=44
- ↑ https://www.youtube.com/watch?v=6En96J3J3WA&feature=youtu.be&t=71
- ↑ https://www.wkf.net/karateprotections/karate-gi
- ↑ https://lawofthefist.com/karate-gi-16-things-you-should-know-before-buying-your-karate-uniform/
- ↑ https://www.youtube.com/watch?v=nqzkGMkP0uU&feature=youtu.be&t=252
- ↑ https://www.sportsrec.com/proper-apply-patches-karate-uniforms-5251382.html
- ↑ https://ensokarate.com/about/dojo-etiquette/
- ↑ https://www.karatebyjesse.com/how-to-wash-karate-gi/
- ↑ http://www.physicalarts.com/en/knowledge/general-interest/karate-uniforms
About This Article