This article was co-authored by wikiHow Staff. Our trained team of editors and researchers validate articles for accuracy and comprehensiveness. wikiHow's Content Management Team carefully monitors the work from our editorial staff to ensure that each article is backed by trusted research and meets our high quality standards.
This article has been viewed 393,398 times.
Learn more...
The Format Background utility in PowerPoint allows you to select an image from your computer or online to use as the background for your slide. You can set this background to multiple slides at once, or apply it to your entire presentation. You can also add effects to the background image to give it a bit of flair. If you aren't able to change the background elements, you may have to edit the slide master.
Things You Should Know
- You can add a background image to an individual slide or to all slides in your presentation.
- To create repeating wallpaper-like background, you can tile any photo as a texture.
- Adding backgrounds in the Slide Master makes it easy to apply the one background to all slides using the same layout.
Steps
Adding a Picture
-
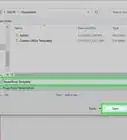
1Open your PowerPoint presentation. You can add graphics to the background of any slide in your PowerPoint presentation. Open the presentation you want to edit in PowerPoint.
-
2Click the Design tab at the top of the window. This will display the Design tools.Advertisement
-
3Click the "Format Background" button. You'll find this on the far right side of the Design ribbon. The Format Background sidebar will appear on the right side of the screen.[1]
-
4Select the slides you want to apply the background to. By default, your background changes will only apply to the active slide. You can hold Ctrl / ⌘ Command and click each slide in the slide list on the left that you want to select.
- If you want to apply the background to every slide in your presentation, you can do so at the end of this section.
-
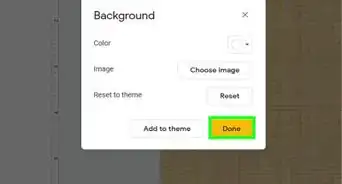
5Select "Picture or texture fill." This will allow you to select a picture to use as the background.
- There are other fill options you can choose from, such as solid colors, gradients, and patterns. Selecting one will display additional options for that type of fill. This guide focuses on adding images and graphics to the background.
-
6Choose the image that you want to insert as the background. To add an image that will not be stretched or squished, it should be 1280 x 720 pixels in size.[2]
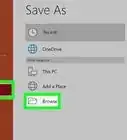
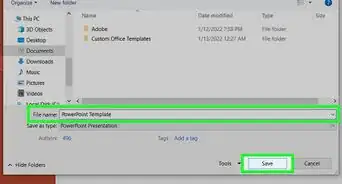
- Click the "File" button to select a picture from your computer. A file browser will open, and you can navigate to the image you want to use.
- Click the "Online" button to find pictures from online sources. You can perform a Bing web search, choose images stored in your OneDrive, or grab pictures from your Facebook or Flickr account.
- Click the "Texture" menu to select from a premade texture background. There are a variety of premade textures that you can pick from if you'd rather not insert your own image.
-
7Click "Apply to All" to set the picture for all slides. The picture is normally just added as the background for the slides you selected. If you want to apply it to every slide, click the "Apply to All." This will set the background of every slide to the new image, including slides that you create later.


Applying Effects
-
1Check the "Tile picture as texture" to turn the image into a tiled texture. This works best for images that are small and can flow seamlessly into each other.
-
2Adjust the tiling effect with the controls below. You can use these controls to adjust the spacing between the tiled images, whether or not they're mirrored, and the alignment.
-
3Use the transparency slider to adjust the image transparency. This is especially useful if you want to add watermarks to your slides. Setting a background image with a high transparency will allow you to use an image as a watermark without obscuring or distracting from the information on the slides.
-
4Click the "Effects" button at the top of the "Format Background" menu to apply effects. This menu allow you to select from a variety of different effects that you can apply to your background image. You'll see a preview of each in the menu, as well as the name if you hold your cursor over it.
- Click the "Artistic Effects" menu and select the effect you want to use.
- When you select an effect, additional options may appear beneath it. The options vary depending on the effect you chose.
-
5Click "Apply to All" to apply the effects to all of your slides. This will change all of the slides in your presentation to use the background image and effects you selected.


Using Slide Master View
-
1Click the View tab in PowerPoint. This will display different view options.
-
2Click the "Slide Master" button. A list of all of your master slides will appear in the left frame. These are the theme slides for the different types of content in your presentation. The theme and graphics options on your master slides overrules regular background settings.[3]
-
3Select the master slide you want to edit. This will open the slide in the main view. You may need to scroll up on the list to view the main master slide.
- Different slides in the master list are for different slide layouts. Changes made to that master will apply to all slides with the same layout. The slide at the top of the master list will apply yo all slides in the presentation.
-
4Click the "Background Styles" button and select "Format Background." This will open the Format Background sidebar.
-
5Adjust the background following the steps in the previous methods. Once the Format Background sidebar is open, you can adjust the background graphics using the steps outlined above. Use the "Picture or texture fill" option to set a new picture as the master background. This background will apply to every slide in your presentation.[4]


Community Q&A
-
QuestionHow do I edit the background graphic?PowerPoint is not an image editor. You need to edit the images using a tool like Paint 3D.
-
QuestionEvery time I try to insert an image as a background, it doesn't do anything. It would be great if you had any ideas why.It could be that they're placed in a different slide than the one you're looking at. It could be that the image's format is not supported. Or, it could be that you haven't yet created an image box in your slide where the image will go.
-
QuestionHow do I post a presentation from PowerPoint to the internet?
 Community AnswerDecide which website you want to post it on, and then follow the directions on that website. Google Drive is one popular choice if you only want people you gave a link to be able to see it.


References
- ↑ https://support.office.com/en-us/article/Add-a-picture-as-a-slide-background-4b0b98d4-774c-4e08-9c38-e8c92f58c957
- ↑ http://www.presentationpoint.com/blog/best-powerpoint-screen-resolution/
- ↑ http://answers.microsoft.com/en-us/msoffice/forum/msoffice_powerpoint-mso_other/how-can-i-edit-a-background-graphics-object/94ef97f5-8e95-4d90-b0aa-d61a7095b9a8?auth=1
- ↑ http://www.gcflearnfree.org/powerpoint2013/slide-master-view/1/
About This Article

To add an image to the background of one or more PowerPoint slides, start by selecting the slides you want to edit in the left panel. To select multiple slides, hold down the Control key on a PC or the Command key on a Mac as you click each slide. If you just want to edit one slide, click it once. Next, click the "Design" tab, and select "Format Background" in the toolbar's top-right corner. The Format Background panel will expand. In the "Format Background panel," select "Picture or texture fill" under "Fill" options. To select an image from your computer or a network drive, click "File." Browse for the picture, select it, and then click "Open." PowerPoint will automatically resize the image to properly fit the slide. Since slides are in landscape orientation, or wider than they are tall, try choosing a background image with a similar orientation. If you don’t have a background image in mind, click the "Online" option, which allows you to search for an image by keyboard using Bing Image Search. Once you've placed your image, you can make some modifications. First, if the image is a pattern or texture and not intended to stretch across the whole slide, check the box next to "Tile picture as texture" so it repeats across the slide like wallpaper. If the text on your slide becomes hard to read now that there's an image in the background, drag the "Transparency" slider to the right until the image fades enough to make the text legible. You can also edit the picture itself after placing it. Click the photo icon at the top of the Format Background to find Picture Corrections and Picture Color tools, such as brightness, contrast, and saturation controls. Your new background image is automatically applied to any slides you selected. However, if you want to apply the background to all slides in the presentation, you can click the "Apply to All" button at the bottom of the "Format Background" panel to do so.