wikiHow is a “wiki,” similar to Wikipedia, which means that many of our articles are co-written by multiple authors. To create this article, 13 people, some anonymous, worked to edit and improve it over time.
This article has been viewed 119,602 times.
Learn more...
Even if you've never used PowerPoint before, adding images to PowerPoint is fairly straightforward with a little explanation. Whether you have your image saved to your computer or you need to search the Internet for the perfect picture for a presentation, have no fear. Soon, you'll be a master when it comes to adding images to your PowerPoint slides.
Steps
Inserting Saved Images
-
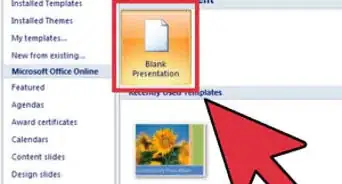
1Open PowerPoint. This will either open a blank slide or initiate a prompt asking you to choose a slide layout. A blank slide will work fine for added images, but slides designed for images might make the process easier.
-
2Drag an image from your desktop to your PowerPoint document. If you have saved your image to your desktop, you can hold-click and drag the icon to your slide. Releasing the click with your cursor over the PowerPoint window should insert the image.
- Many times, due to formatting issues, this method can be unreliable. Don't give up; there are other options available.
Advertisement -
3Click on the "Insert" heading. You'll find this toward the left side of the menu ribbon at the top of your screen. Click the "Insert" heading to access image options.
-
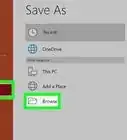
4Click the "Pictures" option. This icon should also be toward the left side of your task ribbon. Clicking this will open a dialogue box containing your folders and saved documents.
-
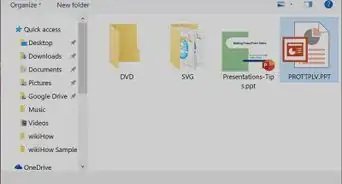
5Choose the folder containing your saved image in the dialogue box. Take note of the file location you have saved the image. Using the "Insert Picture" dialogue box, highlight your image by clicking "Insert" from the lower right hand corner.
- You can also double click your image from the "Insert Picture" directory to insert it.
-
6Position the image on the slide. Clicking your image should bring up guidelines and small square boxes that you can hold-click to manipulate the dimensions of your image.


Inserting Copied Images
-
1Open PowerPoint. This will either open a blank slide or initiate a prompt asking you to choose a slide layout. A blank slide will work fine for added images, but slides designed for images might make the process easier.
-
2Search for your image online. You can improve your image hits by making sure you've selected "Images" for your online search engine. When you find your image, click the link to open the full image at its location. This will ensure you don't only copy a thumbnail image.
-
3Copy the image to your clipboard. Right click and select "Copy" from the dropdown menu. This will save the image to your clipboard for later.
-
4Paste the image into your presentation. Return to the PowerPoint slide to which you would like to add your image. Right click a blank portion of your slide, or the "Insert Image" box surrounded by a dotted line, and select "Paste" from the dropdown menu. Now you can position and adjust your image to your satisfaction.
- You can also paste items from your clipboard by pressing Ctrl+V
-
5Adjust your image to fit your slide. If you click your image, guidelines and tiny square boxes, which you can use to manipulate and adjust your images, will appear. Use these to balance your image with other slide content.


Inserting Clip Art
-
1Open PowerPoint. You can do this in the same way described for opening PowerPoint to insert a saved image.
-
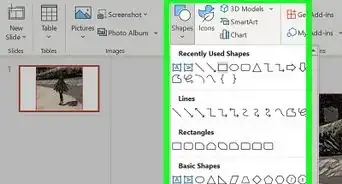
2Find the "Clip Art" heading or "Online Pictures" under the "Insert" heading. By choosing this option, you should open a search bar or dialogue box that reads "Insert Images."
-
3Select "Bing" or another drive to search for your images. PowerPoint will search for clip art online that you can use in your presentation. Scroll through images until you find one suitable for your purposes.
-
4Choose your clip art from the available options. Highlight it with your cursor and select "Insert" from the lower right, or simply double click to add your picture to your presentation.
-
5Size your image. By clicking your image, you can make guidelines and small square manipulator boxes appear. Use these guidelines to alter the dimensions of your inserted image.


Community Q&A
-
QuestionHow do I insert video in my presentation?
 Community AnswerYou can insert it the same way you do with an image. Follow the steps above, but when choosing a file to add, use your video instead.
 -
QuestionWhat view do I use to view the full notes of each slide in the presentation?
 Community AnswerSelect Notes view. You can drag the notes section up, so it is larger.


References
About This Article
To insert an image on a PowerPoint slide, start by clicking the slide in the left panel of PowerPoint. Next, click the ""Insert"" tab at the top of PowerPoint. If the picture you want to insert is on your computer, click ""Pictures"" in the toolbar and then select ""This Device."" Select the image you want to insert and click ""Insert"" to place it on the slide. You can then drag it anywhere on the slide. To resize the image without warping it, click and drag the circles at any of the corners (not the edges) inward or outward. As long as the picture is selected, you can use the tools on the Format tab to add artistic effects, color filters, lighting corrections, borders, and more. If you'd rather insert a picture from the web, return to the ""Insert"" tab—if you see the option for ""Online Pictures,"" click it—if not, click the ""Pictures"" icon first and then select ""Online Pictures"" from the menu. You can then choose a photo from your OneDrive or search for one using Bing Image Search. After inserting an online picture, you can edit it using the tools on the format tab.