This article was co-authored by wikiHow Staff. Our trained team of editors and researchers validate articles for accuracy and comprehensiveness. wikiHow's Content Management Team carefully monitors the work from our editorial staff to ensure that each article is backed by trusted research and meets our high quality standards.
The wikiHow Video Team also followed the article's instructions and verified that they work.
This article has been viewed 18,719 times.
Learn more...
While some crimping tools are self-adjusting, others need a quick manual adjustment so you can get a neat, secure crimp. Our guide will show you how to open the tool, adjust the force, and close it again—all with just a Phillips head screwdriver.
Steps
Loosening the Adjustment Wheel
-
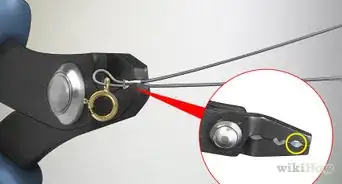
1Look for the adjustment wheel on the crimping tool near the bottom handle. The adjustment wheel is a small, notched disc located on 1 side of your crimping tool. It is held in place by a small screw that slots into the notches or through the middle of the wheel. Look on both sides of your crimping tool near the bottom handle to find this disc.[1]
- If you don’t see an adjustment wheel, your crimping tool is not adjustable. Some crimping tools self-adjust, so you don’t need to make any manual adjustments to them. These types of crimping tools will auto-adjust the crimping force as you squeeze the handles together to suit the sizes of the wires you are crimping.
-
2Set your crimping tool on a flat surface with the adjustment wheel face-up. Lay the tool flat on a work surface so that the side with the adjustment wheel is facing you. This will allow you to remove the screw that holds it in place and make adjustments.[2]
- Orient the tool so that the bottom handle with the wheel is closest to you to make it easier to adjust it.
Tip: You would only need to make adjustments to your crimping tool if you notice that the crimps it makes are messy or it isn’t securing wires together properly.
Advertisement -
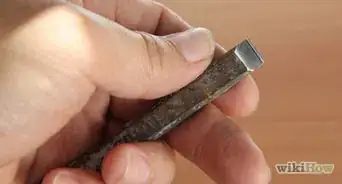
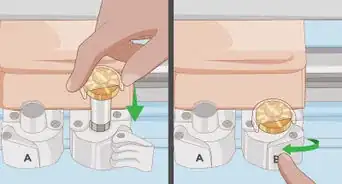
3Use a Phillips screwdriver to remove the adjustment wheel’s locking screw. Insert the tip of a very small Phillips screwdriver into the Phillips screw that holds the adjustment wheel in place. Turn it counterclockwise until you unscrew it all the way, then set the screw aside where you won’t lose it.[3]
- The screw is very tiny and easy to lose, so set it in a cup or dish where it will be safe from getting knocked onto the floor.
- All adjustable crimping tools are adjusted the same way. No matter what brand of tool you have, you will have to remove the screw that holds the adjustment wheel in place to make adjustments.


Changing the Crimping Force
-
1Turn the adjustment wheel towards the minus sign to decrease force. Look closely at the adjustment wheel to spot the plus and minus signs that indicate which direction to move it in. Rotate the wheel 1 notch towards the minus sign to decrease the crimping force of your tool.[4]
- Some crimping tools might have numbers around the adjustment wheel instead of a plus and minus sign. If this is the case for your crimping tool, move the wheel to a lower number to decrease the crimping force.
Tip: Make adjustments only 1 notch at a time and test your crimping tool out after each adjustment to find the optimal position. There’s no other way to know which setting is the best for your purposes.
-
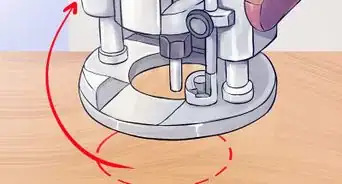
2Move the adjusting wheel towards the plus sign to increase force. Look for the plus sign on the crimping tool’s adjustment wheel. Turn the wheel 1 notch in the direction of this plus sign to increase the crimping force of the tool.[5]
- If your crimping tool has numbers instead of a plus and minus sign, turn the adjustment wheel to a higher number to increase the crimping force.
-
3Replace the screw that holds the adjusting wheel in place and tighten it. Carefully insert the small Phillips screw back into the hole next to the adjustment wheel. Use your Phillips screwdriver to tighten it all the way to lock the adjustment wheel in place.[6]
-
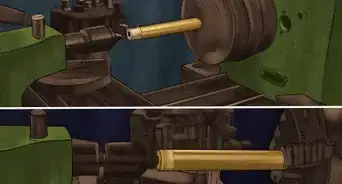
4Test your tool and repeat the process if you want to adjust the force further. Make a sample crimp on a scrap pair of wires. Leave your crimping tool at the current setting if you are happy with the crimp or repeat the process to make further adjustments by moving the adjustment wheel 1 notch at a time, testing it after each adjustment.[7]
- If you aren’t sure how to tell whether the crimping force is correct, try your tool out at a few different settings. Whichever setting crimps 2 wires together more neatly is probably the best for your purposes.
Things You’ll Need
- Phillips screwdriver


References
- ↑ https://www.commscope.com/globalassets/digizuite/45196-408-8738-revu-10-9-19-pdf.pdf
- ↑ https://www.youtube.com/watch?v=c5zAiNz7rE4&feature=youtu.be&t=32
- ↑ https://data.kleintools.com/sites/all/product_assets/documents/instructions/klein/3005CR_Instructions.pdf
- ↑ https://www.youtube.com/watch?v=c5zAiNz7rE4&feature=youtu.be&t=47
- ↑ https://www.commscope.com/globalassets/digizuite/45196-408-8738-revu-10-9-19-pdf.pdf
- ↑ https://data.kleintools.com/sites/all/product_assets/documents/instructions/klein/3005CR_Instructions.pdf
- ↑ https://www.commscope.com/globalassets/digizuite/45196-408-8738-revu-10-9-19-pdf.pdf
About This Article