wikiHow is a “wiki,” similar to Wikipedia, which means that many of our articles are co-written by multiple authors. To create this article, 13 people, some anonymous, worked to edit and improve it over time.
This article has been viewed 120,696 times.
Learn more...
As the saying goes, a sharp blade is safer than a dull one. It's as true for a chisel as any other tool, so it's important to give your chisels a clean, sharp edge one or two times per year, depending on how often you use them. See Step 1 to get started.
Steps
Preparing Your Tools
-
1Plan to sharpen chisels before using. A set of brand-new chisels won't be sharp enough to do intricate woodworking, so you'll want to sharpen them before you start on a project.[1] They stay sharp for a long time, so plan to sharpen them about once or twice a year unless you use them very frequently.
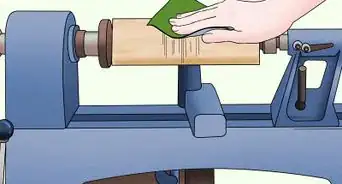
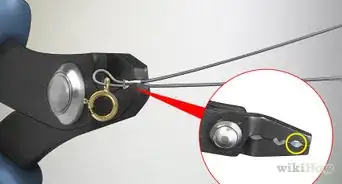
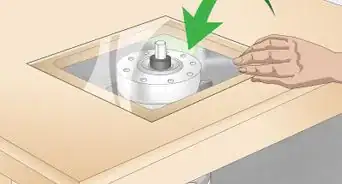
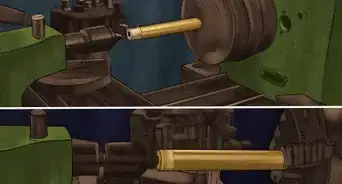
- If the chisels are old or have uneven or damaged bevels, it may be necessary to reshape them using a grinding wheel before sharpening. Hold the bevel of the damaged chisel flat to the grinding wheel to remove large gouges, dirt or rust.
-
2Get a sharpening stone. You'll need a stone with three levels - course, medium and fine - to achieve the sharpest edge. Sharpening stones are available at home and garden centers and hardware stores. The stone you choose will come with a lubricant (or recommend one for you to buy separately). There are two main types, both of which are quite effective:
- Water stones use water as a lubricant. They are soaked in water for several minutes before use. This is the type of stone favored in Japan.
- Oil stones are lubricated with petroleum-based oil before use.
Advertisement -
3Prepare the stone. Get it ready according to the instructions that came with it. For a water stone, you will need to soak it in a water bath. An oil stone should be lubricated with the appropriate type of petroleum oil.


Honing a Chisel
-
1Start with the flat side. The flat side of a chisel should be as reflective as a mirror once it's properly sharpened. Start by working it back and forth lengthwise over the course grit on your stone. Use both hands to keep it steady as you slide it back and forth. Your movements should be smooth and steady, rather than jerky. When the entire flat surface shows the intricate scratches of the stone's course grit, do the same thing with the medium grit, and again with the fine.[2] The flat side is finished when it's as reflective as a mirror.
- Do not move the chisel from side to side, or rock it back and forth.
- Use the entire surface of the stone for a more even finish.[3]
- Clean the blade and your hands between grits so the powder doesn't obscure your view of the chisel's surface.
-
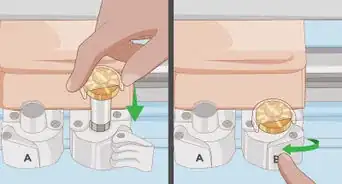
2Use a honing guide to set the bevel angle. It's possible to sharpen a bevel by freehanding it against the stone, but it's very difficult to make sure you get the exact angle you want without using a honing guide. Fit the chisel into the honing guide and tighten the screws on either side to hold it in place. Depending on the type of chisel you have and what you'll be using it for, you'll want to set the guide to create an angle somewhere between 20 and 35 degrees.
- For a paring chisel, set it at 20 degrees.
- Standard chisels work well at 25 degrees.
- If you don't want to buy a honing guide, it's common to make one out of wood. You'll need to saw a wooden wedge to the angle you want, superglue two strips on either side to act as rails (the chisel rests between these), then screw another strip of wood over the rails so you can tighten the chisel in place.[4]
-
3Hone the bevel. Place the bevel flat against the coarsest grit on the stone. Using both hands to hold the guide, move the chisel back and forth over the stone in a very thin, stretched figure 8 pattern. When you can see the grit's scratches on the bevel, switch to the medium grit, then the fine grit, wiping the blade in between grits.
- Use the entire surface of the stone as you sharpen.[5] If you use the same area too much, a hollow will develop there, and it won't sharpen edges as easily from then on.
- After honing the bevel, you may notice a slight recess on the flat side. This is called a hollow grind, and in Japan, chisels are sharpened that way on purpose, because it makes it easier to sharpen them the next time.[6]


Optional Finishes
-
1Add a micro bevel. In most cases it's fine to stop after honing, but if you want the chisels to be even sharper, you can add a micro bevel. It's essentially a miniature second bevel created at the tip of the bevel. This is an unnecessary step unless you're doing work that requires extreme precision. To create a micro bevel, adjust the honing guide to an angle 5 degrees tighter than the previous angle you honed, and repeat the honing process using only the finest grit.
- You only need to do a few strokes on the finest grit to create a microbevel, since you're taking off so little metal.[7]
-
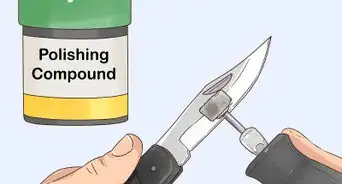
2Strop the chisel. Some people like to finish with stropping, which gives the chisel a nice polish. Tape a piece of leather to a flat surface and cover it with an even layer of polishing compound. Rub the flat side of the chisel against the compound a few times, then rub the bevel (or microbevel) against it a few times. Wipe the blade when you're finished.[8]


Community Q&A
-
QuestionShould I sharpen only one side of the chisel?
 Community AnswerNo, do the flat side first, and then the bevel side. Afterwards, draw the flat side once more to remove any burrs.
 -
QuestionWhere can I buy a chisel?
 Andy GutjahrCommunity AnswerYou can buy chisels in any tool shop, or even online. As a cabinetmaker and joiner, I would recommend buying in a specialized woodworking shop. Make sure you compare prices, as shops usually vary, but always remember, a good tool has its price.
Warnings
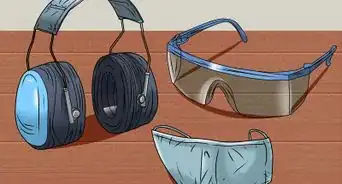
- Always wear eye protection when using a grinding wheel.⧼thumbs_response⧽
Things You'll Need
- Grinding wheel (optional)
- Wet or oil sharpening stone
- Honing guide
- Leather and polishing compound (optional)


References
- ↑ http://www.stewmac.com/tsarchive/ts0108.html
- ↑ http://www.popularwoodworking.com/techniques/hand-tools-techniques/sharpening_a_chisel
- ↑ http://www.bobvila.com/articles/1005-sharpening-chisels/#.UulkUmRdVzc
- ↑ http://www.stewmac.com/tsarchive/ts0108.html
- ↑ http://www.bobvila.com/articles/1005-sharpening-chisels/#.UulkUmRdVzc
- ↑ http://www.stewmac.com/tsarchive/ts0108.html
- ↑ http://www.bobvila.com/articles/1005-sharpening-chisels/#.UulkUmRdVzc
- ↑ http://www.stewmac.com/tsarchive/ts0108.html
About This Article
To sharpen a chisel, you’ll need a sharpening stone with coarse, medium, and fine grits. If you’re using a water stone, soak it in water for several minutes before use. Alternatively, for an oil stone, lubricate with a petroleum-based oil. After lubricating, rub the flat side of the chisel smoothly back and forth over the coarse grit. Once the flat surface shows scratches, move onto the medium grit, then repeat the process before moving onto the fine grit. Once the flat surface of the chisel is shiny, it’s sharp enough. To learn how to use a honing guide to set the chisel’s bevel to a specific angle, scroll down!