This article was co-authored by wikiHow staff writer, Hunter Rising. Hunter Rising is a wikiHow Staff Writer based in Los Angeles. He has more than three years of experience writing for and working with wikiHow. Hunter holds a BFA in Entertainment Design from the University of Wisconsin - Stout and a Minor in English Writing.
There are 13 references cited in this article, which can be found at the bottom of the page.
wikiHow marks an article as reader-approved once it receives enough positive feedback. In this case, 88% of readers who voted found the article helpful, earning it our reader-approved status.
This article has been viewed 168,924 times.
Learn more...
A jigsaw is one of the most versatile power tools you can have in your workshop. It can cut through materials such as wood, metal, laminate, and PVC, as well as make straight and curved cuts easily. When working with a jigsaw, make sure to use the correct blade for the material you’re cutting and wear safety gear.
Steps
Choosing and Installing the Right Blade
-
1Choose a carbon steel blade to cut through wood and PVC. Carbon steel blades are the standard material used in a jigsaw. If your project requires you to cut through wood, PVC, or laminate, find a hardened carbon steel blade.[1]
- Most blades will be labeled with the type of material they can be used on. Look on the packaging or on the label printed directly on the blade.
-
2Use a bi-metal blade to cut through thin metals. Since metal is a harder material, you need a tougher blade to cut through it. Bi-metal blades have hardened steel teeth to make the cut and a softer, flexible body so they don’t break. Find a blade or set of blades meant for metal cutting.[2]Advertisement
-
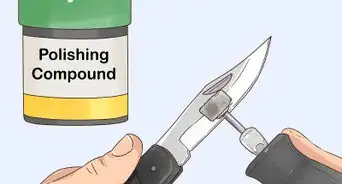
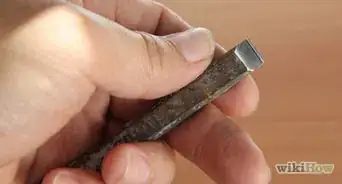
3Pick a fine-toothed blade for making clean and accurate cuts. Fine-toothed blades have more teeth on the blade per 1 inch (2.5 cm). Fine-toothed blades are standard for cutting metal or making a clean edge on wood.[3]
- Wood blades tend to have as many as 12 teeth per 1 in (2.5 cm), while metal blades can have up to 36 teeth per 1 in (2.5 cm).
- Fine-toothed blades work best when they’re used at a slower speed so they don’t break.
-
4Use a coarse blade to cut through wood faster. Coarse-toothed blades have fewer teeth per 1 inch (2.5 cm) and are mostly used to cut wood. If you need to make cuts quickly for a project, opt for a coarse-toothed blade to finish faster.[4]
- Coarse-toothed blades leave a rough surface and will chip wood.
-
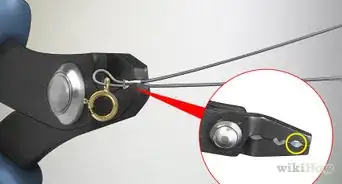
5Push a T-connection blade directly into the quick release to snap it in place. A T-connection blade has 2 notches near the top of the blade on each side. Feed the blade through the bottom shoe, the flat guard on the bottom of the saw, until the end fits into the quick release. Make sure the blade’s teeth are facing towards the front of the saw. Push the blade into the quick release until it clicks into place.[5]
- The type of connection you need depends on the model of your jigsaw. Check your jigsaw’s manual to see what type of connection you need.
- Some quick releases have a small lever you need to turn before the blade locks in. Try pulling on the blade once you insert it to make sure it fits tight.
- To remove the T-connection blade, pull on the lever on the quick release and pull the blade out.
- Make sure your jigsaw is unplugged or disconnected from power before you change the blades.
-
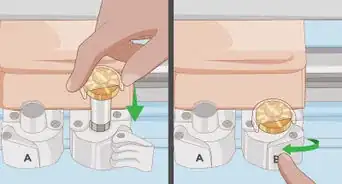
6Screw in a U-connection blade using an Allen wrench or a screwdriver. U-connection blades have a single notch on top. Put the U-connection blade through the shoe of the jigsaw and hold it in place in the release. Tighten the screw that holds the blade in place with an Allen wrench or screwdriver until it doesn’t wiggle anymore.[6]
- To remove the blade, simply turn the screw counterclockwise and pull the blade out.
Tip: Some jigsaws can accept both T-connection and U-connection blades. Read the user manual for your jigsaw to see what kind of connections it's compatible with before purchasing new blades.


Learning the Basics
-
1Plug in the saw or put in the battery pack. Once you have your saw blade secured, plug the cord into a nearby outlet so you can reach all the areas you need to cut. If you have a cordless jigsaw, insert the battery pack into the port on the back of the machine.[7]
- Whenever you aren’t using your jigsaw, unplug it so you don’t accidentally turn it
- Coil the cord once around your dominant arm so the cord doesn’t hang down loosely.
-
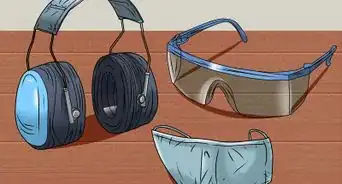
2Wear safety glasses and a dust mask. Before you make any cuts, cover your mouth and nose with a face mask so you don’t inhale any dust. Protect your eyes with safety glasses in case any of your material kicks back towards you.[8]
-
3Clamp your material to your work surface so it doesn’t move around. Make sure the area where you plan on making your cuts extends over the edge of your work surface. Use at least 2 C-clamps on the edge of your work surface to hold the material sturdy. If it still moves around easily, use additional clamps or rest a heavy object on the opposite end of the material.[9]
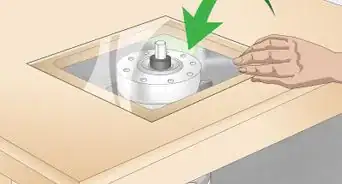
- If you need to cut a hole in the center of your material, balance it between 2 sawhorses so you can easily cut through it without damaging your work surface.
- You don’t need to use clamps if you’re making a vertical cut on a wall.
-
4Squeeze the trigger on the handle to start your saw. Locate the power trigger underneath the handle on top of the saw. Pull the trigger to start the blade, and keep it held down until you’re finished with your cut.[10]
- Most jigsaws have a lock switch next to the trigger. If your jigsaw has one, push it with your thumb to lock the trigger in place so you don’t have to hold it the whole time.
-
5Adjust the speed of your blade with the dial on the front of the machine. Locate the dial on the front of the machine above the blade to adjust the speed. The blade moves faster when the dial is set to a higher number. Keep the speed slow at first until you get used to using your jigsaw.[11]
- Use a slower speed when you need to make accurate cuts or when you’re cutting through metal.
- Some jigsaws have a variable-speed trigger, meaning the blade will move faster when you squeeze it harder.[12]
-
6Draw the line you want to cut with a pencil. Use a straightedge or a compass to trace the line that you want to follow with your jigsaw. When you make your cut, follow along the outside of the mark so you don't accidentally overcut your material.[15]


Making Various Cuts
-
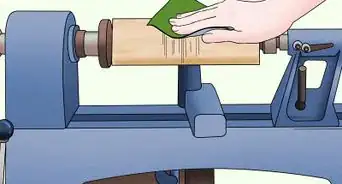
1Guide the blade through the material you’re cutting. Start at the edge of the material you’re cutting and slowly push the blade through it. Go slow at first, making sure to follow along with the line you want to cut. Keep the shoe (or the base plate) flat against the material you’re cutting to ensure you’re making a straight line. Continue guiding the saw until you completely cut through the material.[16]
- Don’t force the machine through your material since you may break the blade if you push too hard. Let the machine do the work for you.
- Keep your fingers away from the saw while you’re cutting since the blade is exposed.
-
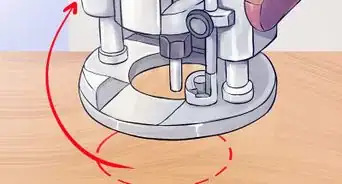
2Cut along curves by turning the back of the saw. Install a fine-toothed blade and set the speed of your saw to the slowest setting. Slowly guide your saw along the curve you’re cutting out, turning the back of the saw in the opposite direction of where you want the blade to go.[17]
- Use a compass tool to draw the curved lines on your material to ensure you get a smooth outline. That way, as you work through the curve, the material will fall out in smaller pieces and relieve the pressure on the blade
Tip: When making cutouts, cut straight relief lines in from the edge to your cut line every 3–4 in (7.6–10.2 cm). That way, as you work through the curve, the material will fall out in smaller pieces and relieve the pressure on the blade.
-
3Adjust the angle of the saw’s shoe to make a miter cut. Look for a screw on the bottom or back of the shoe, and turn it counterclockwise to loosen it. Adjust the angle of the shoe to the angle for your cut and tighten the screw to secure it in place. Set the shoe flat against the surface you’re cutting. Your blade should now be at the angle needed for your cut.[18]
- Miter cuts are common for making 45-degree angles and creating clean joints between wood.
-
4Use a drill to make starting and stopping points for cutting a hole in your material. Start with a drill bit that’s slightly larger in circumference to the width of your saw blade. Drill a hole in each corner of the area you want to cut out. Feed the saw blade one of the holes and turn it on. Follow along with the outline for the area you want to cut out towards one of the other holes you drilled. Work from hole to hole until you’re finished with your cuts.[19]
- This allows you to make a cut out in the middle of the material without cutting in from the edge, like if you needed space for a vent or outlet.


Community Q&A
Did you know you can get answers researched by wikiHow Staff?
Unlock staff-researched answers by supporting wikiHow
-
QuestionWhere should the electrical cord be when using a jigsaw?
 wikiHow Staff EditorThis answer was written by one of our trained team of researchers who validated it for accuracy and comprehensiveness.
Staff AnswerwikiHow Staff EditorStaff AnswerThe power cord should be behind the saw at all times while you're cutting. Wrap it around your arm if you want to make sure it doesn't fall out of place.
Support wikiHow by unlocking this staff-researched answer.
-
QuestionCan I avoid splintering by adding an extra layer of material (e.g. plywood) to act as a sacrificial board that gets "splintered" while protecting the main job? If so, what is the best way to fasten it to the job?
 Community AnswerThat may work, I've never tried it myself, but an easier and more efficient way to prevent the wood from splintering is to take a damp rag and rub the bottom area of where you're cutting. It also helps to use a fine-toothed blade.
 -
QuestionWith the jigsaw I have, when I pull the trigger, it sometimes starts then stops; sometimes it goes slow then speeds up. What could be causing this?
 Community AnswerIf you move your jigsaw, the blade can catch on the workpiece. That's why it helps to keep the jigsaw parallel to the cutting surface. Try clamping your piece down.
Warnings
- Always wear safety glasses and a dust mask when working with a jigsaw.⧼thumbs_response⧽
- Keep your jigsaw unplugged from power and out of reach from children whenever you aren’t using it.⧼thumbs_response⧽
- Avoid putting your fingers in front of or near the blade while the saw is running.⧼thumbs_response⧽
Things You’ll Need
Choosing and Installing the Right Blade
- Jigsaw blades
- Allen wrench
- Screwdriver
Making a Basic Cut
- Safety glasses
- Dust mask
- C-clamps
Making Advanced Cuts
- Drill


References
- ↑ https://youtu.be/sxaOpbbZE-A?t=39
- ↑ https://extremehowto.com/how-to-use-a-jigsaw/
- ↑ https://extremehowto.com/how-to-use-a-jigsaw/
- ↑ https://extremehowto.com/how-to-use-a-jigsaw/
- ↑ https://youtu.be/f1cuvdA99tM?t=218
- ↑ https://youtu.be/b3RB3Vq8yQI?t=41
- ↑ https://youtu.be/b3RB3Vq8yQI?t=62
- ↑ https://youtu.be/b3RB3Vq8yQI?t=55
- ↑ https://youtu.be/f1cuvdA99tM?t=603
- ↑ https://www.prettyhandygirl.com/how-to-use-a-jig-saw-tool-tutorial-friday-and-trick-or-tip/
- ↑ https://youtu.be/f1cuvdA99tM?t=69
- ↑ https://extremehowto.com/how-to-use-a-jigsaw/
- ↑ https://youtu.be/b3RB3Vq8yQI?t=220
- ↑ https://youtu.be/b3RB3Vq8yQI?t=215
- ↑ https://youtu.be/f1cuvdA99tM?t=438
- ↑ https://youtu.be/f1cuvdA99tM?t=438
- ↑ https://extremehowto.com/how-to-use-a-jigsaw/
- ↑ https://youtu.be/b3RB3Vq8yQI?t=165
- ↑ https://extremehowto.com/how-to-use-a-jigsaw/
About This Article

To use a jigsaw, choose the correct metal blade, depending on the kind of material you're sawing, and install it. Next, plug in the saw and put on safety glasses and a dust mask. Then, use C-clamps to secure your project to a work surface so it doesn’t move around and use a straightedge and pencil to trace a cut line on the surface. Finally, pull the trigger to start the saw, adjust the blade speed, and guide the blade slowly through the material along the cut line. For tips on making different kinds of cuts, read on!