X
wikiHow is a “wiki,” similar to Wikipedia, which means that many of our articles are co-written by multiple authors. To create this article, 22 people, some anonymous, worked to edit and improve it over time.
There are 8 references cited in this article, which can be found at the bottom of the page.
This article has been viewed 169,878 times.
Learn more...
Cutting mitered joints by hand can be difficult and time consuming. Whether you are running baseboards or trim around a large home, or you are building a project that requires many accurate cuts, a power miter saw will improve the quality of your work while making the job much easier.
Steps
-
1Select the type and size miter saw you will need. These saws come with a variety of functions and in several sizes, so choose one that will meet your needs. Here are a few differences in these machines:[1]
- Size. This is determined by the blade diameter, and normally varies between 8 and 12 inches. The diameter of the saw's blade will determine how wide and thick the material you are cutting can be.
- Action. There are three types of power miter saw:
- Standard miter saw: The basic, standard miter saw will make a perpendicular cut through a board or other material at angles typically ranging from 45 degrees left (counterclockwise) to 45 degrees right (clockwise). An angle scale and locking device keep the blade correctly aligned.
- Compound miter saw: Adds the ability to tilt the blade at a specified angle from vertical, to cut a compound angle.
- Sliding miter saw: The saw slides along a horizontal arm, similar to a radial arm saw. It can be pushed through the material being cut, which allows a much wider piece of stock to be sawed.
-
2Decide how much muscle your miter saw will need. In electrical tools, the power to do the job the tool is designed for is generally considered the amperage rating of the tool, or its horsepower. A standard miter saw is designed to draw (use) between 12 and 15 amps or electrical power, and operate on 120 volts (in the U.S.). For cutting tough or very large pieces of stock you may need to select an industrial rated machine which is much heavier and may require special wiring.Advertisement
-
3Purchase, rent, or borrow a miter saw. Once you have decided which saw you want, and what features it will need, you need to get your hands on it. These machines can cost between $80.00 USD to over $1,000 USD, so if the project is a one time event or you are on a tight budget, you may consider if purchasing one is a good investment.
-
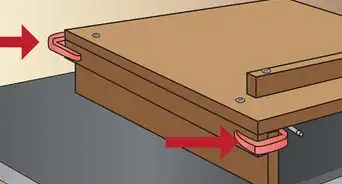
4Set up a table or stand the saw up in an area where you have room to work. For very long material cutting, you may find it necessary to work on a floor, but a work bench or improvised work table makes operating the saw much more comfortable.
-
5Read the operator's manual if one is available for the one you are using.[2] The first section will be general safety rules like wearing safety glasses, using the correct type of extension cords, and making sure the electrical power is sufficient for the machine. Make sure you understand the tool's requirements before operation as overloaded electrical circuits can damage your saw or cause a fire in your workshop.[3]
-
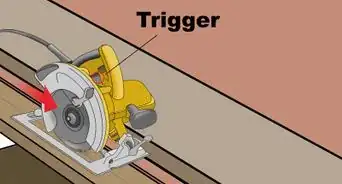
6Learn about the different parts of the machine and the purpose of each one. You should find an angle scale and an angle indicator on the front of the saw's bed, a blade guard, a power switch or trigger, and a mechanism for locking the saw in position when it is not in use. Other features, such as laser guides, saw tilt scales, and locking clamps for securing the workpiece vary from saw to saw.[4]
-
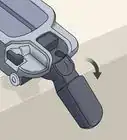
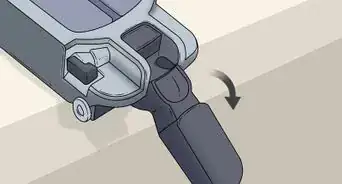
7Unlock or release the saw so that stock can be placed on the saw bench and the blade will travel. Raise and lower the saw several times before turning it on to become familiar with the path the blade takes as it will saw through the stock. This will make it easier for you to avoid accidents when actually cutting with the saw.
-
8Plug your saw into a receptacle and place a piece of material on the bench. Start with a small piece of scrap material to test the saw with. Make sure it is long enough to fit securely against the backrest of the saw's bench and to allow you to hold it in position while it is cut. Very short pieces of stock are difficult to cut safely without clamps, and cutting near the end of a piece of stock can allow the drop (the piece that is cut off) to be thrown by the blade when the cut if complete.[5]
-
9Cut a variety of angles on scrap material and fit them together to see how they fit. When joining stock cut at different angles, you will find basic shapes are fairly easy to fit. To join two pieces of stock at a given angle, the angle of the cut on the end of each piece is half the angle of the joint. For example, to make a square (90 degree) corner, cut the ends of two pieces of stock at opposite 45 degree angles.
-
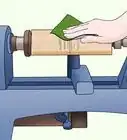
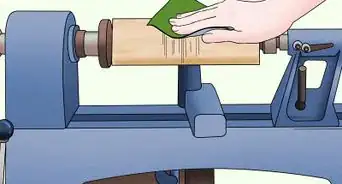
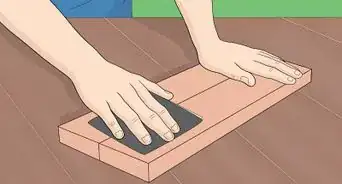
10Make sufficient cuts so that you are comfortable operating the saw. Practicing with scrap material will make it less likely you will make a mistake when you cut your finished work. Notice that the blade begins cutting the stock on or near the front edge (unless it is a very wide piece), so you will want to make cut marks or measurement marks on that side of the stock, or use a square or angle square to mark your work piece all the way across before cutting.[6]
-
11Experiment with the various functions your saw is equipped with to learn the correct procedure for using them when applying the tool to a finished project. Once you are comfortable with your knowledge of the tool's features and performance, you should be able to begin the project you chose the miter saw for.


Advertisement
Community Q&A
-
QuestionHow can I release or unlock a miter saw?
 Liam OstranderCommunity AnswerIt depends on the brand and model of the saw Google the model you have and find an online instructional video or booklet.
 -
QuestionHow much does a 45 degrees angle open up when someone raises it 10 degrees?Liam OstranderCommunity AnswerIf you are talking about mired corners, the angle of the two pieces make an 110-degree angle.
-
QuestionWhere is the safety button?
 Community AnswerThe safety button should be either on the inside part of the handle or on the outside part, usually on the opposite side of the trigger.
Advertisement
Warnings
- Wear eye protection when operating a power miter saw.⧼thumbs_response⧽
- Keep hands away from moving parts.⧼thumbs_response⧽
- Make sure all guards are in place and operating correctly.⧼thumbs_response⧽
- Make sure all electric cords are in good condition.⧼thumbs_response⧽
- Sawdust is very flammable, and certain treated materials may contain poisonous chemical compounds, so do not allow dust to accumulate, or breathe sawdust.⧼thumbs_response⧽
- Always wear hearing protection when operating a power miter saw. Power miter saws can register up to 105 decibels of sound, enough to cause permanent hearing loss after less than 4 minutes of use.⧼thumbs_response⧽
- Keep your work area clear. Miter saw blades travel at a high speed, and can throw loose material a long way.⧼thumbs_response⧽
Advertisement
Things You'll Need
- A power miter saw with sufficient capacity/power for the job.
- A work table or area to set the saw up in.
- Scrap lumber or stock to practice with.


References
- ↑ https://sawingpros.com/different-types-of-miter-saws/
- ↑ https://images.homedepot-static.com/catalog/pdfImages/8d/8d64cff1-600a-4dc0-a0ff-7a3a7b257067.pdf
- ↑ https://www.scu.edu/media/school-of-engineering/pdfs/maker-lab-resources/Manual_CraftsmanCompoundMiterSaw.pdf
- ↑ https://www.alce.vt.edu/content/dam/alce_vt_edu/teacher-resources/lab-safety-resources/mitersaw.pdf
- ↑ https://www.youtube.com/watch?v=015ET8ioHjg
- ↑ https://www.lowes.com/n/how-to/how-to-use-a-miter-saw
- https://www.osha.gov/SLTC/etools/machineguarding/saws/miter_saws.html
- https://www.finewoodworking.com/2009/04/01/safety-manual-miter-saw
About This Article
Advertisement