This article was co-authored by wikiHow Staff. Our trained team of editors and researchers validate articles for accuracy and comprehensiveness. wikiHow's Content Management Team carefully monitors the work from our editorial staff to ensure that each article is backed by trusted research and meets our high quality standards.
This article has been viewed 74,614 times.
Learn more...
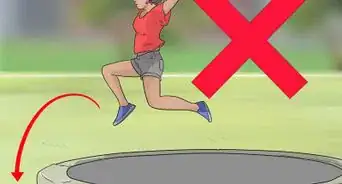
Securing a trampoline against strong winds and big bounces is a simple project that can be done in a matter of minutes using a trampoline anchor kit. Tap U-shaped wind stakes into place over the legs of the trampoline for a quick fix, or sink auger-style anchors into the ground directly below the frame. Hook the included straps through the augers and tighten them down on each side to make sure your trampoline stays put, even during the worst weather.
Steps
Putting in Wind Stakes
-
1Pick up a set of U-shaped wind stakes. Like their name suggests, these types of stakes come pre-curved into a tight “U” shape. They’re made of solid steel and are typically sold in sets of 4. Installing wind stakes is a cinch—all you have to do is place them over the legs of the trampoline and hammer them down.
- A pack of basic U-shaped wind stakes will usually only run you $15-20.
- Wind stakes are the easiest trampoline stakes to install, but they don’t hold quite as well as auger-style anchor systems with straps. For this reason, it's a good idea to always inspect them before you start jumping.
-
2Position each stake over one leg of the trampoline. Center the stakes on the trampoline legs as best you can. They’ll offer the most stability when they’re set an equal distance from one another.[1]
- The prongs of U-shaped wind stakes are spaced about 2–2.5 inches (5.1–6.4 cm) apart, which makes them just wide enough to fit over the legs of most average-sized trampolines.
Advertisement -
3Tap the stakes into the ground with a hammer. It should only take a few taps to get them seated firmly. Once the stakes are in place, jiggle them to test how well they hold. If they feel loose, you may need to pull them up and drive them again.[2]
- All styles of trampoline anchors, including U-shaped wind stakes, are designed to be used on soft surfaces, such as grass, dirt, or clay.
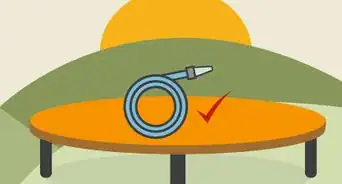
- If the ground beneath your trampoline is too hard to easily sink the stakes, spray it lightly with a garden hose to soften it up.
- Consider using 2 or even 3 sets of stakes if you live in an area where storms and strong winds are a frequent occurrence, or if your trampoline is prone to shifting on the patch of ground where it's situated.
-
4Remove U-shaped stakes with a screwdriver or similar tool. When it comes time to pry up your wind stakes, work the blade of the screwdriver into the space between the stake and the trampoline leg, then lift up on the handle. After moving the stakes 1–2 inches (2.5–5.1 cm), you should be able to finish pulling them out by hand.
- Try using a hammer to wedge the screwdriver in if you’re having trouble getting your stakes to budge.
- Replace your wind stakes if they become bent, broken, or rusted, as this could cause them to fail or even make them a safety hazard.


Installing Auger-Style Anchors
-
1Purchase a trampoline anchor kit. A standard trampoline anchor kit contains 4 steel augers and 4 adjustable nylon straps. After screwing the augers deep into the ground on each side of the trampoline, you’ll attach and tighten the straps to hold it in place from below.
- Auger-style anchor kits are by far the most effective way to steady an ordinary backyard trampoline. They’re strong enough to stand up to high-speed winds and rain, as well as shifting caused by repeated jumping.
- Trampoline anchor kits cost around $40-50 on average.
-
2Measure roughly 1–1.5 feet (0.30–0.46 m) inward from each leg. This is where you’ll place the augers. Measure each of the legs individually using a tape measure, if possible. To guarantee that your measurements are consistent on each side, make sure the tape measure is centered on the leg.
- The exact placement and spacing of the augers may vary depending on the design of a particular trampoline anchor kit. Always follow the guidelines laid out in the manufacturer’s instructions to be on the safe side.
-
3Screw the augers into the ground. Place the pointed tip of the auger against the ground and take a firm grip on the hooked upper end. Twist the auger in a clockwise direction until only the circular hook is left above ground level. Repeat this process on each side of the trampoline, then jostle the augers to confirm that they're secure.[3]
- If you’re having difficulty sinking the augers, wetting the ground under the trampoline will help minimize the amount of resistance you encounter.
- Eyeball each auger from ground level to make sure they're as vertical as possible. They'll be able to grip better when they're running straight up and down.
-
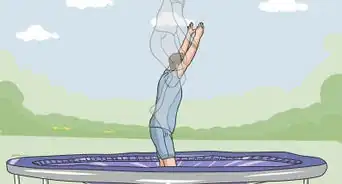
4Loop the included straps over the top of the trampoline frame. Pull the straps up and over the circular bar directly over the site of each auger, making sure both ends hang at the same length. Your kit should include one strap for each auger.
- Anchoring the trampoline at the top of the frame rather than the base makes for a much more secure hold.
- Some anchor kits may come with 2-piece straps that feature a separate ratchet strap that makes it easier to cinch the strap down tight. With these systems, the ratchet strap will usually attach directly to the auger.
-
5Guide the free end of the strap through the auger. Insert the strap into the hook at the top of the auger (the part you gripped while screwing it into the ground). After passing it through, line it up with the buckle dangling at the opposite end. From here, all that’s left to do is to join the 2 ends.
- Make sure there are no twists or kinks in the strap before you pull it through the auger.
-
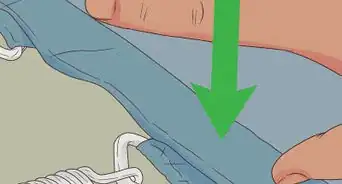
6Feed the end of the strap through the buckle. Thread the strap through the top of the buckle, then out the bottom. Pull down on the free end to take out the remaining slack. Again, do this on each side of the trampoline.
- If you're using a kit with 2-piece straps, feed the loose end of the frame strap through the buckle on the lower ratchet strap to close the loop.
- If you miss a buckle, there's a greater chance that your trampoline could be turned over with enough force.
-
7Tighten the straps. Work your way around the trampoline, checking to make sure there’s no give in any of the straps. Yanking on one strap can sometimes cause another to come loose, so it make take a few trips around to get everything properly secured.
- If the free ends of the straps are long enough to reach the ground after tightening, wrap the extra length around the legs of the trampoline to get them out of the way.
- For anchor kits with ratchet straps, work the lever on each buckle up and down repeatedly until there's no slack remaining.
- Consider fastening each strap with a knot to prevent them from coming undone.
-
8Reverse the process to remove your new trampoline anchors. Lift up sharply on each buckle to loosen the straps, then finish undoing them by hand. Slide the frame straps clear of the outer edge of the trampoline, making sure they don't get caught on the springs or the frame itself. Finally, twist the augers counterclockwise while pulling up on them gently until they come free of the ground.
- You'll need to invest in a new set of augers if your current set happens to become damaged or lose their ability to grip properly.


Warnings
- Only specially-designed trampoline anchor kits should be used to hold a trampoline in place. Attempting to weigh down your trampoline with heavy objects like sandbags is both ineffective and unattractive.⧼thumbs_response⧽
- Anchoring a trampoline on a hard surface like asphalt or concrete is not a DIY project—it will typically involve digging up the ground and pouring new paving materials over the legs.⧼thumbs_response⧽
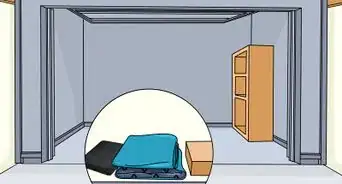
Things You’ll Need
- Trampoline anchor kit
- Mallet
- Tape measure
References
About This Article

To prevent your trampoline from flying off in the wind, you can anchor it with wind stakes or an anchor kit. Wind stakes are U-shaped pegs that you place over your trampoline’s legs and hammer into the ground. You’ll need at least one for each trampoline leg, but if you live in an area that tends to get strong winds and storms, use 2 or 3 per leg. Trampoline anchor kits come with 4 augers, which are corkscrew-like pegs, and 4 straps. These are more effective than regular pegs, but they’re also a little more expensive. To use an anchor kit, all you need to do is screw the augers into the ground about 1 foot inwards from each trampoline leg, and fasten the straps between the augers and the frame of your trampoline. For more tips, including how to remove your trampoline anchors, read on!