This article was co-authored by wikiHow staff writer, Hannah Madden. Hannah Madden is a writer, editor, and artist currently living in Portland, Oregon. In 2018, she graduated from Portland State University with a B.S. in Environmental Studies. Hannah enjoys writing articles about conservation, sustainability, and eco-friendly products. When she isn’t writing, you can find Hannah working on hand embroidery projects and listening to music.
There are 10 references cited in this article, which can be found at the bottom of the page.
This article has been viewed 15,987 times.
Learn more...
Trampolines are tons of fun to jump on during the summer, but come winter time, you probably won’t be using them much. Since trampolines are weather-proof, you don’t need to completely disassemble them unless you’re expecting a lot of snow. If you do leave your trampoline up, you’ll just need to do some weekly maintenance to keep it in tip top shape.
Steps
Coverage and Maintenance
-
1Take down the netting if you have it. Use a socket wrench to unscrew the bolts that connect the net poles to the frame. Unhook the poles, then untie the net and fold it up.[1]
- Store the poles and the netting inside where they won’t be left to the elements.
- You can also take the pad off the springs and fold it up, too. However, if your cover fits over the pad, you don’t have to.
-
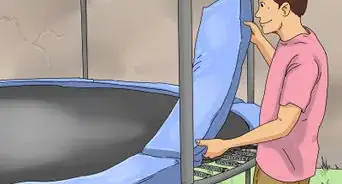
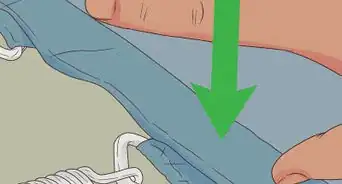
2Attach a trampoline cover over the jump pad. If your trampoline is wet, let it air dry fully before you put on the cover. Pull a plastic trampoline cover over your jump pad, then hook it to the springs underneath your trampoline.[2]
- You can find trampoline covers at most sporting good stores.
- Trampoline covers are essential for keeping rain and snow off your jump pad during the winter. They’re a little different from a regular tarp because they have elastic around the edge to hook onto your trampoline securely and keep rain and snow out.
- Trampoline covers also protect your springs and safety pads from the elements to cut down on rust and wear.
Advertisement -
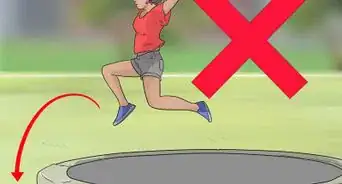
3Brush off snowfall with a broom if it piles on top of the trampoline. Heavy snowfall can actually rip or tear your jump pad because of how heavy it gets. If you get more than 1 in (2.5 cm) of snow, head out with a broom and push the snow off to clear your trampoline.[3]
- Never use a snow shovel to clear off your trampoline! The shovel can actually rip your jump pad if you push too hard. Stick with a soft broom to keep your trampoline intact.
-
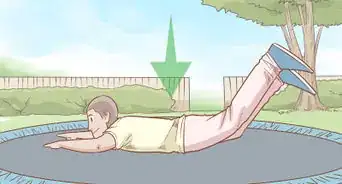
4Check the cover once a week, and dry it off if there’s moisture. If any water gets trapped in between your jump pad and the cover, it could lead to mildew. Check underneath your cover once a week, and take it off to let it air out if you notice any moisture.[4]
- Most trampoline covers have elastic on the ends to keep water from getting in, but they aren’t foolproof.
-
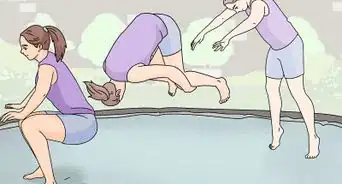
5Anchor your trampoline frame if you’re expecting high winds. Buy a trampoline anchor kit or some metal stakes and drive them into the ground around your frame. Make sure your trampoline is secured before any winter storms come rolling in, or your light metal frame could blow away.[5]
- It might seem impossible, but heavy windstorms can and have tipped over trampolines and even blown them out of people’s yards. It’s better to be safe than sorry!


Complete Disassembly
-
1Remove the bolts that hold the net with a socket wrench. If you have a net surrounding your trampoline, use a socket wrench to loosen the bolts that connect the poles to the frame. Keep those nuts in a small bag so you can use them when you set up your trampoline again in the spring.[6]
- Not all nets connect to the frame with bolts. If you assembled your netting by popping the poles into the frame without bolts, don’t worry about using a wrench anywhere.
-
2Take down the poles that hold the net up. Grab each pole, keeping the net attached for now, and lift it up and out of the frame. Set the poles on top of the jump pad for now, then untie the net from each pole.[7]
- If your poles have foam padding on them, you can leave that be.
-
3Fold up the safety pad and set it aside. Untie all of the strings that attach the safety pad to the frame of the trampoline. Fold the pad up over itself a few times until you can grab it with both hands, then take it off the trampoline completely.[8]
- If it rained recently and your safety pad was wet, dry it off with a towel before folding it up. Storing a damp safety pad could lead to mildew later on.
-
4Unhook the springs and collect them in a box. You can do this by hand or use the triangular shaped tool that came with the trampoline by hooking it on one end of the spring and pulling upwards. Keep the springs together in a box so you know where they are next time you set up your trampoline.[9]
- If you don’t have the triangular shaped tool, you can also use a hooked end of a loose spring to remove all the other ones.
-
5Fold the net over itself and set it aside. Grab one end of the net and fold it in half, then fold it in half again. Keep folding until you can pick the net up in both hands, then move it off the jump pad.[10]
- If your jump pad is dirty or wet, give it a quick rub down with a dry towel.
- If you want to keep your net contained a little better, wrap it up with bungee cords or plastic wrap.
-
6Fold the jump pad in on itself. Just like you did with the net, fold the jump pad in half, then in half again the other way. Keep folding until it’s at a manageable size, then wrap it up with plastic wrap or bungee cords to keep it in place.[11]
- The smaller you fold it down, the easier it will be to store.
-
7Disassemble the frame if you have room to store it. If you’d like to take the frame apart too, pop each metal piece out of its connection, starting with the top pieces. You don’t need any special tools to do this, so just use your hands to pull each piece apart.[12]
- If you don’t have room to store your frame inside, you can leave it outside for the winter. Metal frames can handle the elements, and they won’t be hurt by rain or snow.
-
8Store your trampoline parts inside your home. Gather up all your trampoline parts and keep them in your garage, basement, or closet. Make sure they stay cool and dry to avoid mold or mildew during the winter months.[13]
- If you’re worried about mice or moths, seal your trampoline net and jump pad inside a plastic container.


Warnings
- Always brush snow off your trampoline to avoid ripping or tearing.⧼thumbs_response⧽
Things You’ll Need
Coverage and Maintenance
- Socket wrench
- Trampoline cover
- Trampoline anchor kit
Complete Disassembly
- Socket wrench
- Plastic wrap / bungee cord


References
- ↑ https://trampolinereviewguide.com/trampoline-winter-care/
- ↑ https://www.youtube.com/watch?v=sgx6O2uSvG0&feature=youtu.be&t=28
- ↑ https://trampolinereviewguide.com/trampoline-winter-care/
- ↑ https://trampolinereviewguide.com/trampoline-winter-care/
- ↑ https://www.trampolinegurus.com/trampoline-anchors/
- ↑ https://www.youtube.com/watch?v=NUhht3S1sv8&feature=youtu.be&t=28
- ↑ https://www.youtube.com/watch?v=WsmMJuWFFoQ&feature=youtu.be&t=74
- ↑ https://trampolinereviewguide.com/trampoline-winter-care/
- ↑ https://www.youtube.com/watch?v=WsmMJuWFFoQ&feature=youtu.be&t=110
About This Article