This article was co-authored by wikiHow Staff. Our trained team of editors and researchers validate articles for accuracy and comprehensiveness. wikiHow's Content Management Team carefully monitors the work from our editorial staff to ensure that each article is backed by trusted research and meets our high quality standards.
This article has been viewed 16,488 times.
Learn more...
You may need to measure the springs on your trampoline if you need to replace them or want to upgrade them to a better model. New springs can improve the bounce on your trampoline and ensure it stays in good repair. To measure trampoline springs, start by removing them safely. Then, use a ruler or measuring tape to determine the length of the springs from hook to hook as well as the diameter. If you are ordering new springs, get them from from a trusted retailer and attach them properly so your trampoline is safe to use.
Steps
Removing Springs from the Trampoline
-
1Wear gloves and safety goggles to protect yourself. The springs on the trampoline can be rough on your bare hands, especially if there are no protective coverings on the hook ends of the springs. Wear gardening gloves or thick work gloves to protect your hands. Get safety goggles so your eyes are protected in the event the spring flies in your face.[1]
-
2Unhook the first spring from the trampoline with flat-head pliers. Grip the hook on the spring that attaches to the loop on the trampoline mat with the pliers. Then, carefully pull the hook off the loop, detaching the spring from the mat. It should pop off.[2]
- Do not allow anyone on the trampoline when you remove the spring, as you want the trampoline to remain loose, not taut.
Advertisement -
3Remove the second hook on the frame. Use the pliers to lift the second hook up and off of the loop it is attached to on the frame of the trampoline. It should pop off with a bit of force.[3]
-
4Check that the spring is not stretched out or warped. Examine the wire rings on the spring to ensure they sit close together and are compact. If you can slip a piece of paper between the wire rings, the spring is too stretched out and will not be useful for measuring. Get another spring that is compact and not stretched out or warped to measure.[4]
- If all your springs are stretched out or warped, you will need to measure several of them and take the lowest measurement to determine the correct size of the springs.


Determining Length and Diameter
-
1Place the spring on the ground or on a table. Position it on a flat surface so you can measure it correctly. Make sure the springs are not being stretched or pulled when you place it down, as this can skew your measurements.
-
2Measure hook to hook with a ruler or measuring tape. Take a ruler or measuring tape and place it on the outside edge of one of the hooks on the spring. Extend it to the outside edge of the other hook on the spring. This will ensure you get a proper measurement.
- Note where the outside edge of the hook hits the ruler or measuring tape so you get an accurate measurement.
-
3Measure the outside diameter of the spring. Place the ruler or measuring tape against the opening on the spring, next to one of the hooks. It should lay vertically against the spring. Extend the measuring tape to the other end of the opening. Note the diameter of the spring, or how wide the opening is.
-
4Measure 2-3 springs to confirm the measurements. Confirm your measurement is correct by checking several other springs on the trampoline. Check that the springs are not warped or stretched out when you measure them.[5]
- The springs on the trampoline should all be the same size. Most trampoline springs range in size from 3.5 to 8.5 inches (8.9 to 21.6 cm), depending on the size and shape of the trampoline.


Replacing the Springs
-
1Determine how many replacement springs you need. Count how many springs need to be replaced on the trampoline so you order the correct amount. The condition of the trampoline, as well as the shape and size, will also determine how many springs you will need to replace.[6]
- Most trampoline manufacturers sell replacement springs in sets of 5-15. If you need just 1 replacement spring, order a set of 5 so you have extras on hand.
-
2Get replacement springs in the correct size online or in stores. Make sure you order the correct size so it will fit your trampoline. Good quality trampoline springs will be fully galvanized to protect them from water and moisture. Some springs will have an extra coating to ensure they can stand up to weather and rain.[7]
- Make sure you get the same type of spring that is already on your trampoline for the replacements, as this will ensure the springs are the same model.
-
3Replace the springs 1 at a time. Do not remove and replace all the springs at once, as the trampoline mat will be too loose and unwieldy for you to deal with. Instead, replace the springs 1 at a time so the trampoline stays taut.[8]
- You can also ask friends or family members to sit on the trampoline, distributing their weight evenly to keep the trampoline taut.
-
4Place the first hook on the spring onto the frame. The trampoline frame should have holes or loops for one of the hooks on the spring. Put one of the hooks in the hole or loop so it stays in place.
-
5Use a screwdriver or a T-hook to attach the second hook. Slide the long end of a screwdriver or the T-hook into the other hook on the spring. Then, pull it slightly and slide the end of the screwdriver or T-hook into the loop on the trampoline mat. The hook on the spring should slide into the loop as well and pop in place.[9]
- You may need to use both hands on the handle of the screwdriver or the T-hook to slide the hook into the loop.
- You can order a T-hook made for replacing trampoline springs online through trampoline retailers or at your local hardware store.
-
6Check that the springs are attached correctly before using the trampoline. Once you have replaced all the springs, press down lightly on the trampoline mat with your hand close to the springs to confirm they are locked in place. The hooks on all the springs should be attached to the frame and the mat.[10]


Things You’ll Need
- Safety goggles and gloves
- Flat-head pliers
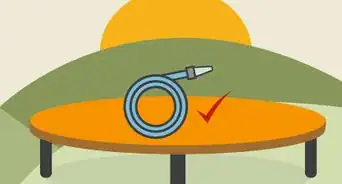
- A ruler or measuring tape
- Replacement springs
- A screwdriver
- A T-Hook


References
- ↑ https://trampolinewebandwarehouse.com.au/how-to-measure-and-replace-trampoline-springs
- ↑ https://www.youtube.com/watch?v=UcFKWH-ZliQ&feature=youtu.be&t=39
- ↑ https://www.youtube.com/watch?v=UcFKWH-ZliQ&feature=youtu.be&t=39
- ↑ https://www.youtube.com/watch?v=rt0v58QkLrI&feature=youtu.be&t=75
- ↑ http://trampolinepartscenter.com/how-to-measure-your-springs
- ↑ https://trampolinewebandwarehouse.com.au/how-to-measure-and-replace-trampoline-springs
- ↑ https://trampolinewebandwarehouse.com.au/how-to-measure-and-replace-trampoline-springs
- ↑ https://trampolinewebandwarehouse.com.au/how-to-measure-and-replace-trampoline-springs
- ↑ https://www.youtube.com/watch?v=UcFKWH-ZliQ&feature=youtu.be&t=70
About This Article