This article was co-authored by wikiHow Staff. Our trained team of editors and researchers validate articles for accuracy and comprehensiveness. wikiHow's Content Management Team carefully monitors the work from our editorial staff to ensure that each article is backed by trusted research and meets our high quality standards.
This article has been viewed 366,375 times.
Learn more...
Trampolines are a great way to bounce the energy out, and they provide a way to make physical activity fun. It's normal to want to begin bouncing as soon as the trampoline package is received, but first, you will need to carefully review the instructions and account for the materials. Take some time to make sure you have all of the tools necessary to set up the trampoline properly. A safe, well put together trampoline is important for everyone to have their best time jumping as high as they can into the air.
Steps
Reviewing the Materials
-
1Check the packages. All of the materials for a trampoline will usually come in two or three packages. Empty each of the packages and make sure that you have everything that is listed in the instructions. A missing piece can prevent you from setting up the trampoline properly, so you don't want to begin putting it together without double checking that you have everything you need.
- If there is a missing piece, call the company you bought the trampoline from and see what can be done about it. Sometimes they will ship you the missing piece, or they will exchange your trampoline for an entirely new one.
-
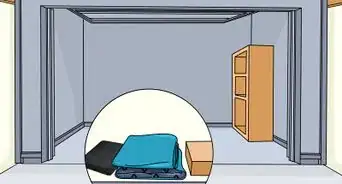
2Organize the parts. There are a lot of parts, big and small, that come with the trampoline package. The setting up process can be confusing if all of the parts are in one pile. Take some time to spread out the pieces and put them in groups according to what they are being used for.
- Some of the pieces may look similar, but will be used for different areas.
Advertisement -
3Gather your tools. You don't need too many tools to set up a trampoline, but it is helpful to have them readily available. You will need a power drill or Phillips head screwdriver. Many packages will come with a screwdriver. You will also need a rubber mallet and spring puller, which comes with the packaging. You should also have gloves handy for when it is time to attach the springs.
- It's easy to get your hands caught in the springs, so gloves prevent your skin from getting caught up in them.


Assembling the Trampoline Frame
-
1Put together the circular pieces. Lay out the pieces that make up the circular frame to get an idea of how big the trampoline will be. Then, begin attaching by snapping the parts together until you have a ring shape. Once assembled, the ring should be laying flat on the ground for now.
-
2Assemble the legs of the trampoline. Once the ring is together, begin assembling the legs. There should be spots on the ring designated for the legs. The legs should fit into the spots easily, but if not, you can use a hammer to fit them into place. You should, however, hammer lightly and use a barrier (like a towel) to soften the blow of the hammer.
-
3Secure the screws and bolts. Now that the frame is put together, you can secure the nuts and bolts into their proper places. Make sure that all of the parts are secure and in the correct positions first, though. After you're finished securing the screws and bolts, look over them to make sure that they are secure.
- Using a power drill instead a Phillips head screwdriver will make the securing process go by faster. Using a screwdriver alone can take a long time.
-
4Flip over the frame. Even if you're quite strong, you will probably still need a partner for this step. Find a partner and go to opposite sides of the frame. Carefully flip the frame of the trampoline over until it is on its legs. It shouldn't be wobbling when you turn it over.
- If you find that it is wobbling, inspect the set up to see which parts aren't secure. The wobbling will probably be because of the legs. Use a screwdriver or power drill to secure the unstable parts.


Setting up the Mat
-
1Begin setting up the springs with a partner. Having a partner install the springs with you makes properly aligning the mat easier. You and your partner should grab an even amount of springs—four each to start out with is okay. Go to opposite sides of the trampoline. Make sure you are exactly opposite of each other by counting the hooks.
-
2Attach the springs evenly with your partner. Begin attaching the springs to their designated hooks. Then, attach the hooks to the metal rings. You will need the spring pulling device to stretch the attach the springs to the hooks, and a rubber mallet to pound the springs into place once attached to the metal rings.
- The springs will start to get harder to attach about halfway through because of the tightening of the mat.
-
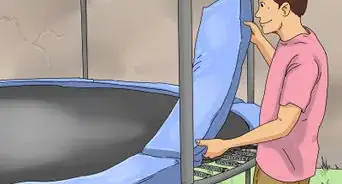
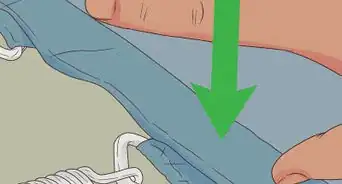
3Put on the protective pad. The protective pad helps to cushion a fall on the springs. Simply lay the pad over the springs. There should be holes at the bottom the padding that line up with the legs. Protective pads usually have metal hooks, Velcro, or ropes to secure the pad to the trampoline. Once you are finished attaching it, make sure that it is aligned over all of the springs.


Putting Together the Enclosure Net
-
1Attach the bungee loops. Not every trampoline will come with an enclosure, but you can choose to purchase one with your trampoline. First, grab your enclosure net and bungee loops. The bungee loops should look rubber band-like. Attach the bungee loops to the net.
- The loops help keep the net in place when it is being bounced against.
- Some regulations make it so that enclosures are required for trampolines.
-
2Connect and secure the posts. The posts for the net may come in multiple pieces. If so, connect them and then cover them with foam sleeves. Once the posts are connected, use a screwdriver or drill to secure them with screws or bolts, depending on what the package came with.
-
3Attach the hooks. Each of the bungee loops should have hooks attached to them. Attach each of the hooks to the holes on top of the posts. Then, lift the posts one by one and place them in the O-rings of the enclosure net. Once the posts are placed in the O-rings, the enclosure net just needs to be lifted to be put in place.
-
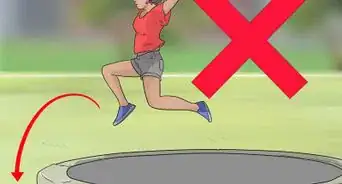
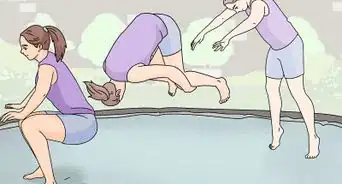
4Test your finished trampoline. Check everything over once more to make sure the trampoline is secure. Then, get on the trampoline and bounce a few times to make sure it is stable. If it is, your trampoline is finished and ready for activity.
- If the trampoline is slightly unstable, check it over for parts that may not be secured correctly. Use a screwdriver or power drill to secure those parts. Call the company you bought the trampoline from if you can't fix the problem. Do not jump on it until the problem is fixed.
- It's always a good idea to anchor your trampoline. This prevents any movement from strong winds and big bounces.


Community Q&A
-
QuestionWhat should I do if my trampoline suddenly folded into a banana shape?
 Community AnswerAssuming the trampoline isn't faulty, then this means there is too much weight on it.
 -
QuestionHow long does it take to assemble a trampoline?
 Community AnswerIi depends on the size and type, but the regular 3 meters in diameter kind should take about 40 minutes to assemble without safety net.
 -
QuestionHow may people does it take to build the trampoline?Community AnswerThough it may be possible to set up with one person, it is easier and safer to assemble a trampoline with two people.
Warnings
- Your instructions will usually come with a set of warnings. Make sure to read those warnings before setting up your trampoline.⧼thumbs_response⧽
Things You'll Need
- Power drill or Phillips head screwdriver
- Spring pulling device
- Rubber mallet
- Gloves


About This Article

To set up a trampoline, start by fitting the pieces of the frame together to form a circle and putting the legs on. Once you’ve assembled the frame, secure the pieces together with screws and flip over the frame so it’s the right-side up. Next, hook the springs into the metal rings of the jump mat and secure them to the frame. Make sure to attach the springs to the right hooks so you don’t have to take them out and start over. After you’ve attached the mat to the frame, place the protective pad over the springs and secure it with the Velcro, ropes, or hooks that came with your trampoline kit. For more tips, including how to set up your trampoline’s enclosure net, read on!