This article was co-authored by Sarah Fogle and by wikiHow staff writer, Amber Crain. Sarah Fogle is a DIY Home Improvement Specialist and the creator of Ugly Duckling House. With over a decade of experience, Sarah specializes in beginner-friendly home remodeling projects. Sarah holds an MBA from Georgia State University. She has been featured in multiple publications including Better Homes and Gardens and Make Magazine. She has also partnered with brands such as Lowe's, Home Depot, and Martha Stewart Crafts.
There are 7 references cited in this article, which can be found at the bottom of the page.
This article has been viewed 61,727 times.
Applying a clear finish to wood brings out the wood’s natural beauty, while sealing and protecting the wood’s surface. Oil-based polyurethane is an excellent product to use for this purpose. Start by sanding the surface thoroughly and wiping it down to remove any dust. Create a homemade sealer by thinning the polyurethane with mineral spirits and use this for your first coat. Follow up with 2 coats of undiluted polyurethane straight from the can. Sand the surface once more, then apply your final clear coat.
Steps
Sanding and Cleaning the Surface
-
1Work in a clean room with good ventilation and lighting. In order to properly apply a clear coat to wood, you want to work in an environment with as little dust as possible. Good lighting, such as natural light or bright artificial light, will enable you watch out for streaks and bubbles in your work.[1]
-
2Sand the surface with medium grit sandpaper. Use 80 or 100-grit sandpaper to lightly go over the entire surface of your project, taking care to get into the nooks and crannies. Use medium grit sandpaper to eliminate any major scratches, notches, or blemishes in the wood.[4]Advertisement
-
3Follow up with fine and extra fine grit sandpaper. After smoothing out the larger blemishes with medium grit sandpaper, use fine 100-grit sandpaper to level and smooth the surface. Follow that up with an extra-fine 220-grit sandpaper to create the smoothest surface possible.[9] [10]
- The smoother the surface, the better your clear coat will adhere and look.
-
4Vacuum up the sanding dust with a shop vac. Use a vacuum with a soft bristle attachment to get rid of all the dust on your project's surface. Vacuum the area around the project, as well. It's important that you rid the area of all dust generated by your sanding. Otherwise, that dust can end up trapped and visible beneath the clear coat.[11]
-
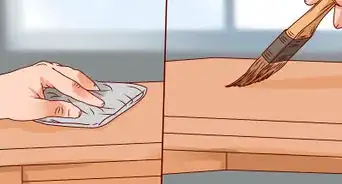
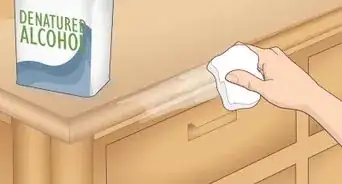
5Wipe down the surface with a cloth moistened with mineral spirits. Use a lint-free cloth to ensure no traces of the cloth's material are left behind. Dampen the cloth with mineral spirits and wipe down the entire surface. Be sure to get into the nooks and crannies. Then go over the surface one final time with a dry tack cloth.[12]


Sealing the Surface
-
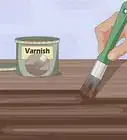
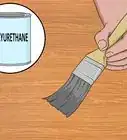
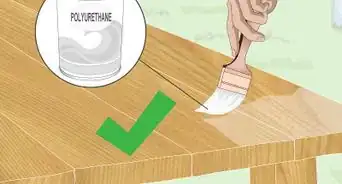
1Use an oil-based polyurethane and a foam or natural bristle brush. Oil-based polyurethane in a satin sheen is an excellent all-purpose clear coat that is relatively easy to apply. Purchase this and your foam brush at a hardware or home improvement store.[13]
- Foam brushes are recommended because they are inexpensive, and you can toss them out when you’re done.
- Natural bristle brushes are also a great choice, although they are more expensive and not disposable.
-
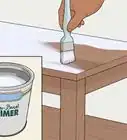
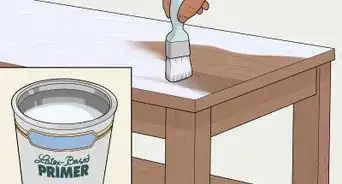
2Create sealer by combining 1 part mineral spirits and 2 parts polyurethane. You can create your own homemade sealer by thinning the polyurethane with paint thinner. Stir the polyurethane well, then combine it with the mineral spirits in a glass jar or plastic bucket. Stir gently with a wooden wand to combine the ingredients.
- Creating a homemade sealer is the easiest and most economical choice.
-
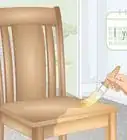
3Brush on 1 coat of the sealer with long, even strokes. Dip your brush into the sealer to load it with product. Starting on 1 side of your project and working systematically to the other side, brush on the sealer with long, even strokes.[14]
- Watch for dripping. If you notice any drips, brush over them to smooth them out.
-
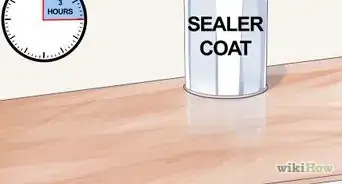
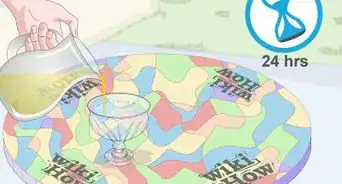
4Wait for 5 minutes and examine the surface once more for dripping. Because the sealer is pretty thin, dripping can be a problem. You definitely don't want any drips to dry on the surface, since this will disturb your smooth finish. Give the coat of sealer about 5 minutes to dry, then examine the surface once more for drips. Smooth out any that you see with your brush.[15]
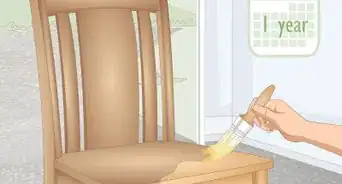
- Leave this to cure for 12-24 hours.


Applying the First 2 Coats
-
1Apply the first coat of straight polyurethane from the can. Dunk your brush into the full-strength polyurethane and brush it onto the surface. Start on 1 side of the project and work systematically to the other side. Use long, even strokes. Stretch out the finish as thin as possible.[16]
-
2Brush on a second undiluted coat of polyurethane. Once the entire surface is wet with your first coat, go back over it with another coat of full-strength polyurethane straight from the can. Use long, even strokes. Overlap each stroke to ensure smoothness.[20]
- Watch for any drips and smooth them out with your brush as they occur.
-
3Check for drips and then let the finish dry for 24 hours. Wait 5 minutes after application and then examine the surface a final time for drips. If you find any, use your brush to smooth them out. Before moving on to your final coat, let the first 2 cure completely over a 24 hour period.
- Make sure the surface is fully dry to the touch before proceeding.

Applying the Final Coat
-
1Sand the surface with 280-grit sandpaper. Rub the sandpaper over the surface of your wood until it feels smooth to the touch. Inspect the surface closely and smooth out any major bubbles, specks, and runs. You want the wood to be as smooth as possible before adding the last coat of polyurethane.[21]
-
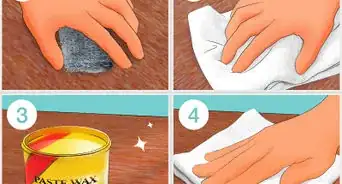
2Wipe down the surface with a tack rag. A tack rag is a sticky cloth that you can purchase at home improvement stores. Use it to remove as much sanding dust as you can from the surface. The smoother the surface, the better the project will look after the final coat.[22]
- If you don’t have a tack rag, you can use a moistened lint-free cloth or a vacuum cleaner.
-
3Apply a full-strength final coat. Just as you did with the initial coats, brush the polyurethane onto the surface, working systematically from one side of the project to the other. Pop any bubbles you see by brushing back over the finish. Move in the direction of the wood grain.[23]
- Always stretch the polyurethane as thin as you can.
- Let the surface cure for 24 hours.
Expert Q&A
-
QuestionHow do I get a smooth clear coat finish on wood?
 William & Shannon LatilWilliam & Shannon Latil are Furniture Refinishing & Home Remodeling Specialists and the Founders of Furniture Refinishing Services based in Houston, Texas. With over 30 years of experience, William and Shannon specialize in repairing and restoring wood furniture, refinishing kitchen cabinets, remodeling kitchens, and building live-edge wooden tables. William and Shannon have won Awards for Excellence from the Better Business Bureau and the Houston Chronicle Best Small Business Award. Their work has also been featured in Houston Press Magazine - Kitchen Design. Additionally, the Furniture Refinishing Services team has conducted major refinishing work on venues such as NRG Stadium and Minute Maid Park.
Furniture Refinishing & Home Remodeling SpecialistsSanding the wood will leave it very, very smooth to the touch. In order to not rash, make sure you apply the finish evenly over the entire piece — if you apply too much finish, it will be too tick and will rash.
Things You’ll Need
- Oil-based polyurethane
- Foam or natural bristle brush
- Clean bucket or glass jar
- Paint thinner
- Lint-free cloth
- Wooden wand or stirrer
- 100-grit sandpaper
- 150-grit sandpaper
- 220-grit sandpaper
- 280-grit sandpaper
- Tack rag (or vacuum cleaner)


References
- ↑ https://www.popularwoodworking.com/techniques/finishing/finishing-for-first-timers
- ↑ https://www.familyhandyman.com/project/how-to-apply-polyurethane/
- ↑ William & Shannon Latil. Furniture Refinishing & Home Remodeling Specialists. Expert Interview. 29 October 2021.
- ↑ https://www.familyhandyman.com/project/how-to-apply-polyurethane/
- ↑ https://thediyplan.com/what-is-a-sanding-sponge/
- ↑ Sarah Fogle. DIY Specialist. Expert Interview. 10 August 2021.
- ↑ https://www.mymove.com/home-inspiration/painting/remove-paint-from-wood/
- ↑ Sarah Fogle. DIY Specialist. Expert Interview. 10 August 2021.
- ↑ https://www.familyhandyman.com/project/how-to-apply-polyurethane/
- ↑ Sarah Fogle. DIY Specialist. Expert Interview. 10 August 2021.
- ↑ https://www.familyhandyman.com/project/how-to-apply-polyurethane/
- ↑ https://www.familyhandyman.com/project/how-to-apply-polyurethane/
- ↑ https://www.familyhandyman.com/project/how-to-apply-polyurethane/
- ↑ https://www.familyhandyman.com/project/how-to-apply-polyurethane/
- ↑ https://www.familyhandyman.com/project/how-to-apply-polyurethane/
- ↑ https://www.familyhandyman.com/project/how-to-apply-polyurethane/
- ↑ William & Shannon Latil. Furniture Refinishing & Home Remodeling Specialists. Expert Interview. 29 October 2021.
- ↑ https://www.popularwoodworking.com/techniques/finishing/finishing-for-first-timers
- ↑ William & Shannon Latil. Furniture Refinishing & Home Remodeling Specialists. Expert Interview. 29 October 2021.
- ↑ https://www.familyhandyman.com/project/how-to-apply-polyurethane/
- ↑ https://www.familyhandyman.com/project/how-to-apply-polyurethane/
- ↑ https://www.familyhandyman.com/project/how-to-apply-polyurethane/
- ↑ https://www.thisoldhouse.com/ideas/all-about-polyurethane
About This Article