This article was co-authored by wikiHow Staff. Our trained team of editors and researchers validate articles for accuracy and comprehensiveness. wikiHow's Content Management Team carefully monitors the work from our editorial staff to ensure that each article is backed by trusted research and meets our high quality standards.
There are 11 references cited in this article, which can be found at the bottom of the page.
This article has been viewed 20,750 times.
Learn more...
Adding some wallpaper to surfaces can give new life to an old set of drawers, a night stand, a desk, or pretty much any other piece of furniture you want to rejuvenate or update to match your decor. This custom update doesn’t take a lot of materials or time to do. Depending on the size of the furniture you want to cover with wallpaper and how many surfaces you actually want to cover, you can probably get the job done on a rainy Saturday afternoon and have your furniture ready to use by Sunday morning!
Steps
Prep Work
-
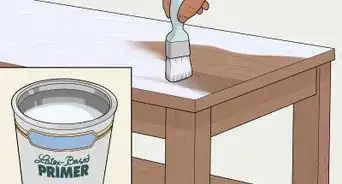
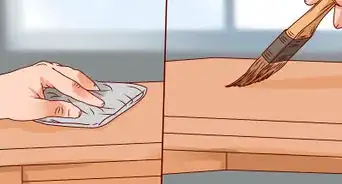
1Wipe down the piece of furniture using a damp sponge. Get a clean sponge wet and wring out the excess water. Use it to clean off the piece of furniture you want to cover with wallpaper, paying special attention to the surfaces you plan to actually stick wallpaper onto. Wait for the furniture to air dry.[1]
- Any dirt or grit on the surfaces of your furniture interferes with the wallpaper’s adherence and can ruin a smooth finish, so that’s why it’s important to clean off the furniture first.
- There’s no limit to the types of furniture you can update with wallpaper. Try wallpapering bookshelves, night stands, dressers, cabinets, coffee tables, and anything else you think is in need of a new look!
- Note that you can wallpaper furniture made out of pretty much any material. However, if you want to stick wallpaper to glass, you must use peel-and-stick wallpaper because traditional wallpaper and glue won’t stick well to glass. Wood is the best surface for using regular wallpaper and glue on.
-
2Remove any drawers and doors from the piece. Pull out drawers that you want to cover in wallpaper or that may get in the way of you covering other surfaces. Unscrew any doors and take them off their hinges if you want to cover them or if they’re in the way as well.[2]
- For example, you could take all the drawers out of your old, dingy dresser and cover the front of each drawer with a fun, brightly-colored, patterned wallpaper. You could also cover the top of the dresser with the same wallpaper to make it match.
Advertisement -
3Take off any hardware that’s in the way where you want to add wallpaper. Unscrew and remove handles from any drawers and doors you’re planning to cover in wallpaper. Unscrew and remove other hardware, such as hinges, if it is in the way of surfaces you’re covering with wallpaper.[3]
- For example, if you’re covering the door of a kitchen sideboard in wallpaper, take the handle off the door. If you’re going to cover the outside or inside of the cabinet as well, remove the hinges from the sideboard so they don’t get in the way.


Wallpaper
-
1Place the wallpaper over a surface and crease it over the surface’s edges. Line up a piece of wallpaper on top of the surface you want to stick it to. Fold over the edges and use your fingers to firmly crease the wallpaper where you fold it to make your cut lines.[4]
- If you want to cover the edges of a surface as well, just fold the wallpaper over and under the edge and make 2 crease lines. The second crease is your cut line.
- You can use either peel-and-stick wallpaper or regular wallpaper to cover your furniture.
-
2Cut the wallpaper where you creased it using a craft knife and a piece of cardboard. Place the piece of wallpaper print-side-down on a piece of cardboard. Slice very carefully straight along the creases you made using a sharp craft knife.[5]
- You can also use a utility knife or box cutter instead of a craft knife.
- You can use a cutting mat instead of cardboard if you have one..
-
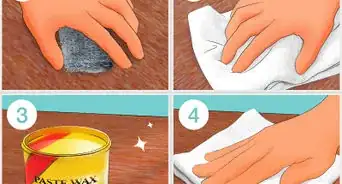
3Peel the backing off or apply a coat of Mod Podge to the back of the wallpaper. Just pull the backing off the adhesive side of the wallpaper if you’re using peel-and-stick wallpaper. Use a sponge brush to apply a thin coat of Mod Podge to the backside of the wallpaper if you’re using regular wallpaper.[6]
- If you’re using Mod Podge to stick regular wallpaper to your piece of furniture, you could also apply a thin coat of glue to the surface you’re covering instead of to the back of the wallpaper.
-
4Line the wallpaper up over the surface and press it onto the surface. Carefully position the wallpaper where you want to stick it. Press it down firmly against the surface when you’re sure it’s oriented correctly and smooth it out using your hands.[7]
- If you’re wrapping wallpaper around the edges of a surface, the corners can be tricky. Use your craft knife to carefully make a horizontal cut in the wallpaper, parallel to the edge of the surface, in each corner. Fold the flap you create neatly over the edge at the corner.
- If you’re covering multiple surfaces next to one another, such as several consecutive drawers, use consecutive smaller pieces of wallpaper from the larger roll so the wallpaper’s pattern lines up from one drawer to the next.
-
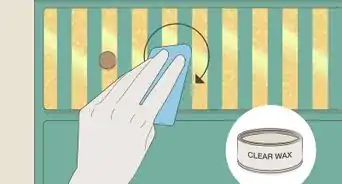
5Run a brayer along the paper from one end to the other to smooth out bubbles. A brayer is a small hand roller made of rubber or another similar material that is typically used to apply ink in printing. Start at one end of the surface you just covered in wallpaper and roll a brayer firmly along the wallpaper all the way to the other end to smooth out the wallpaper. Go back to the side you started from and repeat the process, working your way down the surface and from side to side, until you get rid of all the bubbles.[8]
- If you don’t have a brayer, you could use something with a hard flat edge, such as a plastic ruler or a plastic putty knife, to smooth out the wallpaper.


Reassembly
-
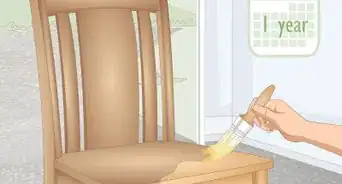
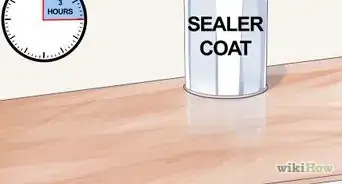
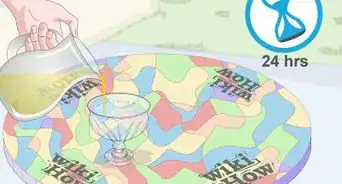
1Let the wallpaper dry overnight before you do reassembly if you used glue. Leave the piece of furniture disassembled if you covered it in regular wallpaper using Mod Podge to stick it on. This allows the glue plenty of time to cure.[9]
- If you try to put your furniture back together right away, you might accidentally unstick some of the wallpaper, so it’s best to let the glue cure all the way.
- This isn’t necessary if you used peel-and-stick wallpaper.
-
2Reattach all the hardware you removed. Screw handles back into drawers and doors. Put any hinges and other hardware you removed back on as well.[10]
- You can just use all the old hardware or you can replace the hardware with different varieties that go with the new wallpaper you applied to your furniture if you want to.
-
3Screw doors back onto the furniture and replace all the drawers. Put any doors you removed back on the hinges. Slide any drawers back into the slots they belong in.[11]
- Keep in mind that wallpaper can get damaged by heat and liquids, so exercise caution if you’re using the surface you covered in wallpaper to set things like mugs on. You can use coasters or even get a piece of glass or plexiglass cut to set on top of the wallpaper and protect it.


Warnings
- Be careful when you’re using a sharp craft knife to cut wallpaper. Keep your fingers and hands away from the cut line and don’t cut on top of any surfaces that you don’t want to damage.⧼thumbs_response⧽
Things You’ll Need
- Piece of furniture
- Sponge
- Water
- Screwdriver
- Craft knife
- Cardboard
- Wallpaper
- Mod Podge
- Sponge brush
- Brayer


References
- ↑ https://www.youtube.com/watch?v=PRfZRYU9JYk&feature=youtu.be&t=25
- ↑ https://thehomesihavemade.com/2018/06/how-to-update-furniture-with-wallpape
- ↑ https://www.youtube.com/watch?v=459OSMwOj78&feature=youtu.be&t=25
- ↑ https://www.designsponge.com/2010/09/before-and-after-basics-wallpaper-detail.html
- ↑ https://www.redbookmag.com/home/decor/how-to/g426/decorate-an-old-dresser/?slide=6
- ↑ https://www.redbookmag.com/home/decor/how-to/g426/decorate-an-old-dresser/?slide=7
- ↑ https://thehomesihavemade.com/2018/06/how-to-update-furniture-with-wallpaper/
- ↑ https://modpodgerocksblog.com/vintage-wallpaper-magnetic-chalkboard/
- ↑ https://www.redbookmag.com/home/decor/how-to/g426/decorate-an-old-dresser/?slide=8
About This Article