This article was co-authored by Jeff Baldwin. Jeff Baldwin is a Residential Painter and the Owner of Baldwin Custom Painting. With two decades of painting experience, Jeff specializes in high-end residential and small commercial painting projects. Dedicated to quality craftsmanship, Jeff and Baldwin Custom Painting provide bonded/insured, licensed, and lead-safe certified services in residential painting, light commercial painting, and wood refinishing.
There are 9 references cited in this article, which can be found at the bottom of the page.
This article has been viewed 49,541 times.
Elastomeric paint is great for exteriors because it can fill in minor cracks, it stretches, and it's water resistant. You apply it like you would most paints, using a brush, roller or sprayer. Before you begin, though, you need to make sure the surface is clean. Then figure out exactly how much paint you need to buy to cover the area.
Steps
Preparing the Surface for Paint
-
1Power wash the surface for a sure clean. The best way to ensure your surface is clean is to power wash it at a pressure of 2,000 to 2,500 psi. It's always a good idea to test the pressure on your surface, because it can cause damage. You may need to use a lower pressure or another cleaning method if washing at these pressure levels causes damage.
- Don't add cleaner or bleach to the water when power washing.[1]
-
2Use a stiff broom or wire brush if you don't have a power washer. Another option for cleaning the surface is to brush the dirt away. You will need to use a strong brush, such as a wire brush or sturdy broom, and you may still need to wash it with water or a cleaner when you're done.[2]Advertisement
-
3Try a cleaner designed for paint preparation if needed. If you do need to use a cleaner on the surface, pick one that's meant to clean the surface before painting, such as trisodium phosphate which removes oxidation. Apply the cleaner to the surface according to the bottle's directions. Thoroughly rinse the product off so you don't leave any on the surface.
-
4Test for cleanliness after the surface dries. The area needs to air dry before you make sure it's clean or try to paint. Leave it to dry out for at least an hour or so, and then perform a tape test to check if it's clean. Put a strip of masking tape on the surface you plan to paint. Pull off the tape and examine the sticky side. If you see dirt or contaminants, your wall needs further cleaning.
-
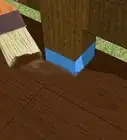
5Seal cracks larger than 1⁄16 inch (0.16 cm) with caulk. While elastomeric paint does fill in smaller cracks, you should fill in most cracks with acrylic or siliconized caulk. Use a caulk gun to fill the crack, and then smooth it out with a putty knife.[3] If you're filling in a large crack, use layers to fill it in, letting it dry in between.[4]
- Let the caulk dry overnight. If the caulk isn't flat after drying, sand it down until it is.
- Avoid using pure silicone caulks.
-
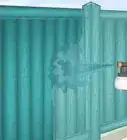
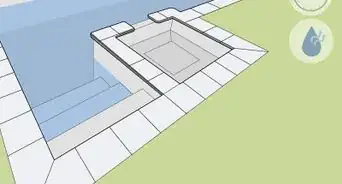
6Apply a sealer as needed. If you're working with a porous or chalky surface, you may need to apply a sealer or primer. Similarly, if you're working with newer masonry (less than a month old), you should also apply a sealer. Apply 1-2 coats to the surface, based on what the manufacturer's instructions say.[5]


Determing How Much Paint You'll Need
-
1Divide the area into simple shapes. First, determine the square footage or meterage of the space you're covering. Divide it into simple shapes as needed, such as rectangles and triangles, and then measure each piece. You can round up to the next whole foot or meter to make it easier.[6]
- For instance, say you're covering 2 walls that are 20 by 12 feet (6.1 by 3.7 m), 2 walls that are 15 by 12 feet (4.6 by 3.7 m), and a triangle that has a base of 15 feet (4.6 m) and a height of 8 feet (2.4 m).
-
2Calculate the area of each simple shape. Now, use the measurements to find the area of each shape. To find the area of a square or rectangle, multiply the length by the height. For a triangle that has 2 equal sides, multiply the length by the height and divide by 2.
- To find the square footage or meterage (area) of the first 2 walls, multiply the length by the height: 20 feet (6.1 m) x 12 feet (3.7 m) = 240 square feet or 22.6 square meters. Multiply that by 2 to get the area for the first 2 walls: 480 square feet or 45.2 square meters.
- Find the area of the second 2 walls: 15 feet (4.6 m) x 12 feet (3.7 m) = 180 square feet or 17 square meters. Multiply by 2 for the 2 walls to get 360 square feet or 34 square meters.
- For the triangle, multiply the length times the height, and then divide by 2 to find the area: 15 feet (4.6 m) x 8 feet (2.4 m) = 120 square feet or 11 square meters / 2 = 60 square feet or 5.5 square meters.
-
3Add up your simple shape areas to get the total area. Once you've figured out each area, add them all together to determine the square footage or meterage of the area you want to paint. In this case, add the following: 480 ft2 (45.2 m2) + 360 ft2 (34 m2) + 60 ft2 (5.5 m2) = 900 ft2 (84.7 m2).[7]
- Even if you've been rounding up your figures, you still may want to add 5% - 10% to your total -- you don't want to run out of paint in the middle of the job!
-
4Apply your calculations to buying paint. At the recommended thickness, you'll need 1 55-pound (25-kilogram) pail to cover 250 to 375 ft2 (23 to 35 m2) for 1 coat on a porous surface, which you'll need to double for the second coat. On a smooth, filled-in surface, you'll need 1 55-pound (25-kilogram) pail to cover 700 to 800 ft2 (65 to 75 m2) for 1 coat. Again, you'll need to double the amount.[8]
- Double your square footage/meterage for 2 coats, then divide by the average square footage/meterage 1 pail covers: 900 ft2 (84.7 m2) x 2 = 1,800 ft2 (169.4 m2) / 312.5 ft2 (29 m2) = 5.8. Round up to get 6 pails.
- Do the same for a smooth surface: 900 ft2 (84.7 m2) x 2= 1,800 ft2 (169.4 m2); 1,800 ft2 (169.4 m2) / 750 ft2 (70 m2) = 2.4. Round up to 2.5 or 3 pails.
- Remember to round up to make sure you have enough paint.


Painting the Surface with Elastomeric Paint
-
1Wait for ideal conditions. The temperature must be over 40 °F (4 °C) for the paint to dry properly. Also, it's best to work in dry conditions. If you can't, you'll need to protect the area from rain with an awning or tarp so it doesn't get wet. If it's foggy or dewy, you also should wait to do the work.[9]
- Painting in hot, humid weather and direct sunlight may also lead to problems.[10] It can affect the drying process and the final look of the paint.
-
2Mix the paint with a stir stick. Like any paint, elastomeric paint may settle a bit over time. You need to mix it with a paint stick so it has the same consistency throughout. Try not to create bubbles in the mixture.[11]
- You may need to thin it a bit if you're spraying it on, but never add more than about 16 fluid ounces (470 ml) per pail. You will also need to strain the paint with a paint strainer for spray applications.
-
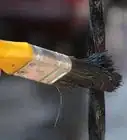
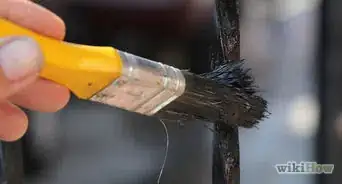
3Start with a damp brush or roller. Use a latex brush or roller to apply the paint.[12] Before you begin, get the brush or roller wet, and then squeeze out the extra water. If you have any areas that might have dust, rub some elastomeric on with a floor brush to make the elastomeric stick better (elastomeric will not stick to dust). [13]
-
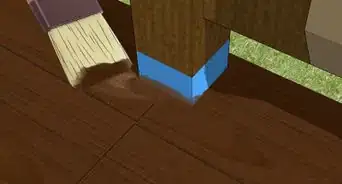
4Work in small areas to apply the paint with a "V" shape. Roll or brush the paint on. Paint in a "v" shape to get better coverage. Make sure you're not leaving any areas unpainted.[14]
- If you're using a sprayer, go over the area in a consistent motion, making sure you cover all of it in an even coat.
-
5Create thick coats of paint. If you put polyurethane mesh (which is sold in rolls of 6 inches up to rolls of 4 feet) over the first coat it will prevent the elastomeric from cracking. Apply the paint at the thickness directed by the manufacturer. The coats for this paint are relatively thick, which is what fills in some cracks and provides weatherproofing. However, you must pay attention to the thickness of the paint to get these benefits. The best way to achieve the correct thickness is to follow the manufacturer's instructions for applying the paint.[15] '
- You can buy machines that measure thickness, but they tend to be somewhat expensive if you're just doing 1 paint project.
-
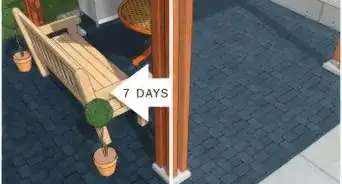
6Apply the second coat after the first one dries. Wait for the first coat to dry, which should take about 4 to 6 hours. Once it does, apply the second coat in the same way you applied the first. Let it dry as well.[16]
-
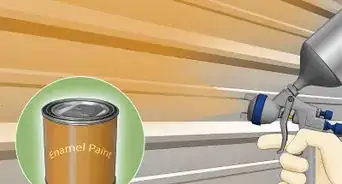
7Apply a conventional paint on top if you want a darker color. Elastomeric paints don't do well in dark colors. They have a tendency to take on a chalky appearance, particularly when in direct sun. Because of this tendency, you won't find many dark colors in this type of paint. If you want a darker color, apply 2 coats of a conventional paint, such as 100% acrylic latex flat or satin-finish exterior paint, over the elastomeric paint.[17]


Expert Q&A
-
QuestionHow can I get rid of paint smells?
 Jeff BaldwinJeff Baldwin is a Residential Painter and the Owner of Baldwin Custom Painting. With two decades of painting experience, Jeff specializes in high-end residential and small commercial painting projects. Dedicated to quality craftsmanship, Jeff and Baldwin Custom Painting provide bonded/insured, licensed, and lead-safe certified services in residential painting, light commercial painting, and wood refinishing.
Residential PainterYou can open windows, burn candles, or turn on the fireplace if weather permits it, and you have one. It is not good to use smelly paint additives. They tend to have a strong perfume smell. -
QuestionWhat is the best way to dispose of paint?Jeff BaldwinJeff Baldwin is a Residential Painter and the Owner of Baldwin Custom Painting. With two decades of painting experience, Jeff specializes in high-end residential and small commercial painting projects. Dedicated to quality craftsmanship, Jeff and Baldwin Custom Painting provide bonded/insured, licensed, and lead-safe certified services in residential painting, light commercial painting, and wood refinishing.
Residential PainterThe best way to dispose of paint is to take it to a recycling center. You can also give it to a paint store that accepts used paint. -
QuestionWhat should I do if I want to paint my house?Jeff BaldwinJeff Baldwin is a Residential Painter and the Owner of Baldwin Custom Painting. With two decades of painting experience, Jeff specializes in high-end residential and small commercial painting projects. Dedicated to quality craftsmanship, Jeff and Baldwin Custom Painting provide bonded/insured, licensed, and lead-safe certified services in residential painting, light commercial painting, and wood refinishing.
Residential PainterFirst, you should understand the substrate and look for suitable products. Instead of buying cheap products, get quality products that last long. Then look around your house and fix issues such as loose boards, wood rot, and fill holes with caulk. Finally, clean the surface that you plan to paint.


References
- ↑ http://www.paintquality.com/en/advice-and-tips/faq/exterior/elastomeric-wall-coatings
- ↑ Jeff Baldwin. Residential Painter. Expert Interview. 1 March 2021.
- ↑ Jeff Baldwin. Residential Painter. Expert Interview. 1 March 2021.
- ↑ http://www.paintquality.com/en/advice-and-tips/faq/exterior/elastomeric-wall-coatings
- ↑ https://www.naturalhandyman.com/iip/infpai/infelastomericpaint.html
- ↑ http://www.elrey.com/literature/PUSAECDS.pdf
- ↑ http://www.siding4u.com/estimating-siding-costs.php
- ↑ http://www.elrey.com/literature/PUSAECDS.pdf
- ↑ http://www.elrey.com/literature/PUSAECDS.pdf
- ↑ Jeff Baldwin. Residential Painter. Expert Interview. 1 March 2021.
- ↑ http://www.elrey.com/literature/PUSAECDS.pdf
- ↑ Jeff Baldwin. Residential Painter. Expert Interview. 1 March 2021.
- ↑ http://www.elrey.com/literature/PUSAECDS.pdf
- ↑ http://www.paintpro.net/Articles/PP505/PP505_Elastomerics.cfm
- ↑ http://www.paintpro.net/Articles/PP505/PP505_Elastomerics.cfm
- ↑ http://www.elrey.com/literature/PUSAECDS.pdf
- ↑ http://www.paintquality.com/en/advice-and-tips/faq/exterior/elastomeric-wall-coatings
About This Article