This article was co-authored by Lindsay Yoshitomi. Lindsay Yoshitomi is the nail artist behind the blog, Lacquered Lawyer. She was featured as one of Nail It! magazine’s “Bloggers You Should Know,” and has been on the cover of Nail Art Gallery Magazine. She has been practicing nail art for over 15 years.
There are 12 references cited in this article, which can be found at the bottom of the page.
This article has been viewed 74,180 times.
One of the best ways to add a little more sparkle to your life is a glitter manicure. If you don't want to use glitter nail polish, you can apply loose glitter over regular nail polish. The benefits of doing things this way is that you can choose between regular and gel polish. Best of all, the color possibilities are endless. Once you get the hang of it, you can even try doing some nail art instead!
Steps
Using Regular Nail Polish
-
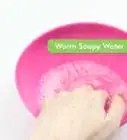
1Clean, trim, and shape your nails. Wipe your nails down with nail polish remover. This will get rid of any old polish, dirt, and oils. Trim your nails down with clippers, then shape them with a file. If you need to, use an orange stick or a cuticle pusher to push back the cuticles.
-
2Apply a base coat and base color. Apply a thin layer of base coat to each nail, then let it dry. Follow up with a single coat of your desired nail polish to each nail. Wait for the polish to dry before continuing.[1]
- Your nail polish can be flat, matte, or pearlescent, but it needs to match the glitter that you will be using.
Advertisement -
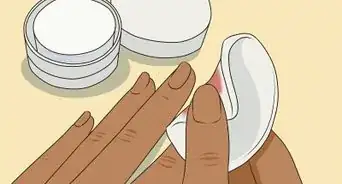
3Apply a second coat of nail polish to your first nail. Don't do the other nails just yet. You need the nail polish to be wet in order for the next step to work. If you paint all of the nails now, the polish will dry and the glitter won’t stick.[2]
-
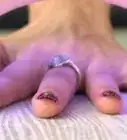
4Shake some glitter onto your nail. Tilt your nail around as you shake the glitter onto it so that gets evenly coated. Work over a sheet of paper to catch the excess glitter that falls off your nail. You can use nail art glitter, as well as cosmetic-grade glitter or even crafting glitter.[3]
- If you are using crafting glitter, be sure to use the finest grain you can find.
-
5Tap the excess glitter off and let the polish dry. Twist your hand so that your nail is facing the paper. Gently tap your finger with your other finger. This will knock off any loose glitter. Next, flip your finger back over and wait for your nail to dry. This can take a few minutes, so you can move on to your other nails at this point.[4]
-
6Repeat the process for your other nails. Work one nail at a time. Apply a thin coat of nail polish, then shake on the glitter. Tap the excess glitter off, then move onto the next nail. Make sure that all of your nails are nails are dry before moving onto the next step.
-
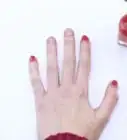
7Gently brush the excess glitter off with a soft brush once the polish is dry. Run a soft eyeshadow brush over each nail, starting at the nail bed and finishing past the tip. This will knock off any excess bits of glitter that did not stick and give you a smoother finish.[5]
-
8Apply 2 layers of clear top coat, allowing each one to dry in between. Apply a thin layer of clear top coat to each nail. Wait for the top coat to dry, then apply a second layer to each nail. Allow that layer to dry as well.[6]
-
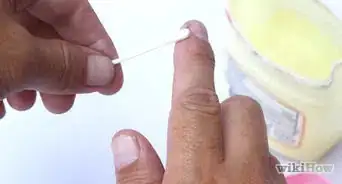
9Clean the manicure up. Use a thin brush dipped in nail polish remover to wipe away any nail polish stuck to the skin around your nails. If you notice any roughness along the tips, you can gently sand it away with a nail file.

Using Gel Nail Polish
-
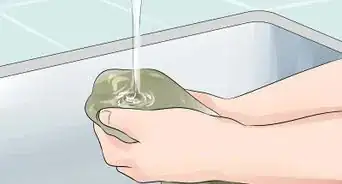
1Clean, trim, and file your nails. Wipe your nails down with a gel cleanser first. Trim and shape them as desired with clippers and a nail file. Use an orange stick or a cuticle pusher to push back your cuticles, if needed.[7]
-
2Brush on your pre-gel primer and base coat. Apply a thin coat of pre-gel primer and let it air dry for 30 seconds. Brush on a thin layer of gel base coat, then let it cure under a UV lamp for 1 to 2 minutes.[8]
- If you got any gel base coat onto your skin, be sure to wipe it off with an orange stick before curing it.
-
3Apply a thin coat of your desired gel polish and let it cure for 1 to 2 minutes. Don't worry if the polish looks thin now; you will eventually be doing a second coat. Choose a color that is similar to the glitter that you will be using.[9]
-
4Brush on another coat of polish, then immediately add the glitter. Apply a thin coat of gel polish to your first nail. While the polish is still tacky, sprinkle your desired glitter over it. Gently pat it down with a fan-shaped brush, then blow off any excess glitter. Don't do the other nails just yet.[10]
- You can use nail art glitter, cosmetic glitter, or even extra-fine scrapbooking glitter!
-
5Cure the polish, then remove the excess glitter. Allow your nail to cure beneath the UV lamp for 1 to 2 minutes. Use an orange stick or a tissue to wipe off any excess glitter. Focus especially on the skin around your nails.[11]
-
6Do the rest of your nails, then seal the glitter with clear gel top coat. Apply a medium to thick layer of clear gel top coat to your nail. Allow it to cure beneath the UV lamp for 2 to 3 minutes. The thick top coat will help make your nails smoother. If you want a rough texture, use a thinner layer of gel top coat instead.[12]
-
7Wipe your nails with gel cleanser. Gel manicures are usually still tacky after you finish curing them. You can fix this by wiping the nails down with a cotton ball soaked in gel cleanser. File away any roughness on the tips of your nails with a nail file.[13]
Doing Glitter Nail Art
-
1Clean, cut, and shape your nails. Wipe your nails down with nail polish remover to clean off any existing nail polish, dirt, and oils. Trim and shape your nails with clippers and a nail file. Use an orange stick or a cuticle pusher to push back the cuticles.
-
2Apply a base coat and a base color and let them dry. Apply your usual base coat first. Let it dry, then apply 1 to 2 coats of your desired base color. A flat, neutral color, such as buff will work great. You can also go with other colors and finishes as well, including matte and pearlescent.
-
3Block off the areas you don't want glittered with pieces of tape. Tap the tape against your skin first to make it less sticky, then lay it down across your nail. You can do it vertically, horizontally, or even diagonally. You can even use multiple strips to create a striped or banded effect![14]
- Use circle stickers to create a French tip!
- For a polka-dot effect, skip the tape and use a tiny brush or a toothpick to make little dots of clear polish instead. Do just one nail for now.[15]
-
4Paint a coat of clear polish onto your first nail, then remove the tape. Only do one nail for now. Apply a thin layer of clear nail polish over your first nail, then quickly peel the tape off. The glitter will only stick to the part with the top coat.[16]
- If you are doing the polka-dot effect, skip this step.
-
5Sprinkle loose glitter over the wet polish. You can use special nail art glitter, cosmetic glitter, or even craft glitter. If you choose to use craft glitter, consider getting the finest type you can find; this will give you a smoother look.[17]
-
6Wait 1 minute before brushing the excess glitter off. Allow the polish to dry for 1 minute. Next, use the fan brush to gently brush the excess glitter away. Focus on the painted part of the nail that you did not cover with glitter.[18]
-
7Repeat the process for the rest of your nails. Remember to work one nail at a time. Apply the clear nail polish, then peel the tape off. Sprinkle the glitter on, pat it in place, wait 1 minute, then brush the excess off.[19]
-
8Apply a thin layer of clear top coat over each nail. Be sure to cover the glittered part as well. If you want to, you can use this time to apply tiny nail art gems to complete the look. Be sure to apply them while the top coat is still wet, however, or they won't stick![20]
- If you used matte polish as your base coat, you'll need to use a glossy top coat over the glittered part and a matte top coat over the un-glittered (matte) part.
-
9Clean your manicure up. If you got any glitter or polish onto your skin, use a brush dipped in nail polish remover to wipe it off.[21]

Things You'll Need
Using Regular Nail Polish
- Nail polish remover
- Nail clippers
- Nail file
- Orange stick
- Base coat
- Top coat
- Nail polish
- Glitter
- Soft eyeshadow brush
Using Gel Nail Polish
- Gel nail cleanser
- Nail clippers
- Nail file
- Orange stick
- Gel nail primer
- Gel base coat
- Gel top coat
- Gel nail polish
- Glitter
- UV lamp for gel manicures
Doing Glitter Nail Art
- Nail polish remover
- Nail clippers
- Nail file
- Orange stick
- Base coat
- Top coat
- Nail polish
- Glitter
- Fan brush

References
- ↑ https://www.youtube.com/watch?v=h4w6bJY0834&feature=youtu.be&t=2m38s
- ↑ https://www.youtube.com/watch?v=h4w6bJY0834&feature=youtu.be&t=2m43s
- ↑ https://www.youtube.com/watch?v=h4w6bJY0834&feature=youtu.be&t=2m50s
- ↑ https://www.youtube.com/watch?v=h4w6bJY0834&feature=youtu.be&t=3m2s
- ↑ https://www.youtube.com/watch?v=h4w6bJY0834&feature=youtu.be&t=3m9s
- ↑ https://www.youtube.com/watch?v=h4w6bJY0834&feature=youtu.be&t=3m16s
- ↑ https://www.rocknrollbride.com/2014/03/diy-tutorial-glitter-gel-manicure/
- ↑ https://www.rocknrollbride.com/2014/03/diy-tutorial-glitter-gel-manicure/
- ↑ https://www.rocknrollbride.com/2014/03/diy-tutorial-glitter-gel-manicure/
- ↑ https://www.rocknrollbride.com/2014/03/diy-tutorial-glitter-gel-manicure/
- ↑ https://www.rocknrollbride.com/2014/03/diy-tutorial-glitter-gel-manicure/
- ↑ https://www.rocknrollbride.com/2014/03/diy-tutorial-glitter-gel-manicure/
- ↑ https://www.rocknrollbride.com/2014/03/diy-tutorial-glitter-gel-manicure/
- ↑ http://nailthataccent.com/loose-glitter/
- ↑ https://www.collegefashion.net/beauty-and-hair/diy-nail-art-tutorial-loose-glitter/
- ↑ http://nailthataccent.com/loose-glitter/
- ↑ http://nailthataccent.com/loose-glitter/
- ↑ http://nailthataccent.com/loose-glitter/
- ↑ http://nailthataccent.com/loose-glitter/
- ↑ http://nailthataccent.com/loose-glitter/
- ↑ http://nailthataccent.com/loose-glitter/
- ↑ https://www.allure.com/story/best-nail-polish-hacks
- ↑ Lindsay Yoshitomi. Nail Artist. Expert Interview. 12 July 2019.
- ↑ http://nailthataccent.com/loose-glitter/
- ↑ https://www.youtube.com/watch?v=h4w6bJY0834&feature=youtu.be&t=4m45s
- ↑ http://nailthataccent.com/loose-glitter/
- ↑ http://nailthataccent.com/loose-glitter/
- ↑ Lindsay Yoshitomi. Nail Artist. Expert Interview. 12 July 2019.
About This Article

A glitter manicure is a fun way to spice up your look without too many extra supplies. To start, apply a base coat and a base color as you normally would. Then, apply a second coat of base color. While the polish is still wet, shake glitter onto each nail until they’re totally covered. You can use nail art glitter or just regular crafting glitter since either will work fine. Tap the excess glitter off your nails, then wait for the polish to dry completely. Once they’re dry, apply 2 layers of clear topcoat to hold the glitter in place. To learn how to give yourself a gel glitter manicure, read on!