This article was medically reviewed by Janice Litza, MD. Dr. Litza is a board certified Family Medicine Physician in Wisconsin. She is a practicing Physician and taught as a Clinical Professor for 13 years, after receiving her MD from the University of Wisconsin-Madison School of Medicine and Public Health in 1998.
This article has been viewed 71,324 times.
If you're caring for a patient with a fracture or bone deformity, applying a skin traction may help them heal. Although this should only be done under a doctor's orders, we'll walk you through the basics of applying the traction and caring for the patient afterward.
Steps
Ensuring Safe, Consistent Traction
-
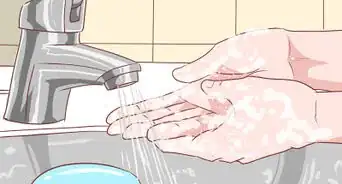
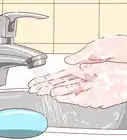
1Clean and shave the leg. Use soap and water to clean the limb. Make sure to clean the entire limb, not just the site of the injury. Shave the patient’s skin wherever traction straps will be applied. A single blade razor should be sufficient. Wipe away any leftover soap or shaving cream with a wet cloth and then pat dry with a clean towel. Make sure that the limb is totally dry.[1]
- Ask the patient if they are allergic to adhesive if adhesive skin traction has been prescribed (this is quite uncommon).
-
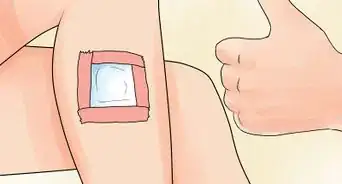
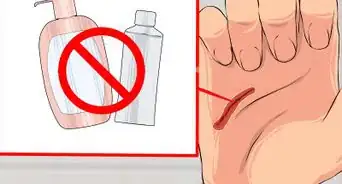
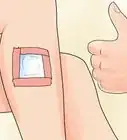
2Do not apply skin traction to damaged skin. Avoid using skin traction on a patient that has cuts, scrapes, or surgical incisions where you would need to apply the wrap. Similarly, do not use skin traction on a patient experiencing ulcers or numbness.[2]Advertisement
-
3Administer painkillers if prescribed. As skin traction can potentially be painful, a pain management strategy has likely been planned. Ensure that any necessary pain medication is administered and documented.[3]
-
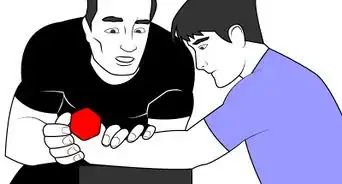
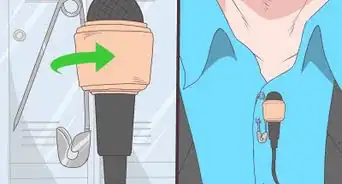
4Explain the procedure. Tell the patient why skin traction has been prescribed, and how it will help them. The procedure requires more explanation than some others, as the visual and tangible experiences associated with skin traction can be frightening. If administering skin traction to a child, explain the procedure to them as well.[4]
- For instance, explain what each piece of the traction apparatus is by saying something like "This material is called traction strapping. It adheres to the skin and helps pull your bone into the correct position." or "We will run this traction cord through this pulley, and attach a small amount of weight that will help keep your leg in alignment."


Applying Skin Traction to a Leg
-
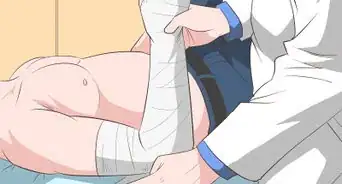
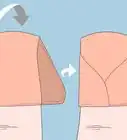
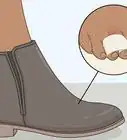
1Apply traction strapping. Gently lift the straightened leg and pull it away from the patient’s body in the direction of their sole. Apply traction starting at, but not above, the fracture line. Run strapping down one side of the leg, around a 3-inch (7.5 cm) spreader, and up the other side of the leg. The spreader should extend approximately 6 inches (15 cm) beyond the end of the patient’s leg. The extra strap beneath the foot will appear like a loose stirrup.[5]
- Instead of a spreader, your facility may be equipped with a foam and metal stirrup that can be bent around the heel and ankle of the injured leg and wrapped onto the strap.
-
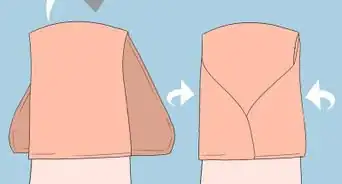
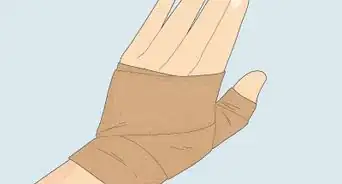
2Pad the ankles while wrapping the leg. At this point, you will carefully wrap the leg in crepe wrapping or gauze. As you do so, pad the sides of the ankle and any other bony areas, such as the sides of the knee. Wrap the leg in alternative spirals instead of consistent circles to reduce tightness. Start at the ankle and move upward in slow, even rotations. Conclude the wrap just before the end of the adhesive strip. The bandage should not go past the fracture.[6]
- If using a stirrup, make sure it is also wrapped securely into place above the traction tape.
-
3Elevate the leg. Usually, skin traction is used in tandem with weight resistance that helps apply pressure to the leg through the adhesive strip. If you’re using weights as well, elevate the leg. If possible, do so by elevating the end of the bed where the leg is resting. Once elevated, attach a traction cord through the spreader at the midpoint of the adhesive tape.[7]
-
4Apply weighted resistance as prescribed. If weighted skin traction is to be used, a doctor will have prescribed a specific amount of weight to be attached to the end of the traction cords. Depending on the injury, this traction cord may run over the end of the bed with the weights hanging below. Alternatively, some scenarios may call for the use of pulley systems, with the weight on one side and the suspended leg on the other.[8]
- Never exceed 11 lbs. (4.99 kg) of weight.
- You may need to shorten the traction cord to ensure that the weight is suspended in the air, as opposed to resting on the floor or bed.


Monitoring the Patient
-
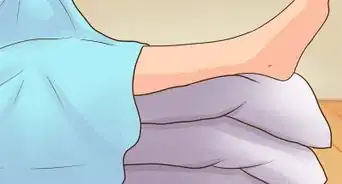
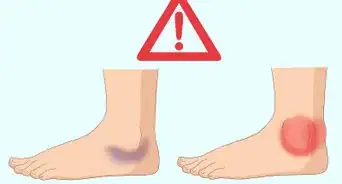
1Reduce pressure to keep skin healthy. The condition of the patient’s skin should be steadily monitored. In particular, blisters and pressure sores may develop. Check the patient’s legs, heels, and bottom for sores or discomfort from maintaining a constant position. Place a rolled up towel or pillow beneath the patient’s heel to relieve undesired pressure. Further, encourage the patient to slightly adjust their position once per hour.[9]
- If using adhesive, watch out for a rash or other allergic reaction, as the pressure induced by traction may cause a reaction in patients who do not know they are mildly allergic.
- Remove and reset the weight, including the stirrup, once every few hours to check skin condition.
- Change wet sheets immediately.
-
2Record neurovascular observations hourly. Neurovascular issues and/or compartment syndrome may develop from overly tight wraps. Watch out for signs that blood circulation has slowed, such as discoloration or numbness. Remove the wrap and reapply if any neurovascular signs change during application of skin treatment. Contact the orthopedic team if circulation doesn’t quickly return.[10]
-
3Keep the patient entertained. Though they are mostly immobile, try to keep the patient active. Have them sit up when able and read, do crafts, play games, or watch TV. This will improve comfort as well as hygiene. Further, constipation may also occur from immobility.[11]
- If the patient reports constant pain, ensure medication schedules have been kept, and contact a doctor if you feel those schedules may need to be revised.


Warnings
- Avoid wrapping in circular patterns around the injured limb, since this can easily cut off circulation. This is caused when the wrapping is wound too tightly.⧼thumbs_response⧽
- Because this treatment permanently alters the patient's bone structure, applying skin traction should always be done under the supervision of an orthopedic surgeon.⧼thumbs_response⧽
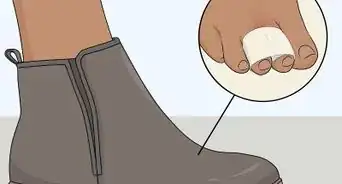
- Skin traction can easily cause blistering in older patients. Do not use this treatment option if your patient is more than 50 years of age.⧼thumbs_response⧽


References
- ↑ http://www0.sun.ac.za/ortho/webct-ortho/general/trac/trac-2.html
- ↑ http://www0.sun.ac.za/ortho/webct-ortho/general/trac/trac-2.html
- ↑ http://www.rch.org.au/rchcpg/hospital_clinical_guideline_index/Skin_Traction/
- ↑ http://www.rch.org.au/rchcpg/hospital_clinical_guideline_index/Skin_Traction/
- ↑ http://www.rch.org.au/rchcpg/hospital_clinical_guideline_index/Skin_Traction/
- ↑ http://www0.sun.ac.za/ortho/webct-ortho/general/trac/trac-2.html
- ↑ http://www.rch.org.au/rchcpg/hospital_clinical_guideline_index/Skin_traction/
- ↑ http://www.rch.org.au/rchcpg/hospital_clinical_guideline_index/Skin_traction/
- ↑ http://www.rch.org.au/rchcpg/hospital_clinical_guideline_index/Skin_Traction/
About This Article
Before applying a skin traction, note that it should only be done by medical professionals following a prescription from a doctor. After a doctor has approved the treatment, wash and shave the patient’s leg to make sure the traction grips properly. Once you’ve dried their leg, straighten it out gently and apply traction at, but not above, the fracture line. You should also bring the strapping down and around the spreader and up the other side of the leg. Afterwards, wrap the leg in gauze or crepe wrap in spirals to limit the pressure. As you do this, pat the sides of the ankle and any other bony areas to reduce tension. If the doctor has prescribed weights, elevate the patient’s leg and attach the correct amount of weight to the end of the traction cords. For tips from our Medical co-author, including how to monitor the patient, read on!


Medical Disclaimer
The content of this article is not intended to be a substitute for professional medical advice, examination, diagnosis, or treatment. You should always contact your doctor or other qualified healthcare professional before starting, changing, or stopping any kind of health treatment.
Read More...