This article was co-authored by Ryaan Tuttle and by wikiHow staff writer, Hunter Rising. Ryaan Tuttle is a Home Improvement Specialist and the CEO of Best Handyman, Inc. in Boston, Massachusetts. With over 17 years of experience, he specializes in building home service businesses, focusing on creating scalable and efficient brands. With the help of his global team, the companies have achieved over 10+ million in sales and received recognition through magazine features, and enjoy partnerships with wikiHow and Jobber field service software. Boston Magazine and LocalBest.com have named Best Handyman Boston the Best Handyman in Boston. Ryaan holds Construction Supervisor and Home Improvement Contractor Licenses.
There are 9 references cited in this article, which can be found at the bottom of the page.
This article has been viewed 74,320 times.
Adding an arch on top of your doorway can make your space seem more inviting and adds an elegant touch to your room. Creating an arch is a process you can accomplish with a few tools you may have around your home. When you're planning your arch, take measurements and draw the shape of the arch you want on plywood. Once you cut out the pieces, you can assemble them and install the archway on your door frame. After applying drywall, your doorway is finished!
Steps
Drawing the Archway
-
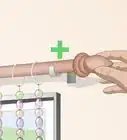
1Find the dimensions of your doorway to determine the height of your arch. Put the end of the measuring tape at the top of the doorway, and extend it down to the floor to find the height. Then, check the width of the opening at the top of the frame since that’s where you’ll install your arch. Aim to have the top of the arch extend about 4 inches (10 cm) down from the frame so people can comfortably walk through it.[1]
- Avoid extending the arch down too far in your doorway since taller people may not be able to fit through it comfortably. Try to keep the top of your arch about 78–80 inches (200–200 cm) from the floor.[2]
- If you’re adding an arch to an existing door, remove the trim with a pry bar and take off the drywall around it to expose the frame.[3]
-
2Mark the top and bottom edges of your arch on a sheet of plywood. Use a sheet of 1⁄2 in (1.3 cm) plywood that’s the same width as your doorway for the frames of your arch. Use your measuring tape to mark 4 inches (10 cm) in from the short side of the plywood sheet. Then make another mark 10 inches (25 cm) down from the first one for the bottom corner of your arch. Snap a chalk line across the plywood so you have 2 parallel lines.[4]
- You can buy chalk lines from hardware or home improvement stores.
- If you don’t have a chalk line, you can also use a pencil and a straightedge to draw your lines.
- If you don’t want to draw or cut your own arches, you can buy a prefabricated kit that provides the pieces you need for your archway. Search for a kit that’s adjustable or matches the width of your doorway.
Tip: Ask the employees to cut your plywood to the right size for you if you don’t want to cut it at home.
Advertisement -
3Draw lines from the center of the arch to the bottom corners. Divide the width measurement of the doorway by 2 and measure that distance in from the edge of the plywood. Make a mark on the top line you drew for the middle of your arch. Use a straightedge or your chalk line to draw a line from the mark you just made down to the ends of the line for the bottom edge of your arch. These lines will help you draw a perfect curve for your arch.[5]
-
4Make perpendicular lines extending from the midpoints of the lines you drew. Find the midpoint of one of the lines you just drew and mark it with a pencil. Place the right angle of a speed square on the mark you made and start drawing a perpendicular line with your pencil. Repeat the process with the line on the other side of the arch to make another perpendicular line. Use a straightedge or a chalk line to extend the lines down the plywood until they intersect.
- Double check your measurements to make sure they are accurate before moving on. That way, you can catch any errors before you make any cuts.
-
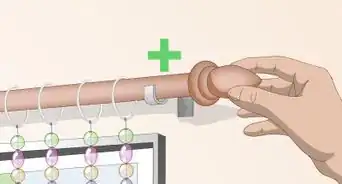
5Place a nail where the lines intersect and hook your tape measure to it. Find the point where the 2 lines intersect one another and tap a nail into the plywood. The nail acts as a pivot point and will help you draw a curve for the top of your archway. Make sure the nail is deep enough in the plywood so it doesn’t come out when you pull on it. Slide the end of the tape measure over the nail and make sure it doesn’t slip off easily.
- Tape measures have holes in the end so you can easily attach them to a nail.
- If your tape measure doesn’t have a hole in the end, then you can wrap a string around the nail instead.
-
6Trace the curve of the arch with the measuring tape and a pencil.[6] Extend the tape measure until it reaches mark at the top of your arch, and then lock it in place so the tape can’t retract. Hold a pencil on the mark next to your tape measure, and move it toward the side of the plywood. Since the tape measure is locked in place, it will draw a curve that stops at the end of the bottom line. Move the tape measure to the other side to finish the other side of the arch.
- Be gentle with the tape measure since it may still extend slightly if you pull on it hard enough.
- If you’re using a string instead of a tape measure, tie it to your pencil.


Assembling the Arch
-
1Use a jigsaw to cut out the side of your archway. Set the plywood on a workbench so the area you’re cutting hangs over the edge. Turn on your jigsaw and slowly follow along the line you drew to make a precise cut. When you’re about to finish your cut, hold onto the piece of plywood so it doesn’t drop onto the floor.[7]
- If you don’t have a jigsaw, you can try using a circular saw instead. [8]
Warning: Wear safety glasses whenever you work with power tools so you don’t get injured.
-
2Trace the piece you just cut out to make the other side of the arch. Once you have the first piece of your archway cut out, trace it onto the plywood with a pencil so your pieces are identical. Use your jigsaw to cut the other piece out from the plywood. After you make the cut, hold the 2 pieces together to ensure that they’re the same size, and make any additional cuts to even them out if you need to.
- Clamp the 2 pieces of plywood together if you need to make adjustments to both to ensure that they stay the same.
-
3Attach 2 1⁄2 in (6.4 cm) wood pieces along the curve to use as spacers. Since most doorways are framed with 2 in × 4 in (5.1 cm × 10.2 cm) boards, you need to space the plywood pieces apart to fit. Line the curved edge of the archway with 2 1⁄2 in (6.4 cm) thick wood pieces and nail them in from each side. Leave about 2–3 inches (5.1–7.6 cm) between each of your spacers so it’s the same thickness as the doorway.[9]
- Cut down scrap pieces of 2 in × 4 in (5.1 cm × 10.2 cm) boards for your spacers so you don’t need to buy additional wood.
-
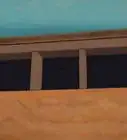
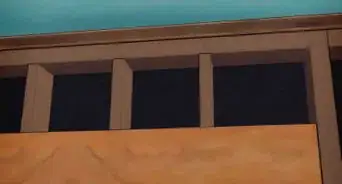
4Screw 2 1⁄2 in (6.4 cm) boards onto the corners of your door frame. Hold a board that’s the same width as your doorway at the top of the door frame so there’s 1⁄2 in (1.3 cm) of space on either side of it. Drive screws into the middle of the board every 3–4 inches (7.6–10.2 cm) to secure it in place. Then screw 2 vertical boards that are each 10 inches (25 cm) long on the sides of the frame so the short edges are flush with the top board.[10]
- These boards allow you to easily attach the plywood to the door frame so your archway is flush with the rest of your wall.
-
5Slide the archway you built over the board on the frame and nail it in place. Carefully guide the archway you built over the 2 1⁄2 in (6.4 cm) boards so the plywood is flush with the door frame. Once your archway is at the correct height, have a helper hold it in place while you drive 3 in (7.6 cm) nails through the plywood into the boards every 4 inches (10 cm).
- If you don’t have a helper, use a nail gun to secure the arch in place. Be sure to wear safety glasses when using a nail gun.


Adding Drywall
-
1Nail drywall pieces onto the archway. Cut out 2 pieces of drywall that are 14 inches (36 cm) tall and the same width as your door frame using a utility knife. Make sure the new pieces match the thickness of your existing drywall. Hold one of the pieces against the archway so the top edges are flush with one another and nail it in place every 3–4 inches (7.6–10.2 cm). Work on one side of the archway at a time so it’s easier to handle and maneuver.[11]
- You can buy sheets of drywall from a home improvement or hardware store.
- Wear safety glasses when you install drywall since the dust could get in your eyes.
-
2Remove any excess drywall off with a flush-cut saw. A flush-cut saw has a straight, flexible blade so you can cut your drywall so it’s flush with the plywood. Start at the bottom corner of the arch and saw along the curve of the archway. Once you saw through the drywall on one side of the door frame, attach the other side and saw through it as well.[12]
- You can buy a flush-cut saw from your local hardware store.
- You can also use a reciprocating saw to cut through the drywall faster if you want.
-
3Bend drywall strips to cover the bottom of the arch. Cut 2 strips of drywall so they’re the same width as the door frame and half the length of the arch. Hold the strip against the bottom of the archway and lightly push on it so it bends along the curve. Screw the strip of drywall every 2 inches (5.1 cm) along the edges of the plywood using screws that are 2 inches (5.1 cm) long. Repeat the process with the second strip of drywall on the other side of the frame.[13]
- If the drywall doesn’t sit flush against the bottom of the arch, drive additional screws into the spacers in the middle of the archway.
Tip: Wet the back of the drywall with a sponge to make it easier to bend along the curve.
-
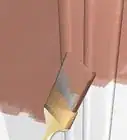
4Apply drywall mud to your archway. Buy a container of premixed drywall mud and stir it together with a flat trowel. Scoop out some of the drywall mud and spread it evenly over any seams between drywall pieces to help hold them together.[14] Push the drywall mud in between the seams with your trowel, and remove any excess so your wall is flat.
- You can buy drywall mud from your local home improvement store.
-
5Hold edges together with fiberglass netting and let the mud dry. While the first layer of mud is still wet, push a layer of fiberglass netting over the seams on the bottom of the arch. If the fiberglass netting bunches up rather than lying flat, then use a pair of scissors to cut halfway through the netting every 2 inches (5.1 cm). Press the netting into the wet mud and let it set for about 24 hours.
- You can buy fiberglass netting from a local hardware store.
- If you can’t find any fiberglass netting, paper tape works as well.
-
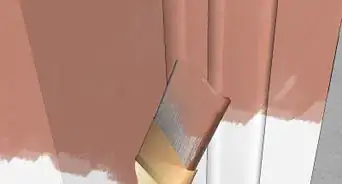
6Put on a second layer of drywall mud and let it dry. Once the first layer of drywall mud is dry, use your flat trowel to apply a second layer to the archway. Cover the fiberglass netting completely to hide it and seal the seam between drywall pieces. Compact the drywall mud as much as you can before smoothing it out and removing the excess. Let the second layer of mud set completely for at least 24 hours.
- Once you’ve finished applying drywall, you can paint the wall.


Warnings
- Wear safety glasses while working with power tools so you don’t injure yourself.⧼thumbs_response⧽
Things You’ll Need
- Measuring tape
- 1⁄2 in (1.3 cm) plywood
- Chalk line
- Speed square
- Straightedge
- Pencil
- Nail
- Hammer
- Jigsaw
- Wood screws
- Screwdriver or drill
- 2 1⁄2 in (6.4 cm) wide boards
- Drywall
- Flush-cut saw
- Sponge
- Drywall mud
- Flat trowel
- Fiberglass netting


References
- ↑ Ryaan Tuttle. Home Improvement Specialist. Expert Interview. 24 September 2021.
- ↑ https://extremehowto.com/make-an-arched-doorway/
- ↑ Ryaan Tuttle. Home Improvement Specialist. Expert Interview. 24 September 2021.
- ↑ https://extremehowto.com/make-an-arched-doorway/
- ↑ https://extremehowto.com/make-an-arched-doorway/
- ↑ Ryaan Tuttle. Home Improvement Specialist. Expert Interview. 24 September 2021.
- ↑ Ryaan Tuttle. Home Improvement Specialist. Expert Interview. 24 September 2021.
- ↑ https://youtu.be/_ycR02d2Q7c?t=101
- ↑ https://youtu.be/_ycR02d2Q7c?t=176
- ↑ https://youtu.be/_ycR02d2Q7c?t=193
- ↑ https://youtu.be/y86r3DpQWQE?t=244
- ↑ https://youtu.be/y86r3DpQWQE?t=258
- ↑ https://youtu.be/y86r3DpQWQE?t=311
- ↑ Ryaan Tuttle. Home Improvement Specialist. Expert Interview. 24 September 2021.
- ↑ https://youtu.be/6mLKI_f8uqQ?t=68
About This Article