wikiHow is a “wiki,” similar to Wikipedia, which means that many of our articles are co-written by multiple authors. To create this article, 9 people, some anonymous, worked to edit and improve it over time.
This article has been viewed 398,162 times.
Learn more...
Swiffer WetJets come in a variety of styles and are great for convenience and easy to assemble. Whether assembling a battery powered model or simply changing the batteries of your Swiffer, use your WetJet to clean tile, wood, laminate, vinyl or linoleum floors.
Steps
Assembling the Swiffer
-
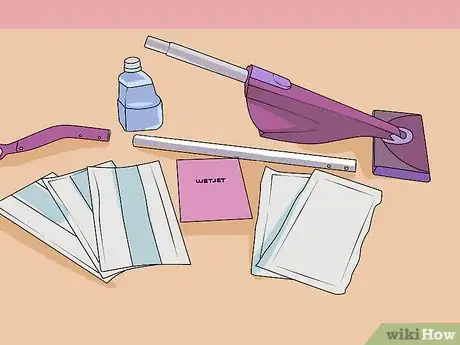
1Unwrap the Swiffer. Open the box and unwrap all the pieces. This includes removing any sticky tape from the handle, floor piece, cleaning solution and cleaning pads. Set all these items to the side for easy access.
-
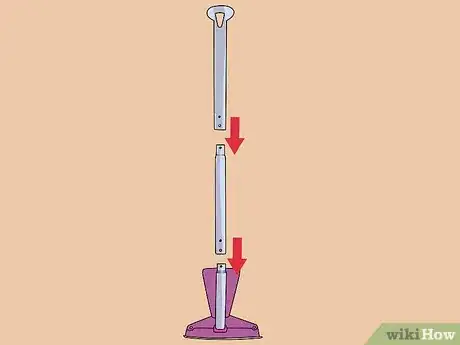
2Snap the 3 pieces of the pole together. After lining up all 3 of the main pieces, snap the pole with the mop, the middle pole, and the pole with the handle together.
- If your Swiffer is pre-assembled, you may need to pull the handle to extend the pole. Listen for a click. Once the pole is extended, it is permanently extended.
Advertisement -
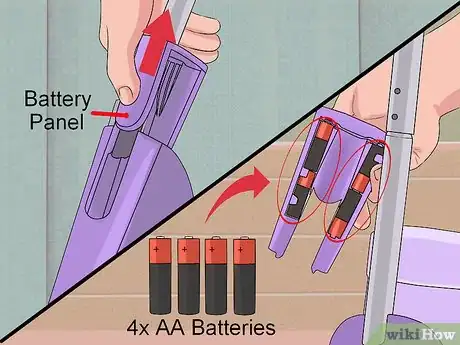
3Insert batteries. Your Swiffer will generally require 4 AA batteries. To remove the battery panel, click the notch inside the area that holds the cleaning supply. Open the cover and insert the batteries.[1]
-
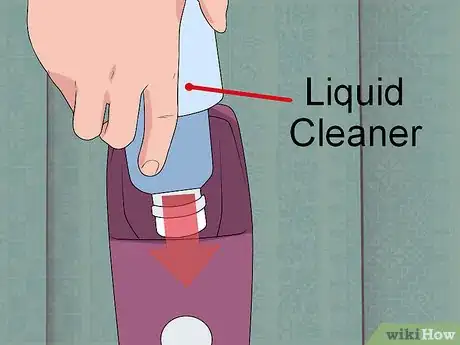
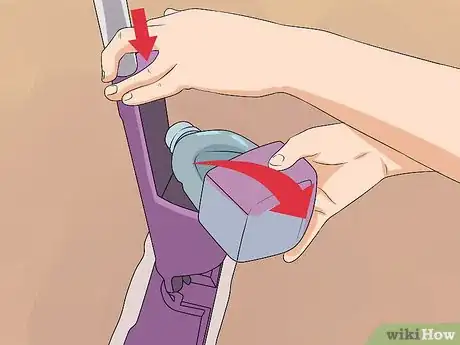
4Insert cleaner. Your Swiffer should come with liquid cleaning supply. To insert the liquid, turn the Swiffer upside down. The flat side of the cleaner should fit flush against the pole of the Swiffer. Once the cleaning bottle is aligned, firmly press it up into the Swiffer holder.[2] You should hear a click once the liquid is inserted correctly.
- Older models may need the lid of the cleaning solution to be turned slightly. In current models, there is a seal that will be broken by the Swiffer. If you suspect you have an older bottle, try turning the lid a quarter turn.
-
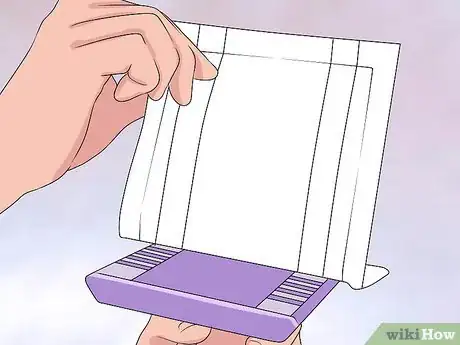
5Put on a cleaning pad. While looking at the cleaning pad you will see two strips of paper. These will need to be removed to allow the sticky adhesive to seal onto the Swiffer itself. Once removed, line the adhesive up with the bottom of your Swiffer. Put the Swiffer down onto the pad and hold for three seconds and the pad should automatically stick on.[3]
- Swiffer pads have an extra-tough-spot cleaning strip that is textured. It can be found on one side of the mopping pad. When applying the pad to the Swiffer, put the tough-side at the back end of the mop.
- Swiffer pads come in many styles with different cleaning products. If you don’t like the initial choice, don’t be afraid to go back and exchange your Swiffer for a new style.
-
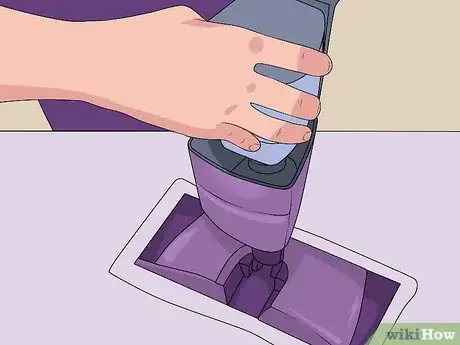
6Flip the Swiffer rightside up and test. To use your Swiffer, lay it on the floor pointed at the mess you wish to clean. Gently press the button on the handle to release the cleaning liquid. Mop the Swiffer back and forth to clean the liquid.
- A 2-3 second hold of the button will release enough liquid to clean approximately 10 square feet of flooring.
Changing the Swiffer Batteries
-
1Remove the cleaner. To access the batteries, you must remove the Swiffer cleaner. To do so, hold the Swiffer upside down. Push the large button between the cleaner and the Swiffer pole. Pull down firmly to remove the cleaner.[4]
-
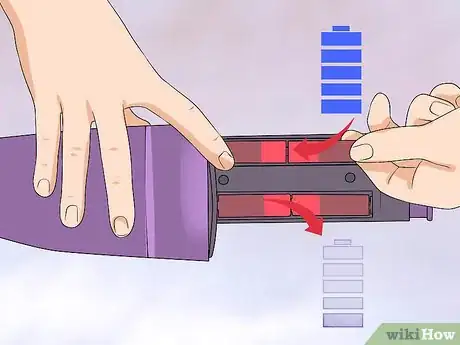
2Remove the battery tab. The battery tab will have a finger notch you can pull down. Put your finger within the opening and pull down. This will slide the battery cover off.[5]
-
3Replace the expired batteries. Remove the batteries and replace them with new ones. Check to make sure you are putting them in the correct direction.[6]
- Batteries should be recycled. Your local township should have a recycling depot that will recycle your one-use batteries free of charge.[7] Save them in a container until you’re ready to dispose.
-
4Reassemble the swiffer and test. Once you’ve inserted the new batteries, replace the battery cover and the cleaning supplies. If you don’t need your swiffer right away, you can test it without putting on a pad by holding the button down.
- If the Swiffer doesn’t release liquid, disassemble it and check that the batteries have been inserted correctly.
Community Q&A
-
QuestionAfter using my Swiffer, it leaked. Is there a way to store without it spilling, or do I have to remove the cleaner each time?
 Community AnswerJust make sure you pushed the refill bottles all the way down, then store the Swiffer in an upright position.
 -
QuestionDo I need to remove all the plastic from the pads?
 Community AnswerYou aren't supposed to take anything off the pads. The brown strip should go down, meaning it will be against the floor.
 -
QuestionDo I keep the pads in the plastic that is covering the pads
 Community AnswerYes. The swiffer pads come in a plastic or cardboard box, but without other packaging. When you remove the pad from the box, it is ready to use.
Warnings
- Swiffer pads are not toilet-friendly. Do not flush them.⧼thumbs_response⧽
References
- ↑ https://www.youtube.com/watch?v=F-KhBA88ZQc
- ↑ https://www.youtube.com/watch?v=F-KhBA88ZQc
- ↑ https://www.youtube.com/watch?v=zZAZfiD70xg
- ↑ https://www.youtube.com/watch?v=F-KhBA88ZQc
- ↑ https://www.youtube.com/watch?v=F-KhBA88ZQc
- ↑ https://www.youtube.com/watch?v=F-KhBA88ZQc
- ↑ http://www.earth911.com/recycling-guide/how-to-recycle-single-use-batteries/
About This Article
To assemble your Swiffer WetJet, first remove all of the parts from the box and unwrap the packaging. Then, snap the 3 poles together. Remove the battery panel and add 4 AA batteries to power your Swiffer. After the batteries are in place, turn your Swiffer upside down and push the bottle containing the cleaning solution into the Swiffer holder. Next, press the button for a few seconds to test if the WetJet is working. If it works, release some cleaner and move the mop back and forth over the area to clean it. To learn how to change your Swiffer’s batteries, read on!
