- Take a Quick Full Screen Screenshot |
- Take a One-Window Screenshot |
- Use Snipping Tool (Windows 11) |
- Use Snipping Tool (Windows 10, 8.1, and 7) |
- Use the Snipping Tool Shortcut (Windows 10 & 11) |
- Take a Screenshot of a Game or App |
- Screenshot on a Windows Tablet |
- Screenshot Several Windows in a Row |
- Q&A |
- Tips
This article was written by Ken Colburn and by wikiHow staff writer, Jack Lloyd. Ken Colburn is a Consumer Electronics Expert and the Founder & CEO of Data Doctors Computer Services. With more than 34 years of experience, he specializes in computer checkups and repairs, data recovery, and teaching others about technology. Ken also provides one-minute tech tips through his broadcast, Data Doctors Tech Tips.
This article has been viewed 35,441,401 times.
Need to take a screenshot on your Windows PC? Whether you want to capture your full screen or just one window or area, there are several quick and easy ways to take screenshots in Windows 10, Windows 11, and Windows 8. This wikiHow article will teach you how to use keyboard shortcuts (including the Print Screen key), the built-in Snipping Tool app, and the Xbox Game Bar to screen capture any area of your Windows desktop.
Things You Should Know
- Press the Windows key + Print Screen key to capture the entire screen. The image will save to the Screenshots folder inside of your Pictures folder.
- Press Windows Key + Shift + S to use Snipping Tool, which lets you capture the whole screen, individual windows, or certain areas.
- Press the Print Screen (PrtSc) key to capture the screen to your clipboard. You can then paste it anywhere using Ctrl + V, or by right-clicking and selecting "Paste."
Steps
Take a Quick Full Screen Screenshot
-
1Go to the screen that you want to capture. When you screenshot your entire screen, everything that's open will be captured in your screenshot. Be sure to close any windows you don't want open.
- This method will quickly capture everything on your screen and save the image to your PC. Once you've saved the screenshot, you can edit it or share it with anyone.
-
2Find the ⎙ Print Screen key on your keyboard. The Print Screen key is most often found in the upper-right side of the keyboard, not counting the numeric keypad.
- The Print Screen key will usually be abbreviated to "PrtSc" or something similar.
Advertisement -
3Take your screenshot. You have two options for capturing your entire screen:
- Instantly save the screenshot as an image: Press the Windows key and the PrtSc keys at the same time. This saves your screenshot as a PNG file to the Screenshots folder in your Pictures folder. In most cases, you'll see the screen dim briefly.
- Copy the screenshot so you can paste it: Press the Print Screen key alone to copy the screen to your PC's clipboard. You can then paste the copied screenshot into a document, email message, or social media post by right-clicking the desired location and selecting Paste.
- On some Windows laptops, you will need to hold down the Fn key as you press the Print Screen key.
-
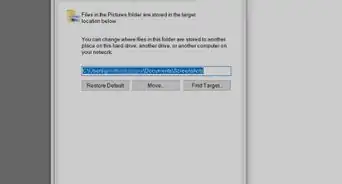
4Find the screenshot. If you used Windows key + Print Screen to capture the screenshot, follow these steps to find the file:
- Open File Explorer by pressing Windows key + E on your keyboard.
- If you see a folder called Pictures in the left panel, click it. If not, click This PC, and then double-click the Pictures folder.
- Double-click the Screenshots folder.
- Each screenshot that you take is labeled "Screenshot (number)." Depending on the version of Windows you're using, the file name will either end with a number that corresponds with the number of screenshots you've taken, or the date and time at which you captured the screenshot.
- If you can't find your screenshot, try using the Snipping Tool instead. See Snipping Tool (Windows 11) or Snipping Tool (Windows 10 and earlier).


Take a One-Window Screenshot
-
1Click the window that you want to capture. If you only want to screenshot a single window, click anywhere on the window you want to capture. Make sure the window is in front of all your other windows.
-
2Hold down Alt and press ⎙ PrtScr. This copies an image of the window to the clipboard.
- You will not see any confirmation that the screenshot has been taken.
- On some Windows keyboards, you will need to also hold down the Fn key when you use print screen.
-
3Open Paint. This program comes installed on all Windows computers. To open it:
- Press Windows key + S to activate the search bar.
- Type paint.
- Click Paint.
-
4Press Ctrl+V to paste the screenshot. You will now see your one-window screenshot in the Paint window.
- You can also paste the screenshot into other programs, such as Word or into the body of an email. Simply open the program that you want to paste the image into and press Ctrl + V.
- Alternatively, you can paste the screenshot into any open document, email, or other area using this shortcut.
- If your screenshot doesn't appear, try using the Snipping Tool instead. See Snipping Tool (Windows 11) or Snipping Tool (Windows 10 and earlier).
-
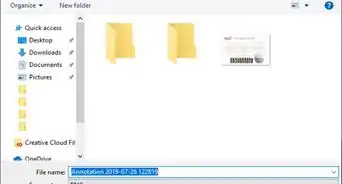
5Save your screenshot as an image. Click File, click Save, enter a file name, click a location on the left side of the page, and click Save.
- You can change the screenshot's file type by clicking the "Save as type" drop-down box at the bottom of the window and then clicking a different format (e.g., JPEG) in the drop-down menu.


Use Snipping Tool (Windows 11)
-
1Open the Snipping Tool. The Windows 11 Snipping Tool makes it incredibly easy to capture and edit full-screen and partial-screen screenshots. To open the tool, click Search in the taskbar, type snip, and then click Snipping Tool.
-
2Select a screenshot mode. Click the Mode menu, which is the down-arrow at the top of the screen. Then, choose an option:
- Rectangle mode: Let's you capture any part of the screen by drawing a rectangle around an area.
- Window mode: Allows you to capture an individual window without getting anything else in the screenshot.
- Full-screen mode: Captures everything on the screen.
- Free-form mode: Lets you draw any shape around an area of the screen to take a screenshot.
-
3Click + New. It's at the top-right corner of Snipping Tool.
-
4Capture your screenshot.
- In Rectangle mode, click and drag a rectangle around the desired area to instantly capture a screenshot.
- In Window mode, click the window you want to capture to take the screenshot.
- In Full-screen mode, the entire screen will instantly capture.
- In Free-form mode, draw an outline around the part of the screen you want to capture.
-
5Click the Snipping Tool icon in the taskbar to view your screenshot. Now you'll see a preview of your screenshot, which gives you a chance to edit it if you'd like.
-
6Edit your screenshot (optional). If you'd like to crop the screenshot, click the crop tool at the bottom, then select the part of the screenshot you want to keep. You can also use the other editing tools at the bottom to draw on or erase part of the screenshot, which is helpful if you need to redact something.
-
7Save your screenshot. Now that you've taken a screenshot, you can save it easily:
- Click the disk icon at the top.
- Select a location to save your screenshot.
- Name your file and click Save.
-
8Use the Snipping Tool shortcut in the future. Now that you know how to use Snipping Tool, you can use this handy shortcut next time you want to take a screenshot: Windows key + Shift + S.
- When you use the keyboard shortcut, you'll see a smaller version of Snipping Tool at the top of the screen. Each icon on the Snipping Tool indicates a different screenshot type—Rectangle Mode, Window Mode, Full-screen Mode, and Free-form Mode.
- Click the mode you'd like to use, then capture your screenshot.
Use Snipping Tool (Windows 10, 8.1, and 7)
-
1Open the Snipping Tool. The Snipping Tool is an great way to take all kinds of screenshots, including full-screen, individual windows, and even a particular area of the screen.[1]
- On Windows 10, press Windows key + S, type snip, and click Snipping tool.
- On Windows 8.1, swipe in from the edge, select Search, type snipping, and then select Snipping Tool.
- On Windows 7, click the Start menu, type snipping, and then click Snipping Tool.
-
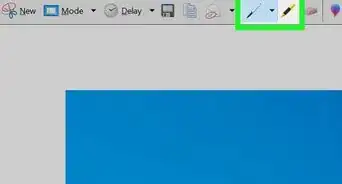
2Choose the shape of the Snip. "Rectangular Snip" is chosen by default. Click the Arrow button next to the Mode button to change the Snip shape:.
- Free-form Snip lets you draw any shape with your mouse. The area inside the shape will be snipped.
- Rectangular Snip lets you select a rectangular area, which will be snipped.
- Window Snip lets you choose a window to snip.
- Full-screen Snip snips the whole screen, with all windows (except the Snipping Tool window) included.
-
3Create a new Snip. Click the New button to start the selection. The screen will fade, and you can draw your Snip area, or select the window if you chose Window Snip. Release the mouse to take your screenshot.
- If you had Full-screen Snip selected, your Snip will automatically be created once you click New.
-
4Annotate the Snip (optional). Once you create the Snip, it will open in a new window. You can use the Pen tool to draw on it and make notes, and use the Highlight tool to draw attention to text.
- The Erase tool will only erase annotations, not the screenshot itself.
-
5Save the Snip. Click the floppy disk icon to open the save dialog. Type in a name for the screenshot and change the "Save as type:" field if desired. You can now send the screenshot by email or put it on a website.
- PNG is the default format in Windows 8 and later. The default format in earlier versions is JPG.
-
6Paste or save the Snip. By default, the Snip is copied to the clipboard when you create it. This means you can paste it into Paint or Word, much like you would with a full-screen screenshot. In Paint, you can make more edits than you can in the Snip annotation editor.
- To paste the Snip, open a window that supports pasting and press Ctrl+V.


Use the Snipping Tool Shortcut (Windows 10 & 11)
-
1Go to the view that you want to screenshot. Open the program or screen that you want to take a picture of, making sure that any windows or items that you don't want on-screen are out of the way.
-
2Press ⊞ Win+⇧ Shift+S. Doing so will cause your screen to turn grey, and your mouse will turn into a crosshairs icon. The Snipping Tool will open at the top of the screen.
- By default, the shortcut will open Snipping Tool in Rectangle Snip Mode, which means you can click and drag a rectangle around the area of the screen you want to capture.
- On Windows 10, you can select a different screenshot mode from the Mode menu. For example, if you want to capture the whole screen, select Full-screen Snip (which takes the screenshot automatically). To capture a single window, select Window Snip.
- On Windows 11, you can select a different mode to take a screenshot using the icons at the top. . The icons in order are Rectangle Mode (the default), Window Mode, Full-screen Mode (which takes the screenshot automatically), and Free-form Mode.
-
3Select an area to screenshot. Click and drag your mouse from the top-left corner of the area that you want to screenshot to the bottom-right corner. When you release the mouse button, the screenshot will be captured, as well as copied to your clipboard.
- If you selected a full-screen screenshot, you can skip this step.
-
4Paste or save your screenshot. You can now paste your screenshot into any program that allows pasting photos (e.g., Paint, Word, an email, etc.) by pressing Ctrl+V. You should see the section of the screen that you selected appear in your program.
- Alternatively, save your screenshot as an image file by pressing Ctrl + S, entering a name, selecting a save location, and clicking Save.

Take a Screenshot of a Game or App
-
1Open the Xbox Game Bar. The Game Bar is a handy tool that makes it easy to capture screenshots of games, as well as any other open windows on your PC. To open the tool, press Windows key + G at the same time.
- You can even use the Xbox Game Bar to record your screen in real time.
-
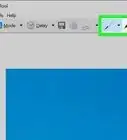
2Click the Widget menu. It's the it's the second icon from the left in the Game Bar at the top of the screen.[2]
-
3Click Capture. You'll see this near the top of the menu. The Capture widget will appear.
-
4Click the pushpin icon on the Capture widget. This pins the widget to your screen so it won't disappear when you navigate away.
-
5Click the window you want to capture. You can capture any single window on your screen, such as your web browser, a game, or a document.
-
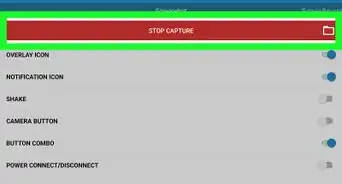
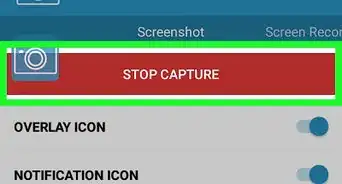
6Click the camera icon on the Game Bar. This captures a screenshot of the activate window and saves it to your screenshots folder.
-
7Click See my captures to view your screenshots. You'll see this option at the bottom of the Capture widget. Here, you'll find all of the screenshots you've captured using the Game Bar.
- When you're finished taking screenshots, follow these steps to unpin the Capture widget:
- Press Windows key + G to reopen the Game Bar.
- Click the pushpin icon.
- Click anywhere on the screen.
- When you're finished taking screenshots, follow these steps to unpin the Capture widget:
Screenshot on a Windows Tablet
-
1Press and hold the Windows logo. This is the logo on the bezel of the tablet, not the Windows button on your desktop.
- If there is no Windows button on the tablet, press the Power button instead.
-
2Press the Volume Down button (or Volume Up if using the Power button). The screen will dim momentarily to indicate a screenshot was taken.
- Your screenshot will be stored in the Screenshots folder, which you can access by Opening File Explorer and navigating to Pictures → Screenshots.


Screenshot Several Windows in a Row
-
1Go to the initial screen that you want to screenshot. This should be the first page in the sequence of pages that you want to screenshot.
- Understand how this works. The Windows Steps Recorder allows you to record up to 100 different screens and save them all to one document. This program also makes a note of where you click and which actions you perform on each screen.
-
2Press ⊞ Win+S. This activates the Windows search bar.
-
3Type psr.exe and press ↵ Enter. This opens the Windows Steps Recorder.
-
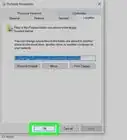
4Click Start Record. This is at the top of the toolbar. Doing so turns on the Steps Recorder, which will record the next 25 screen changes.
- If you want to record more than 25 changes, first click on the right side of the toolbar, click Settings..., and change the "Number of recent screen captures to store" number.
-
5Click through your different screens. Each time your screen changes (other than simply moving your mouse), the Steps Recorder will take a screenshot.
-
6Click Stop Record. It's at the top of the toolbar. Doing so stops recording screen changes and opens the results window.
-
7Review your screenshots. Scroll down through the window to make sure that you captured all of the screenshots that you wanted to save.
-
8Save your screenshots to a ZIP folder. Click Save at the top of the window, enter a file name and select a save location, and click Save.
- This will save the screenshots in one HTML file. You can open the HTML file in your browser in order to view its contents.


Community Q&A
-
QuestionWhat versions of Windows include the Snipping Tool?
 Community AnswerThe Snipping Tool is included in all versions of Windows since Windows Vista. This includes Vista, 7, 8, 10, Server 2008, and Server 2012. The only versions of Windows that it is not included in are Windows 7 Starter and Windows 7 Home Basic. If you are using either of these two versions, you will need to find another utility for taking screenshots, or use the keyboard shortcuts.
 -
QuestionAfter I capture a screenshot, how do I create arrows and circles?
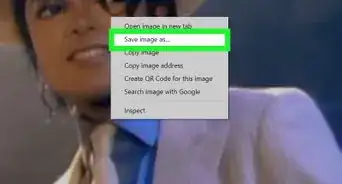
 Community AnswerYou have to load your previous screenshot into a photo editing software (e.g., Adobe Photoshop, Picasa, or even MS Paint) to edit your photo. Then you can draw arrows/circles on your screenshot and save the picture.
 -
QuestionThe screenshots came out fine, but the actual image came out distorted, for example drawers in a dresser appear "squished." What do I do?
 Anuj_Kumar1Community AnswerTry taking a screenshot at maximum possible resolution for getting good quality shots. Also, you may check the screenshot saving app for the maximum output quality setting. You can take high resolution screenshots in virtual machines (even greater resolution than your monitor screen).
Warnings
- Saving a screenshot in some file types (such as bitmaps) will result in a very large file. Because of this, it's highly recommended to use the PNG or JPEG format.
- Most screenshots will not show the mouse cursor.
- DRM-protected content will not be visible in your screenshot and will be blanked out.
-Step-19.webp)


References
About This Article

1. Go to the page that you want to screenshot.
2. Press the ⊞ Win key and the ⎙ Print Screen key at the same time.
3. View your screenshot in the "Screenshots" folder that appears in the "Pictures" folder.


-Step-19.webp)