A simple guide to taking a screenshot of a website in Google Chrome
This article was co-authored by wikiHow staff writer, Kyle Smith. Kyle Smith is a wikiHow Technology Writer, learning and sharing information about the latest technology. He has presented his research at multiple engineering conferences and is the writer and editor of hundreds of online electronics repair guides. Kyle received a BS in Industrial Engineering from Cal Poly, San Luis Obispo.
There are 7 references cited in this article, which can be found at the bottom of the page.
The wikiHow Tech Team also followed the article's instructions and verified that they work.
This article has been viewed 333,609 times.
Learn more...
Want to take a screenshot of your Chrome web browser without getting other windows in the image? It's easy to capture screenshots on Chrome on any device, including your Chromebook. You can use your computer's keyboard shortcut to take the screenshot, or try a dedicated screenshot extension or app for more options, including full-page screenshots. You can also use the built-in Google Chrome Element Inspector or enable a built-in screenshot feature in the Chrome Flags menu. This wikiHow guide will show you how to take a screenshot of your Chrome web browser on a computer, smartphone, or tablet.
Things You Should Know
- You can enable the secret Chrome screenshot tool to quickly capture a webpage.
- On a Chromebook, press the Shift + Ctrl + Show Windows keys, then choose a screenshot type.
- You can use your PC, Mac, Android, iPhone, or iPad's built-in screenshot tool, or install an app or Chrome extension.
Steps


Using a Chromebook
-
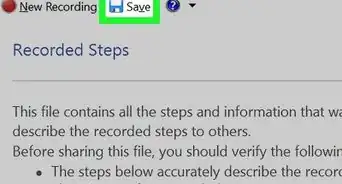
1Press shift + ctrl + show windows. This will open the Screenshot tool at the bottom of the screen. The show windows key is a rectangle with two parallel lines. This method will allow you to take a screenshot of the entire screen, part of the screen, or a window.[5]
- Alternatively, you can press the Screenshot key to open the Screenshot tool. Its icon is a circle in a rectangle.
-
2Click the Screenshot button. It’s a gray camera icon in the Screenshot tool menu.
-
3Choose a screenshot type. Selecting the type will either take the screenshot (full screen screenshot), prompt you to select an area to screenshot (partial screenshot), or choose a window (window screenshot). You can select from three options:
- Full screen screenshot: Take a screenshot of the entire screen.
- Partial screenshot: Allows you to draw a rectangular outline around the part of the screen you want to capture.
- Windows screenshot: Allows you to select a window to screenshot.


Using Chrome Flags
-
1Type chrome://flags in the URL bar and press ↵ Enter. When you go to this URL in Google Chrome, the Chrome Flags menu will open. This is the official settings page for turning on debugging and experimental features in Google Chrome.[6]
-
2Search screenshot in the search bar. The search bar is labeled “Search flags” and is located at the top of the page.
-
3Select Enabled in the drop down menu next to “Desktop Screenshots.” This feature allows you to take screenshots using the Google Chrome web browser.
-
4Select Enabled in the drop down menu next to “Desktop Screenshots Edit Mode.”
-
5Click Relaunch. This is a blue button at the bottom of the screen. This will restart Google Chrome and apply the selected flags features.
-
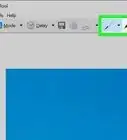
6Click the share button in the URL bar. It’s an arrow in a box. A sharing options menu will appear.
-
7Select Screenshot. This will prompt you to select a portion of the web page. The web page will become darker and your cursor will turn into the plus (+) icon.
-
8Click and drag over the portion you want to screenshot. A rectangle will appear showing you the part of the page that will be captured.
-
9Release the mouse button to take the screenshot. The screenshot will be copied to your clipboard.
-
10Click Download and select a location. After taking the screenshot, a pop up menu will appear in the top right of the browser. Selecting Download will allow you to download the screenshot to a location on your computer.


Using Element Inspector
-
1Press Ctrl+⇧ Shift+I (Windows) or ⌘ Command+⌥ Option+I (Mac). This is the Windows shortcut to inspect the webpage elements.
-
2Press Ctrl+⇧ Shift+P (Windows) or ⌘ Command+⇧ Shift+P (Mac). This will open the Run menu in the Element Inspector.
-
3Type in screenshot. When you type this in the Run search bar, you’ll see four choices.
-
4Press the up and down arrows to choose an option. You can select from the following options:
- capture screenshot - capture the entire screen
- capture area screenshot - capture a portion of the screen
- capture full size screenshot - capture the entire page
- capture node screenshot - capture a specified HTML item
-
5Press ↵ Enter. This will confirm your selection and either take a screenshot, or prompt you to select a portion of the screen.


Using an Extension
-
1Open the GoFullPage page. This Chrome extension is free to install, and will take a screenshot of your entire page (not just the window's contents) in Google Chrome.
-
2Click Add to Chrome. This blue button is in the upper-right corner of the page.
-
3Click Add extension when prompted. Doing so installs the Full Page Screen Shot extension in your Chrome browser.
-
4Go to the page you want to screenshot. Open the website, service, or item of which you want to take a screenshot.
-
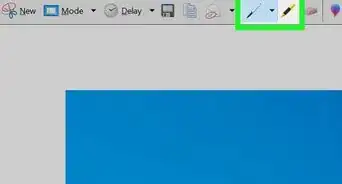
5Click the GoFullPage icon. It's the gray camera icon at the top-right corner of Chrome.
- If you don't see it, click the puzzle piece icon at the top-right corner of Chrome to display all of your extensions.
-
6Wait for Chrome to finish capturing the screen. Depending on how long the page is, this can take anywhere from a second to a minute or two. Once the image opens in a new tab, you can proceed.
-
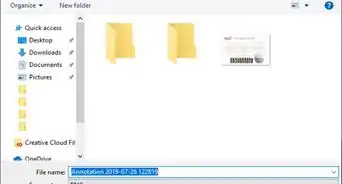
7Download the image. Click the PDF download button in the upper-right corner of the page to download the image as a PDF file, or click the downward facing arrow to the right of the PDF icon to download the image as a PNG file.
- If prompted to allow Full Page Screen Shot access to your downloads, click Allow on the prompt.
- You may be asked to specify a download location before your screenshot will download.


Using an iPhone
-
1Consider using your iPhone's screenshot function. You can use your iPhone's screenshot feature to take a screenshot of your preferred Chrome page if you don't want to download an app to take the screenshot for you.
- If your iPhone has both Home and side buttons (power/sleep button), press them at the same time, then quickly release them.[7]
- For iPhone 14 and other Face ID models, press the volume up button and side button at the same time, then quickly release.
- If you want to use your iPhone's on-screen AssistiveTouch feature instead, proceed with the rest of this method.
-
2
-
3Tap Accessibility. It has an icon of a person in a circle.
-
4Tap Touch. This is in the Accessibility menu and has an icon of a hand.
-
5Tap AssistiveTouch. This option is at the top of the Touch menu.
-
6Tap AssistiveTouch. This will open the settings menu for AssistiveTouch.
-
7
-
8Go to the page you want to screenshot. Open the Google Chrome website which you want to take a screenshot of.
-
9Tap the AssistiveTouch icon. It's a gray cube with a circle inside on your screen. Tapping it opens the AssistiveTouch menu.
-
10Tap Device. You'll see this iPhone-shaped button on the right side of the AssistiveTouch menu.
-
11Tap More. This is at the bottom of the AssistiveTouch menu.
-
12Tap Screenshot. It's at the top of the AssistiveTouch menu. Doing so will take a screenshot of your Chrome contents, AssistiveTouch menu not included.


Using an Android
-
1Consider using your Android's screenshot function. You can use your Android's screenshot feature to take a screenshot of your preferred Chrome page if you don't want to download an app to take the screenshot for you.
- Press the volume down button and power button at the same time to take a screenshot.[8]
- The screenshot shortcut varies by Android model. You can also try holding down the power button and selecting “screenshot.”
- If you want to use an app instead, proceed with the rest of this method.
-
2Download the Screenshot Easy app. If you don’t want to use your Android's built-in screenshot functionality, you can download a screenshotting app. Screenshot Easy is a good choice:
- Open your Android's Play Store.
- Tap the search bar.
- Type in screenshot easy.
- Tap Screenshot Easy in the results menu.
- Tap INSTALL.
-
3Open Screenshot Easy. Tap OPEN in the Google Play Store, or tap the camera-shaped Screenshot Easy app icon in your Android's App Drawer.
- When prompted, tap ALLOW to give Screenshot Easy access to your photos.
- You may be prompted to start capturing. If so, tap CANCEL before continuing.
-
4
-
5Tap START CAPTURE. It's a blue button at the top of the screen.
-
6Tap OK when prompted. This turns on the screenshot feature for Screenshot Easy.
- On Samsung items, you'll tap START NOW here instead.
-
7Press the Home button. It's at the bottom of your Android's housing. Doing so minimizes the Screenshot Easy app.
-
8
-
9Go to the page you want to screenshot. Open the website, service, or item of which you want to take a screenshot.
-
10Tap the Screenshot Easy icon. It's the camera icon that should be in the top-left corner of the screen. Doing so will take your screenshot and, after a few seconds, open the screenshot in the Screenshot Easy app.
-
11Save your screenshot. Once the screenshot opens, you can save the screenshot to your Android by doing the following:
- Tap ⋮ in the top-right corner of the screen.
- Tap Save.
- Tap Save as.
- Tap Android when prompted.
- Tap SAVE when prompted.
- View your screenshot by opening your Android's Photos or Gallery app and selecting the screenshot from the list of recent items.
-
12Disable the screenshot icon when done. When you're ready to turn off the screenshot icon, re-open the Screenshot Easy app, then tap STOP CAPTURE at the top of the screen.
- An ad will usually play after disabling the screenshot icon. You can skip the ad by minimizing or closing the Screenshot Easy app.


Community Q&A
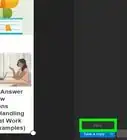
Did you know you can get answers researched by wikiHow Staff?
Unlock staff-researched answers by supporting wikiHow
-
QuestionHow do I take a screenshot on my PC?
 wikiHow Staff EditorThis answer was written by one of our trained team of researchers who validated it for accuracy and comprehensiveness.
Staff AnswerwikiHow Staff EditorStaff AnswerThere are several ways to take a screenshot on a PC. You can use a keyboard shortcut, the Snipping Tool or the Print Screen function. Each of these methods is described in detail, with screenshots, here: How to Take a Screenshot in Microsoft Windows.
Support wikiHow by unlocking this staff-researched answer.
-
QuestionHow do you screenshot on Pixelbook?wikiHow Staff EditorThis answer was written by one of our trained team of researchers who validated it for accuracy and comprehensiveness.
Staff AnswerwikiHow Staff EditorStaff AnswerWhen you’re in laptop mode, decide whether you want to take a partial or whole-of-screen screenshot. For partial screen, press Ctrl + Shift + F4 Overview Mode. For the whole-of-screen, press Ctrl + F4 Overview Mode. On a tablet, press the power button and the volume down button. You can also take a screenshot using the Pixelbook pen: For a partial screenshot, select the pen icon, then Capture Region, then drag across the area of the desired screenshot and lift when done. For a whole-of-screen screenshot, select the pen icon and then Capture Screen, for the whole screenshot.Support wikiHow by unlocking this staff-researched answer.
-
QuestionCan you take a screenshot on Google Chrome?wikiHow Staff EditorThis answer was written by one of our trained team of researchers who validated it for accuracy and comprehensiveness.
Staff AnswerwikiHow Staff EditorStaff AnswerYes, you can take a screenshot on Google Chrome, using a desktop, iPhone or Android. On a computer, use the Windows or Mac screenshot functions as you would for any other screenshots. For the iPhone, use its screenshot feature, while for Android devices, use the Android screenshot feature. Each of these methods is explained in full detail in the Methods above.Support wikiHow by unlocking this staff-researched answer.
-Step-19.webp)


References
- ↑ https://support.microsoft.com/en-us/windows/keyboard-shortcut-for-print-screen-601210c0-b3a9-7b58-bc40-bae4dcf5f108
- ↑ https://support.microsoft.com/en-us/windows/use-snipping-tool-to-capture-screenshots-00246869-1843-655f-f220-97299b865f6b
- ↑ https://support.apple.com/en-us/HT201361
- ↑ https://support.google.com/chromebook/answer/10474268?hl=en
- ↑ https://support.google.com/chromebook/answer/10474268?hl=en
- ↑ https://developer.chrome.com/docs/web-platform/chrome-flags/
- ↑ https://support.apple.com/en-us/HT200289
- ↑ https://support.google.com/android/answer/9075928?hl=en
About This Article


-Step-19.webp)