This article was co-authored by Amy Guerrero. Amy Guerrero is an Arts and Crafts Specialist and the Owner of Sunshine Craft Co., a crafting studio based in Phoenix, Arizona. Amy specializes in macrame, DIY crafting, and teaching fiber arts. She offers monthly in-person and online workshops along with having developed a range of DIY craft kits for at-home projects. Amy holds a BS in Industrial Design from Philadelphia University. She worked as a graphic designer before starting her own business. Sunshine Craft Co. is a creative hub that offers a wide range of workshops, tools, and resources for any craft project to inspire creativity and community engagement.
This article has been viewed 30,349 times.
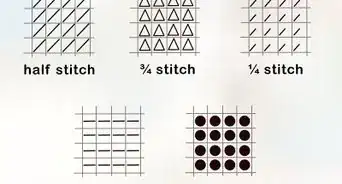
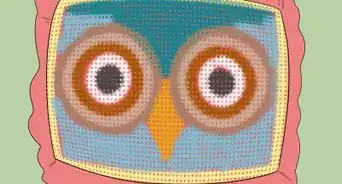
Creating curves in cross stitching can be a challenge. Standard cross stitches may have a jagged appearance, so it can be difficult to create the appearance of a curve. You might want to make a curve for cursive letters, a shape, or as a border to something you have cross stitched. Either way, using the backstitch to create curves is an effective approach, and there are some special strategies you can use to improve the appearance of your curves.
Steps
Making a Basic Backstitch
-
1Gather your materials. You will need some special materials to backstitch a curve. Before you get started, you will need to get:
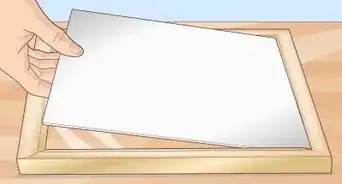
- Cross stitch fabric
- Hoop to hold fabric in place
- Needle
- Thread
- Scissors
- Paper and pins or chalk for creating a guide curve (optional)
-
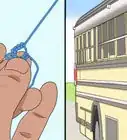
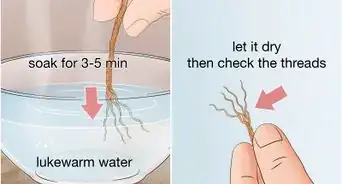
2Thread the needle. Thread the needle with your chosen thread. Make sure to anchor the thread using a knot at the end or by holding it until you have a few stitches in place that will keep the thread from sliding out. You can trim off the knot after you have a few stitches to anchor the knot.[1]
- Make sure that you choose a needle that is appropriate for your thread. For example, if it is a thicker thread, then you may need to use a large eye needle.
- Ensure that you have enough thread on the needle to complete your stitches for the project.
Advertisement -
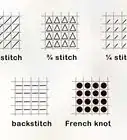
3Make a basic straight stitch. To start your back stitching, begin by making a basic backstitch that is about ¼” (0.6cm) long. To do this insert the needle through your fabric from the back side and going out the front, then come back through the fabric by going into the front side and out the back.[2]
- This straight stitch will help to anchor your thread and it is essential for starting your backstitching.
-
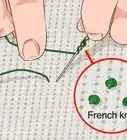
4Push the needle through one stitch ahead. To create your first back stitch, push the needle through the back side of the fabric and out the front. The needle should come out the front one stitch space ahead of the end of your first straight stitch.[3]
- Keep the stitches to about ¼” (0.6cm) like you did with the straight stitch.
-
5Go back and in to complete the stitch. To complete your first straight stitch, you will need to insert the needle in through the space next to the end of the straight stitch. Bring the thread back to this point and then insert the needle into the same space as the straight stitch thread is going through.[4]
- Repeat the process by bringing the thread back out one stitch space ahead of the backstitch you just created.


Creating a Curve with the Backstitch
-
1Imagine the curve you want to create. Backstitching in a curve requires you to use a more freeform approach. Start by imagining the curve you want to create running along your stitching surface.
- You can also use a paper cutout pinned to your stitching surface to help guide you, or even draw a chalk line on the stitching surface. However, this is optional.
-
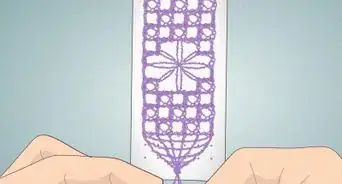
2Stitch as close to the curve as possible. Create your backstitches as close to the curve as you can. They may not form a perfect curve, but it will be close. Keep backstitching until you reach the end of the curve you want to create.
- Keep in mind that smaller backstitches will create a less jagged appearance. If you notice after a few stitches that the line looks extra choppy, then reduce the size of the stitches.
-
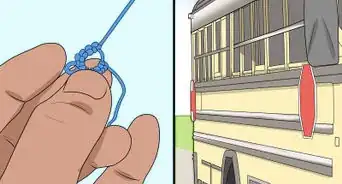
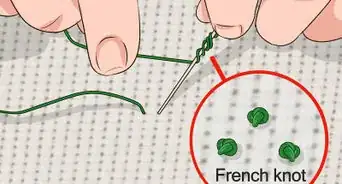
3Wrap the stitches. Wrapping your stitches will help to give the curve a softer finish and reduce the look of any jagged edges. To wrap your stitches, leave the thread connected after you finish your last stitch. Then, slide the needle under the last stitch you did. Do not go through the fabric. Slide the needle under the stitch and out the other side. Then, return the needle to the starting position and wrap the next stitch.
- Continue wrapping the stitches to the end of the backstitches. Then, you can anchor the thread by doing a couple of straight stitches. Cut the excess to complete your curve.


Community Q&A
-
QuestionWhen outlining with backstitch in a straight line, do I stitch every box?
 T. ChinsenTop AnswererBy stitching when outlining, every box the edge will maintain an even appearance. This gives the illusion of a continuous line and curve on the stitching and a polished finish.
Things You’ll Need
- Cross stitch fabric
- Hoop to hold fabric in place
- Needle
- Thread
- Scissors
- Paper and pins or chalk for creating a guide curve (optional)
Expert Interview
Thanks for reading our article! If you'd like to learn more about doing needlework, check out our in-depth interview with Amy Guerrero.
References
About This Article