This article was co-authored by Bill Holdenstern and by wikiHow staff writer, Jessica Gibson. Bill Holdenstern is a Baker and the Co-Owner of East Bay Pie Co. in San Francisco, California. With over 10 years of experience in the food industry, he specializes in making pot pies filled with flavors from around the world. Bill trained with chefs in multiple restaurants and studied business at Bunker Hill Community College. East Bay Pie Co has been profiled in The Manual, Purple List, and Nosh.
This article has been viewed 80,338 times.
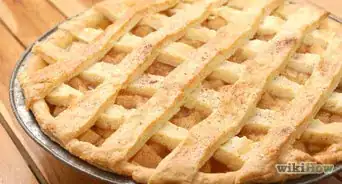
If you're tired of soggy pastry in your favorite tart recipes or a recipe tells you to blind bake the shells, bake the tart shells before you fill them. Make a classic pastry dough and chill it before you roll it out. Cut the dough to fit several medium-sized tart pans or cut mini tartlets to fit inside a muffin tin. Weigh down the pastry using parchment paper and pie weights before you bake the shells. The tart shells will become golden, crisp, and perfect for filling.
Ingredients
- 2 1/3 cups (291 g) unbleached, all-purpose flour, plus more for dusting
- 1 teaspoon (4 g) sugar
- 1/2 teaspoon (2.5 g) salt
- 1/4 teaspoon (1 g) baking powder
- 1 cup (226 g) unsalted butter, cut into 1/2-inch (12 mm) pieces and chilled
- 2 large egg yolks
- 1 teaspoon (5 ml) white or cider vinegar, chilled
- 1 to 2 teaspoons (5 to 10 ml) ice-cold vodka
Makes eight 4 to 4 3/4-inch (10 to 12-cm) tart shells or 12 muffin-sized tartlets
Steps
Making the Pastry Dough
-
1Measure out the dry ingredients and mix for 5 seconds. Get out a large food processor and measure all of the dry ingredients into it. You'll need 2 1/3 cups (291 g) of unbleached, all-purpose flour, 1 teaspoon (4 g) of sugar, 1/2 teaspoon (2.5 g) of salt, and 1/4 teaspoon (1 g) of baking powder. Put the lid on the processor and pulse the dry ingredients for about 5 seconds so they're combined.[1]
- If you don't have a food processor, you can whisk the ingredients in a mixing bowl.
-
2Cut 1 cup (226 g) of chilled, unsalted butter into 1/2-inch (12 mm) pieces. Put half of the butter into the food processor and pulse the mixture for 2 seconds. Put the rest of the butter into the processor and pulse the mixture three times (for about one second each). The dough will look somewhat crumbly.[2]
- If you're making the dough in a mixing bowl, use a pastry blender to cut the butter until it looks like coarse crumbs.
Advertisement -
3Mix in the egg yolks. Place 2 large egg yolks into the dough mixture and pulse the dough twice. Each pulse should last 1 second. You'll still see bits of butter, but the egg yolks should be incorporated.[3]
- You can also stir the egg yolks in using a rubber spatula.
-
4Blend in the vinegar and vodka. Pour in 1 teaspoon (5 ml) of chilled white or cider vinegar and 1 teaspoon (5 ml) of ice-cold vodka. Process the dough for one or two seconds or until the dough forms a shaggy ball. You might need to add another teaspoon of vodka to get the dough to come together.[4]
- If you'd like to leave out the vodka, just add an extra 1 to 2 teaspoons (5 to 10 ml) of cold water.
-
5Shape the dough into a ball. Remove the dough from the food processor. Sprinkle a little flour onto a work surface and place the dough on it. Use your fingers to roll the dough into a rough ball.[5]
- Try to work on a cold surface to prevent the butter in the dough from softening.
-
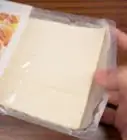
6Wrap and chill the dough for at least 30 minutes. If you'll be making mini-tartlets using a muffin tin, just wrap the ball of dough tightly with plastic wrap. If you'll be making classic tart shells, you can divide the dough into 8 evenly sized pieces and press them into 5-inch (12 cm) circles). Wrap each circle of dough in plastic wrap. Transfer your dough to the fridge and chill it for at least 30 minutes.[6]


Making Classic Tart Shells
-
1Cut out parchment paper circles. Tear off eight pieces of parchment paper. Measure and draw a circle on each piece of paper that's 9 or 10-inches (22 or 25-cm) in diameter. Use scissors to cut out each circle and set them aside.[7]
-
2Rest each piece of dough for 1 minute. Sprinkle your work surface with a little flour. Unwrap one of the chilled dough circles and put it on the floured surface. Sprinkle a little more flour over the top and let the dough rest for 1 minute.[8]
- You'll need to do this for each circle of dough.
-
3Roll the dough to an 1/8-inch (3-mm) thickness. Use a rolling pin to roll each piece into a circle. Turn the dough occasionally to keep it from sticking. Keep rolling the dough until it's 1/8-inch (3-mm) thick and between 7 and 7 3/4-inches (17 to 19-cm) in diameter.[9]
-
4Press the dough into each pan. Get out eight 4 and 4 3/4-inches (10 to 12-cm) wide tart pans. Lay one rolled circle of dough in each pan. Use your fingers to gently press the dough into the bottom of the pan and up along the edges. Don't worry if excess dough hangs over the edges.[10]
- If you're having trouble transferring the dough to the tart pans, try folding them in half before you lift them. Place the folded dough into the pan and unfold the dough so it covers the tart pan.
-
5Trim and double layer the sides. Take a small paring knife and trim off the dough that's hanging over the edges of each tart pan. Leave 1/2 inch (3-mm) overhang to prevent shrinking. Take the trimmed dough and press it into the sides of each tart to strengthen the walls of your tarts.[11]
-
6Weigh down and chill the tarts for at least 30 minutes. Place one circle of parchment paper into each tart shell. Spread pie weights or dried beans over the parchment paper so it's weighed down against the dough. Remember to do this for each tart shell and wrap all of them with plastic wrap. Chill the tarts for at least 30 minutes.[12]
- You can refrigerate the prepared tart shells for up to 2 hours.
- If you want to freeze the shells to use later, remove the pie weights and re-wrap the tarts in more plastic wrap. Freeze the tarts for four to six weeks.
-
7Preheat the oven and remove the shells from the refrigerator. Heat the oven to 350 degrees F (175 degrees C). Unwrap each tart shell and set them on a few rimmed baking sheets.
- If you want to bake frozen tart shells, unwrap the shells and put them on the baking sheets. Lay parchment paper and pie weights in each shell before you bake them.
-
8Bake the tart shells for 7 to 9 minutes. Once the oven has heated, put the sheets in the oven and bake the tart shells for 4 minutes. Carefully lift the parchment paper with the weights out and return the shells to the oven. Bake the tart shells for 3 to 5 more minutes.[13]
- The tart shells will be pale golden once they've finished cooking.
-
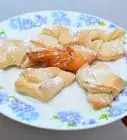
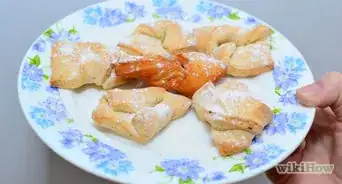
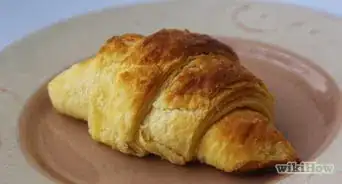
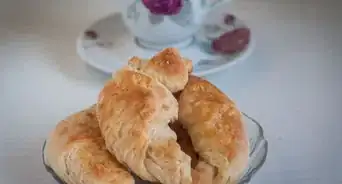
9Cool and fill the tarts. Take the baking sheets out of the oven and let the tart shells cool completely in the pans. To remove tart shells from the pans, set a can on your counter. Place a tart shell directly on the can so the removable sides fall away. You should be able to lift the tart shell off of the bottom piece. Set your baked tart shells serving plates and consider filling them with:[14]
- Lemon curd
- Dulce de leche
- Chocolate hazelnut spread
- Pastry cream and fresh fruit


Making Scalloped Tarlets in a Muffin Tin
-
1Roll the dough into a large circle that's 1/8-inch (3-mm) thick. Sprinkle a little flour on your work surface. Unwrap the chilled dough and place it on the floured surface. Sprinkle a little more flour on top of the dough and use a rolling pin to roll the dough until it's 1/8-inch (3-mm) thick.[15]
- Turn the dough occasionally to keep it from sticking. You might need to sprinkle more flour over the dough as you roll it.
-
2Cut the dough into 12 circles using scalloped cookie cutters. Take a 3-inch (7-cm) round cookie cutter with scalloped edges and use it to cut about 12 circles from the dough. You might need to roll the scraps into a ball and re-roll the dough in order to cut more circles.[16]
- Avoid re-rolling the dough more than once or the pastry will become tough.
- If you want to use a mini-muffin tin, use a smaller cookie cutter to make your circles.
-
3Butter a muffin tin and preheat the oven. Spray a muffin tin with cooking spray or brush each cavity with melted butter. Turn on the oven to 375 degrees F (190 degrees C).[17]
- You can use a standard muffin tin or use a mini-muffin tin if you'd like very small tartlets. For a mini-muffin tin, try using a 2-inch (5-cm) round cookie cutter with scalloped edges.
-
4Press the dough into each cavity and prick the dough with a fork. Lift each scalloped circle up and place it into the prepared muffin tin cavities. Gently press it into the bottom and sides of the cavities. Take a fork and prick the bottoms of each a few times to prevent it from puffing up as it bakes.[18]
-
5Fill each tartlet with a muffin liner and weights. Place one muffin liner on top of each tartlet in the muffin tin. Fill each muffin liner with pie weights or dried beans to weigh the muffin liner down. Filling the liners will help the tartlet shells keep their shape as they bake.[19]
-
6Bake the tartlet shells for 10 to 12 minutes. Put the muffin tin in the preheated oven and bake the tartlet shells until they're pale golden brown. This should take 10 to 12 minutes. Remove the tin from the oven and let the shells cool completely.
-
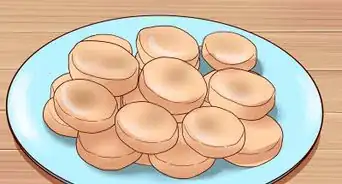
7Remove the liners and fill the tartlet shells. Lift the muffin liner and weights out of each shell. Don't worry if the muffin liners create ridges in the tarts. You shouldn't be able to see these lines once you've filled the tartlets. Fill each tartlet with your dessert filling. For example, fill the shells with:[20]
- Whipped cream and melted chocolate
- Pudding
- Ganache
- Fruit or nuts


Things You'll Need
For the dough:
- Measuring cups and spoons
- Digital scale
- Food processor or mixing bowl
- Whisk
- Pastry blender
- Rubber spatula
- Plastic wrap
For Classic Tart Shells:
- Parchment paper
- Scissors
- 8 (4 to 4 3/4-inch or 10 to 12-cm) tart pans with removable bottoms
- Ruler and pencil
- Rolling pin
- Small paring knife
- Plastic wrap
- Pie weights or dried baking beans
- Rimmed baking sheets
For Scalloped Tarlets in a Muffin Tin:
- Rolling pin
- 3-inch (7-cm) round cookie cutter with scalloped edges
- Cooking spray
- Pie weights or dried baking beans
- Muffin tin
- Fork
- Muffin liners

References
- ↑ http://www.thekitchn.com/how-to-make-freeze-and-bake-tart-shells-230086
- ↑ http://www.thekitchn.com/how-to-make-freeze-and-bake-tart-shells-230086
- ↑ http://www.thekitchn.com/how-to-make-freeze-and-bake-tart-shells-230086
- ↑ http://www.thekitchn.com/how-to-make-freeze-and-bake-tart-shells-230086
- ↑ http://www.thekitchn.com/how-to-make-freeze-and-bake-tart-shells-230086
- ↑ http://www.thekitchn.com/how-to-make-freeze-and-bake-tart-shells-230086
- ↑ http://www.thekitchn.com/how-to-make-freeze-and-bake-tart-shells-230086
- ↑ http://www.thekitchn.com/how-to-make-freeze-and-bake-tart-shells-230086
- ↑ http://www.thekitchn.com/how-to-make-freeze-and-bake-tart-shells-230086
- ↑ http://www.thekitchn.com/how-to-make-freeze-and-bake-tart-shells-230086
- ↑ http://www.thekitchn.com/how-to-make-freeze-and-bake-tart-shells-230086
- ↑ http://www.thekitchn.com/how-to-make-freeze-and-bake-tart-shells-230086
- ↑ http://www.thekitchn.com/how-to-make-freeze-and-bake-tart-shells-230086
- ↑ https://food52.com/blog/17432-how-to-make-any-mini-tartlets-without-tartlet-pans
- ↑ http://www.bakersroyale.com/basic-baking-series-tartlette-shells/
- ↑ http://www.bakersroyale.com/basic-baking-series-tartlette-shells/
- ↑ http://www.bakersroyale.com/basic-baking-series-tartlette-shells/
- ↑ http://www.bakersroyale.com/basic-baking-series-tartlette-shells/
- ↑ http://www.bakersroyale.com/basic-baking-series-tartlette-shells/
- ↑ https://food52.com/blog/17432-how-to-make-any-mini-tartlets-without-tartlet-pans
About This Article