X
This article was co-authored by wikiHow Staff. Our trained team of editors and researchers validate articles for accuracy and comprehensiveness. wikiHow's Content Management Team carefully monitors the work from our editorial staff to ensure that each article is backed by trusted research and meets our high quality standards.
This article has been viewed 37,967 times.
Learn more...
You can protect yourself and your motorcycle by balancing your tires before going out on the road. By adding adhesive weights to the tire's lighter end, you'll be able to enjoy a much more stable and controllable motorcycle ride -- all you need is a static balancer to get started!
Steps
Part 1
Part 1 of 2:
Setting up the Balancer
-
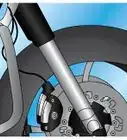
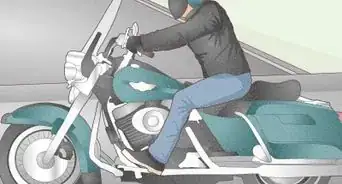
1Take the wheel off the motorcycle. Hold the motorcycle still by engaging the centerstand. Loosen the wheel's lug nuts by turning them counterclockwise with a wrench. Set the lug nuts aside and pull the wheel off the motorcycle.[1]
- The centerstand is underneath the center part of the motorcycle. Read the owner’s manual for more specific instructions on how to engage it.
-
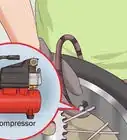
2Set a static balancer on a flat surface. Static balancers can be purchased online or at tire and motorcycle shops for about $100 USD. Set the machine on the ground or on a table. Pick a spot that seems completely even and stable.[2]
- Dynamic balancers are also available. These devices test your wheel electronically. They’re more expensive and often used in tire and repair shops.
Advertisement -
3Test the balancer with a level. Use any sort of level from a home improvement store to test the balancer’s evenness. Place the level on top of the balancer, fastening it to the bar with masking tape if it doesn’t stay put. If the balancer isn’t level, move it to different spots until you find even ground.[3]
- A magnetic level is your best option because it sticks to the balancer’s bar.
-
4Slide the wheel onto the balancer. The metal rod on top of the balancer consists of 2 cones pointing inwards. Pull 1 of the cones to the side and off of the rod. Then, slide the wheel onto the rod, pushing the axle sleeve onto the cone.
-
5Put the other balancer cone back in place. Slide the cone back onto the balancer’s rod. Push it forward until it fits tightly inside the axle sleeve. The wheel should be centered on the rod and set firmly between the cones.
- As long as the cones are wedged into the wheel’s axle holes, the tire will stay in place when you spin it later.
-
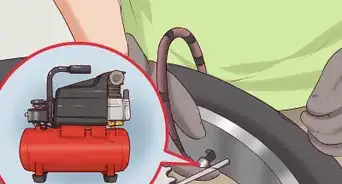
6Degrease the rim with a contact cleaner. Pick up a bottle of WD-40 or another cleaner from a home improvement, automotive, or general store. Dampen a clean cloth in the solution and use it to wipe off the rim. Remove any debris that could affect the balancing test. Always clean the wheel, since debris can skew the balance test results.[4]
- Although you can clean the wheel at any time, it’s easier after placing it on the balancer. You can easily reach all sides and the wheel won’t collect extra debris before the test.
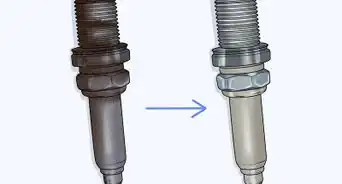
- Debris also includes old wheel weights. Always pull off any old weights before attempting to balance the wheel.
- You can also use nail polish remover to treat stubborn debris, including adhesive residue from old weights.


Advertisement
Part 2
Part 2 of 2:
Evening the Wheel's Weight
-
1Gently spin the tire and wait for it to stop. Give the wheel a spin so it turns 2 or 3 times. If you use too much force, touch the tire with your finger to slow it down. When it comes to a complete stop, the heaviest part of the wheel will be at the bottom.[5]
-
2Mark the lowest part of the wheel with tape. Peel off a small piece of masking tape. Position it on the bottom part of the rim, right in the center. Fasten it in place to mark the wheel’s lowest point.
- You may also mark this point with chalk. Mark this low point by drawing a small line on the tire.
-
3Tape a wheel weight to the rim's top end. Purchase some adhesive wheel weights from a tire shop. The wheel’s highest point, opposite the point you marked earlier, is the lightest part of the wheel. Place the weight directly on the rim. Instead of peeling off the backing, secure the weight with a piece of masking tape.[6]
- Wheel weights generally come in 5 g (0.18 oz) and 10 g (0.35 oz) sizes.
- Non-adhesive wheel weights wrap around the spokes and screw shut. These are less liable to come loose, but they are more expensive.
-
4Rotate the wheel to spin it again. Slowly spin the wheel until the taped side and weighted side are on the right and left. Then let go of the wheel and wait for it to come to a stop. The heaviest side will once again come to the bottom.
-
5Add and remove weights to balance the wheel. Add weights to the lightest part of the wheel, which is always at the top. If the part with the weight is on top again, that means it’s still too light. If the weight ends up at the bottom, that means it’s too heavy and you need to remove weight from that end.[7]
- Clean the wheel as necessary to remove any adhesive debris.
-
6Stop adding weight when the wheel no longer rotates on its own. Test the wheel by rotating it until the heavy and light sides are on the right and left again. When the wheel is balanced, the tire will not move. The heavy side won’t fall back to the bottom. Give the wheel a few extra tests to make sure it is balanced.
- Test the wheel by moving the taped end to different points and letting go of the wheel. Also spin the wheel gently so it turns 2 or 3 times. The heavier side should not fall back to the bottom.
-
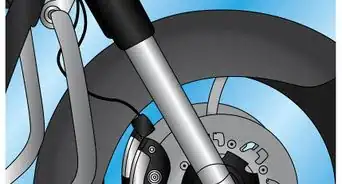
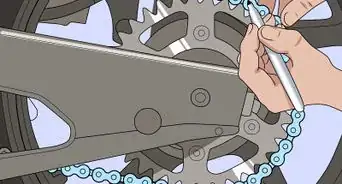
7Secure the weights in place before replacing the wheel. Bring the weighted end back to the bottom. Remove the adhesive backing on the weights, then press them onto the rim. They fit on the inside part of the rim, right beside the spokes. Move the wheel back onto your motorcycle and enjoy the ride![8]
- If you use the more expensive screw-on weights, you should have already attached them to the tire. Wrap them around the spokes, then slide the screws into the slots on their backs to hold them in place.


Advertisement
Warnings
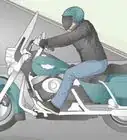
- Always take the time to balance your tires. It stabilizes your motorcycle and reduces wear and tear.⧼thumbs_response⧽
Advertisement
Things You’ll Need
- WD-40
- Soft cloth
- Static balancer
- Wrench
- Masking tape
- Wheel weights


References
- ↑ http://www.dansmc.com/rear_wheels.htm
- ↑ https://rideapart.com/articles/balance-motorcycle-tires
- ↑ https://rideapart.com/articles/balance-motorcycle-tires
- ↑ https://rideapart.com/articles/balance-motorcycle-tires
- ↑ https://www.motorcyclecruiser.com/quick-and-dirty-wheel-balancing
- ↑ https://rideapart.com/articles/balance-motorcycle-tires
- ↑ https://www.motorcyclecruiser.com/quick-and-dirty-wheel-balancing
- ↑ https://rideapart.com/articles/balance-motorcycle-tires
About This Article

wikiHow Staff
wikiHow Staff Writer
This article was co-authored by wikiHow Staff. Our trained team of editors and researchers validate articles for accuracy and comprehensiveness. wikiHow's Content Management Team carefully monitors the work from our editorial staff to ensure that each article is backed by trusted research and meets our high quality standards. This article has been viewed 37,967 times.
Co-authors: 7
Updated: October 11, 2022
Views: 37,967
Categories: Motorcycle Servicing and Repairs
Advertisement