wikiHow is a “wiki,” similar to Wikipedia, which means that many of our articles are co-written by multiple authors. To create this article, 9 people, some anonymous, worked to edit and improve it over time.
There are 9 references cited in this article, which can be found at the bottom of the page.
wikiHow marks an article as reader-approved once it receives enough positive feedback. In this case, 92% of readers who voted found the article helpful, earning it our reader-approved status.
This article has been viewed 80,370 times.
Learn more...
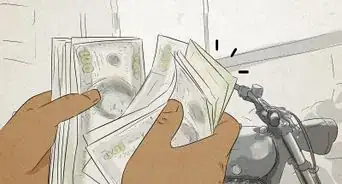
Harley Davidson oil changes can be pricey. Dealerships typically quote $225 for this service. If you're someone that isn't afraid to get their hands dirty, read this article and learn how to save some money. The example used here is an 88 cubic feet (2.5 m3) Softail. Always make sure to consult your service manual to make sure you are referencing the proper fluid capacities for your bike.
Steps
-
1Take your bike for a ride. The oil needs to be hot and thinned out before you can drain it.
-
2Learn where to drain the oil. There are three places you need to drain your oil from: the engine, transmission, and primary chaincase. The drain plug on all three of these pans requires a 5/8" socket or 1/4" Allen wrench to remove.Advertisement
-
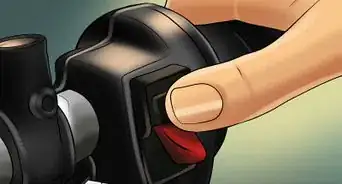
3Remove the oil fill cap. This will allow your old oil to flow out of the bike faster.[1]
-
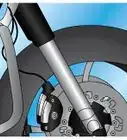
4Drain the engine oil. This is easiest to get to from right side of the bike. You will need to use your 5/8" socket.[2]
-
5Remove the transmission oil fill plug. You will need to use a 3/8" Allen wrench.
-
6Drain the transmission oil. The transmission drain plug it centered directly above the shock absorbers. Because both the engine and transmission drain plugs are so close to each other, they can easily be drained simultaneously into the same drain pan.
-
7Stand your Harley upright. Now that your engine and transmission oil are draining, stand your bike upright until oil stops running out of the holes. This is important to get as much old oil out of the bike a possible.
-
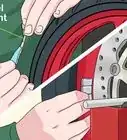
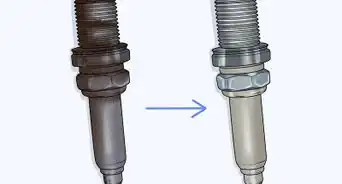
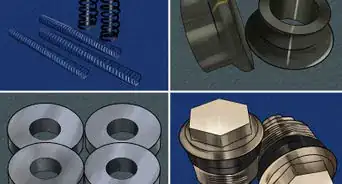
8Inspect the drain plugs.[3] There are magnets embedded in the end of each drain plug. These magnets collect any metal shavings produced from normal wear in the engine and transmission. Furthermore, inspect the rubber o-rings on the plug. If they are worn, they must be replaced.
-
9Re-install the engine and transmission oil drain plugs. You may want to use a torque wrench to tighten the plugs 14 to 21 feet (4.3 to 6.4 m)-lb; otherwise, tighten until the plugs are fully seated and not stripped.
-
10Remove the oil filter.[4] Place your drain pan under the front end of the engine. While removing the oil filter, use the oil filter drain funnel to make sure you don't make an oily mess on the bike or the floor. Alternatively, you can shove a rag under the oil filter prevent a mess. Have several rags on hand because this can get very messy.
-
11Install the new oil filter. When installing a new oil filter you must always lube the new oil filter gasket with a little bit of motor oil.[5] Screw the filter on until the gasket makes contact with the oil filter housing, then turn it another 3/4 or a turn. This must always be done by hand. Never use a wrench to tighten an oil filter.[6]
-
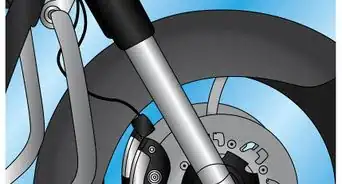
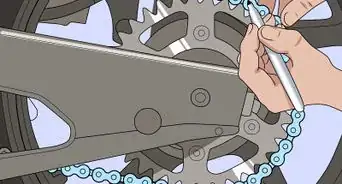
12Drain the primary chain case. This is the beginning of the final leg of your oil change. Find the drain plug in the bottom side of the chain case. Place your drain pan under the plug. You will need to use a T-30 to turn the plug out. The picture of the plug's location is in next step.[7]
-
13Remove the derby cover. While the chain case is draining, remove the derby cover. The five bolts on the derby cover are removed using a T-27.
-
14Inspect the derby cover gasket. If it is in good shape, don't bother replacing it.
-
15Fill the primary chain-case with oil. This is best done by using a primary chain-case funnel. Fill until oil reaches the bottom of the clutch hub. This should take 1 quart (950 ml; 33 imp fl oz).[8] In the photos, a chain-case funnel was not available, so it was fashioned out of a scrap piece of plastic.
-
16Re-install the derby cover. When you do this, make sure to use a torque wrench. Those bolts are extremely easy to over-tighten and strip the threads. When torquing, make sure to tighten in a star pattern.
-
17Fill the engine oil tank. The engine oil capacity is 3 quarts (2,800 ml; 100 imp fl oz). Most likely there is still oil left over in the sump, so fill it with 2 quarts (1,900 ml; 67 imp fl oz) and check the dip stick. Add oil until the oil level is between the low and high indicators on the dip stick. Replace the fill cap.
-
18Fill the transmission. The transmission holds 24 ounces (680 g).
-
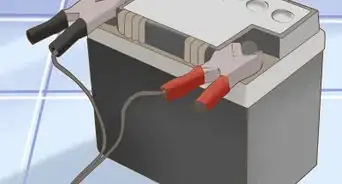
19Take your bike for a ride. Once it is at an operating temperature, check for any leaks.


Community Q&A
-
QuestionAre all oil levels checked while the bike is on its side stand?
 Community AnswerIt depends on the model year. Check the manual. Mine is a 12 Heritage and everything is checked on the kick stand. On older models, it's up.
Things You'll Need
- 6 quarts (5,700 ml; 200 imp fl oz) of synthetic oil, 20w-50
- oil filter
- oil filter wrench or pliers
- rag(s)
- shallow drain pan
- 5/8" Socket
- 3/8" ratchet
- T27 Torx
- 1/4" ratchet
- Oil Filter drain funnel (optional)


References
- ↑ https://youtu.be/k-GyRDst7Y8?t=18
- ↑ https://youtu.be/IIyW5sIpq2w?t=97
- ↑ https://youtu.be/e1E1j6JcRVM?t=77
- ↑ https://youtu.be/k-GyRDst7Y8?t=91
- ↑ https://youtu.be/e1E1j6JcRVM?t=161
- ↑ https://youtu.be/IIyW5sIpq2w?t=125
- ↑ https://youtu.be/e1E1j6JcRVM?t=226
- ↑ https://youtu.be/e1E1j6JcRVM?t=372
- ↑ https://www.youtube.com/watch?v=SMrSkk4sit8