X
wikiHow is a “wiki,” similar to Wikipedia, which means that many of our articles are co-written by multiple authors. To create this article, 17 people, some anonymous, worked to edit and improve it over time.
This article has been viewed 324,638 times.
Learn more...
Want to save some money and learn about your beloved machine at the same time? Try changing your own oil. It's cheap, fun, and doesn't require many tools!
Steps
-
1Set up your spot. This is one of the most important steps. You don't want to be running around looking for tools, containers and rags while oil is flowing out of your bike and your hands are too slick to turn a doorknob! Check the "Things You'll Need" section to get everything ready.
-
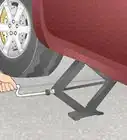
2Put your bike on the side stand, center-stand or rear-stand if you have one. Put your drain pan approximately under the bolt. Try to think ahead of where the oil's going to shoot out, and watch it as it drains. You'll most likely have to adjust the placement of the drain pan as the old oil slows down. Use the proper tool to remove the bolt. You don't want to strip it! If it drops in the pan, just pick it up quickly and don't burn yourself if it's hot!Advertisement
-
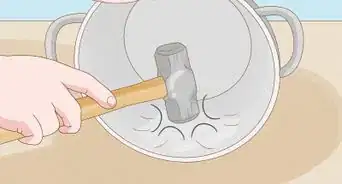
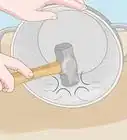
3Allow the used/dirty oil to finish draining while you take off the filter. Carefully unscrew the filter with a filter wrench or, in a pinch, wrap a leather (or rubber) belt around it like a dog choker to get it off. Be careful not to dent or damage the filter, as that could inadvertently allow some of the contaminants in the filter to go back into the engine. There may be some oil left in there that may splash out, so make sure you've got something under there to catch it. If it is on there really tight, you can punch a screwdriver through its side with a hammer and use that to get it loose.
-
4Install a fresh drain plug crush washer. It may cost as much as a dollar, but is cheap insurance. Be sure to remove the old crush washer. The New Washer will help save the threads in your oil pan as it will take less torque to wrench down on the oil drain plug.If the drain plug washer is a copper washer it must be annealed to make it soft by heating to cherry red and cooling in water. All copper washers must be annealed before reinstalling or it will not compress. This includes new ones as copper hardens with age.[1]
-
5Put the drain bolt back in. Make sure it's clean of dirt and grime before putting it back. Remember that it's usually going into cast aluminum, so don't over-tighten it! Consult your manual or your local shop for torque specs for your bike. Remember when using a torque wrench that Nm is not equal to Ft-Lbs. If you don't torque in the bolt to spec, just install it snug but do not over-tighten it!
-
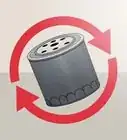
6Prep the filter by filling it about a quarter full of fresh oil. "Swish" it around slowly to try to get all the filter material down in there wet with oil. Then, and this is very important, prep the rubber seal with a dab of oil on your finger. Just get the whole seal "wet". This will ensure that it makes good contact with the engine, and make it much easier to get it off during the next oil change.[2]
-
7Clear the filter area on the engine of grime and wipe a finger of fresh oil around the area just to get good clean contact. Carefully screw on the new filter. Don't force it! It should go quite easily. Once it takes more than about zero effort to turn it, it only needs about 3/4 of a turn left. You really don't want to over-tighten an oil filter. And you shouldn't need more than a clean hand to tighten it. Don't use a tool, unless it is attached to a torque wrench and you are tightening it to factory specs![3]
-
8If you haven't already, move the dirty oil away from the area so you don't spill it! Look in your manual for oil capacity and use the funnel to add about half a quart under full capacity into the fill hole. Stop and check the level. Add or drain oil as necessary to be at about the bottom third between Add and Full. You don't want to overfill the oil! It adds undue pressure on the seals in your engine and can lessen its life. Remember that on motorcycles you have to have it straight up and down, not on the side stand, to check the level.
-
9Clean it up, double check you've returned all the caps and bolts, and you're good to go! Most auto places that sell you the oil will take it back if you pour it back into the original containers. It's a messy job, but don't pour it on the ground. It doesn't go away, it's really bad for the environment, and quite likely it is illegal.[4]
-
10Lastly, make double sure to check the level again as well as the filter, drain bolt, and fill cap tightness after your first ride![5]
-
11Congratulations! Job well done.
Advertisement
Community Q&A
-
QuestionHow can I tell when it is time to change my bike's oil?
 Community AnswerLook up in your bike's service manual, how long your service intervals are (in time as well as kilometres). If you have passed the maximum amount of time or kilometres, it is time to change the oil.
 -
QuestionHow do I change the oil of a Yahama TTR 230, and what oil is best to use?
 Community AnswerYou take the drain plug out of the bottom of the engine, then put 10W-40 in the engine. Only use 10W-40, Yamaha says it lubricates the transmission for longer life.
 -
QuestionDoes all the oil inside the engine drain out once the plug is removed?
 Community AnswerYes, but it will take time, as oil is slow. Running the engine for 5 minutes before draining to make the oil hot, which will make it drain faster.
Advertisement
Warnings
- Overfilling your engine increases oil pressure, putting strain on seals. Think about this. Racers usually run their cars/bikes with even less oil than the manufacturer recommends as the bare minimum in oil to keep weight down. And think about how hard they run their engines. Stay on the not chock-full side and filling 1/3 of the way above "add" (or the lower marker). Just check it often, as you should anyway!⧼thumbs_response⧽
- Never smoke or use a lighter while changing oil, charging batteries, or working with any part of the fuel system (tank, lines, carbs, injectors, etc).⧼thumbs_response⧽
- Hot oil is hot! Be careful as you can burn yourself.⧼thumbs_response⧽
- Oil isn't all that flammable, but fuel that may have contaminated your oil IS. Oil will burn, mind you, but it takes a source of heat far greater than that of a simple cigarette or a lighter. However, you may have had a carburetor's float get stuck and not even realize it, and now you might have a great deal of fuel mixed in with the oil in your crankcase. If a float sticks, the excess fuel should pour out of the overflow. Sometimes, if the line is pinched, plugged, or stopped up, over one night the contents of the entire fuel tank can find their way into both the airbox and the crankcase. It may stick for only a short time resulting in only a small amount of fuel loss, but any fuel in the crankcase is really, really bad. If that has happened, changing your oil in-doors could pose an explosion/fire hazard. An easy way to know what you're dealing with up-front is to pull your oil fill cap, stick your nose up to the hole, and take a whiff. If you smell gas, move the show outdoors to a well ventilated area. Also, you will want to find the source of the errant fuel ASAP. If you have a float sticking, it will cause all sorts of problems. Fuel will also re-contaminate your fresh oil and that can cause permanent damage to your engine. Diluted oil is bad oil!⧼thumbs_response⧽
Advertisement
Things You'll Need
- Oil Filter
- Oil
- Drain Plug Washer
- Open end wrench (or socket and ratchet)
- Drain pan
- Tool to remove the filter (an old leather belt will do)
- Rags for cleanup
- Funnel
- Aluminum foil
- Torque wrench (recommended)
- Owner's or service manual
References
- ↑ https://www.motorcyclecruiser.com/how-to-change-your-motorcycles-oil-and-filter/
- ↑ https://www.rideapart.com/articles/245854/how-to-change-your-motorcycle-oil/
- ↑ https://www.motorcyclenews.com/advice/maintenance/motorbike-oil-change-air-filter-swap-/
- ↑ https://earth911.com/recycling-guide/how-to-recycle-motor-oil-and-filters/
- ↑ https://www.motorcycle.com/how-to/how-do-you-check-a-motorcycles-oil-level
- ↑ https://www.dummies.com/home-garden/car-repair/how-to-dispose-of-motor-oil-safely/
About This Article
Advertisement


