This article was co-authored by wikiHow staff writer, Hannah Madden. Hannah Madden is a writer, editor, and artist currently living in Portland, Oregon. In 2018, she graduated from Portland State University with a B.S. in Environmental Studies. Hannah enjoys writing articles about conservation, sustainability, and eco-friendly products. When she isn’t writing, you can find Hannah working on hand embroidery projects and listening to music.
There are 12 references cited in this article, which can be found at the bottom of the page.
wikiHow marks an article as reader-approved once it receives enough positive feedback. In this case, 100% of readers who voted found the article helpful, earning it our reader-approved status.
This article has been viewed 143,773 times.
Learn more...
Want to try block printing, but not sure where to start? Block printing is a fun way to add your own designs to paper, fabric, or even clothing. In this article, we’ll walk you through everything you need to know about block printing on linoleum, including carving and the printing process. We’ll also tell you how to make fun and easy stamps out of foam or sponges for a quick craft you can try with your kids. To start a new hobby today, keep reading!
Steps
Carving Linoleum
-
1Draw the design you want to create on a piece of paper. Grab a piece of paper that’s roughly the size of your linoleum block. Use a graphite pencil to draw your design onto the paper, drawing it backwards to create a mirror-image of the final print. Remember that you’ll be carving into the printing block to create a relief image, which means the lines you draw become the negative space of the finished design.[1]
- Some image editing software can "invert" your design, switching the black to white and vice versa. This can help you visualize the final design better.
- The same software can also “flip” or “mirror” images for you. If you have trouble drawing letters or images backwards, this software can help tremendously.
-
2Trace your design onto your linoleum block. Tape a piece of transfer paper directly onto the block with the shaded side of the page against the surface of the block. Then, tape or clamp your design over the lighter side of the transfer paper. Using a pen or stylus, trace your design entirely.[2]
- The ink on the back of the transfer paper will leave a “carbon copy” of your design on the surface of the block.
- When your design is fully transferred, carefully remove the tracing paper from your linoleum block.
Advertisement -
3Remove the negative space from your design. Block printing is all about creating a “relief” image, meaning the lines you carve out will become the negative space of your finished print. As you begin to carve, plan out which areas you’d like to keep and which ones you want to remove to create your design.[3]
-
4Carve out large chunks of lino with a large blade. To remove big sections of linoleum, grab the biggest blade that you can find. Set the linoleum on a flat surface, and carefully push the blade into the linoleum away from you. Carve in long, straight lines, being careful to follow your design the entire time.[4]
- It’s helpful to hold the linoleum block in 1 hand and hold the blade in the other. Just make sure that the blade is always pointing away from you, and that you’re never cutting toward your hand or your body.
- Instead of buying individual blades, purchase a tool set with multiple blades to choose from.
-
5Carve out smaller details with a small blade. For detailed line work, switch to a smaller blade. Hold the linoleum in 1 hand and the blade in the other, then carefully push the blade into the block, pointing it away from your body. Work in short, even strokes to carefully follow the lines of your design.[5]


Printing with Carved Linoleum
-
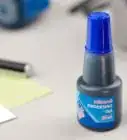
1Roll printing ink onto a glass or plastic tray. Printing ink is sticky and much thicker than other inks. It also dries very quickly. Using a brayer (ink roller), spread the ink on a glass or plastic plate and roll it smooth.[6]
- If you are printing onto fabric, use oil-based ink.
- Oil-based inks will stain clothes and surfaces, so prep your work area carefully. Put down cardboard or newspapers to avoid staining any surfaces, and wear old clothing that you don’t mind getting ink on.
-
2Coat the surface of the block with a thin layer of ink. Use the ink roller to spread the ink evenly over your carved printing block. Hold the ink roller completely flat to avoid getting ink in any areas that aren’t supposed to have it. Make several passes over the block to ensure you’ve got even coverage.[7]
- It might take you a few tries to get your ink coverage perfect, and that’s okay! Many professional print-makers do test prints 2 to 3 times until they figure out the right coverage for their print.
-
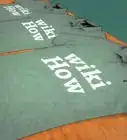
3Press the paper or fabric over the block. Keep the linoleum block face up on a flat surface. Carefully press a sheet of paper or fabric over the block, then use a baren (printmakers' rubbing tool) or wooden spoon to slowly press on the back of the paper or fabric. Rub your entire design onto the paper or fabric in small circles.[8]
- If you’re using a small block, like a stamp-sized block, simply press the inked block onto your paper or fabric.
-
4Peel the paper or fabric off the linoleum block. Once you’ve pressed the ink into your medium, grab a corner of the paper or fabric and slowly lift it up. Try not to move your paper or fabric too much to avoid any smudging.[9]
- If you’re using a stamp-sized block, just pick the block back up off your paper or fabric.
-
5Let the print dry for at least 2 hours. Printing ink takes a while to dry because it’s so thick. Set your paper or fabric on a flat surface and leave it to dry for at least 2 hours, or longer if your ink says to do so.[10]
- While you wait for your design to dry, feel free to do more prints! You can print your design as many times as you’d like by following the same instructions above.
-
6Clean your print block and tools thoroughly when you’re done. If you used water-soluble ink, wash your materials with soap and water. If you used oil-based ink, use mineral spirits to wash your lino block and tools.[11]
- Mineral spirits can cause skin and eye irritation. Wear gloves when handling mineral spirits, and keep it away from your face and eyes.[12]
- Mineral spirits are flammable. Store your bottle of mineral spirits in a cool, dark spot to avoid any issues.


Block Printing With Sponges or Foam
-
1Use sponges or foam for less detailed projects. Sponges and foam can make excellent print blocks for crafts at home.[13] They work well with water-based as well as acrylic hobby paints to “stamp” simple prints on paper and fabric, but they hold much less surface detail than wood and linoleum.
- Different kinds of foam you find around your house, such as styrofoam, can work to make simple outline stamps. However, the denser, specially made “foamcore” available at craft stores will hold noticeably more surface detail and last much longer.
-
2Draw your design directly onto the sponge or block of foam. Because these materials will be used mainly as stamps, the outline of the shape is the most important part of the design. Use a pencil to draw a simple image onto your foam or sponge.[14]
- Remember that your design will print backwards! If you’re printing letters or numbers, draw them on backwards in order for them to be the right way round when printing.
-
3Cut out your design with scissors. Using a pair of scissors or a craft knife, cut the shape out of the sponge or block of foam. Then, use the scissors to gently carve any lines or details into the foam or sponge. The resulting shape will be your printing stamp.[15]
- Always cut away from your body and fingers!
-
4Spread paint or ink onto a palette. Mix up the color and consistency of the paint you want to use on a palette or mixing slate. You can use acrylic paint, or you can use water-based ink.[16]
-
5Pick up ink with your stamp, then stamp it onto paper. After wiping off any excess paint from the stamp, simply press the block down on your medium. Depending on how absorbent the material is, you may be able to get a few printings from each application of paint.[17]


Community Q&A
-
QuestionWhat type of paint do you use for poly block printing?
 Community AnswerWhen printing with polystyrene, it's more important to make sure that when you're rolling out whatever ink you're using, you're spreading it thin enough to prevent 'filling in' your lines on your printing block. I've only used cheaper acrylic water-based inks when using poly plates because they're usually used with beginners and the ink needs to stay tacky or make a 'sticky' sound when rolling it out with your brayer.
 -
QuestionWhat are the advantages of block printing?
 Community AnswerOne of the advantages of block printing is that it can be done on a surface of almost any size and texture. Block printing is also one of the easiest printing methods. The materials needed are relatively inexpensive, and you don’t need a lot of equipment for printing.
 -
QuestionWhat carving tools can I use on linoleum?Community AnswerSpeedball makes a linoleum cutter. It contains a number of cutting tools. You can get fairly good details on them, but I would suggest you pick up an X-acto knife as well. Definitely practice with the tools on a separate block first, they can be a little tricky.
Warnings
- Carving tools can be very sharp. Always cut away from yourself.⧼thumbs_response⧽
Things You’ll Need
Carving Linoleum
Printing with Carved Linoleum
- Printing ink
- Brayer (ink roller)
- Baren
- Paper or fabric
- Soap or mineral spirits
Block Printing With Sponges or Foam
- Sponges or foam
- Pencil
- Acrylic paint or water-based ink
- Scissors
- Paper or fabric

References
- ↑ https://www.gathered.how/arts-crafts/art/how-to-block-print-on-fabric/
- ↑ https://www.youtube.com/watch?v=WcwUMYMYCT0&t=65s
- ↑ https://www.gathered.how/arts-crafts/art/how-to-block-print-on-fabric/
- ↑ https://www.youtube.com/watch?v=jZ-TqboEmQY&t=222s
- ↑ https://www.youtube.com/watch?v=WcwUMYMYCT0&t=192s
- ↑ https://www.youtube.com/watch?v=6GpmdCqDSZI&t=112s
- ↑ https://www.youtube.com/watch?v=6GpmdCqDSZI&t=378s
- ↑ https://every-tuesday.com/how-to-create-a-hand-lettered-block-print/
- ↑ https://sewguide.com/fabric-block-printing-diy-guide/
- ↑ https://sewguide.com/fabric-block-printing-diy-guide/
- ↑ https://research-groups.usask.ca/saferprintmaking/inks.php#Suppliers
- ↑ https://kodiakroofing.com/wp-content/uploads/2019/10/CA_Cisco-Mineral-Spirts-SDS.pdf
- ↑ https://static1.squarespace.com/static/51bd298be4b09566e1107784/t/5e6d29426089275b7c505c25/1584212362878/Foam+printing+facilitation+guide.pdf
- ↑ https://artclasscurator.com/making-art-with-kids-block-printing/
- ↑ https://static1.squarespace.com/static/51bd298be4b09566e1107784/t/5e6d29426089275b7c505c25/1584212362878/Foam+printing+facilitation+guide.pdf
- ↑ https://artclasscurator.com/making-art-with-kids-block-printing/
- ↑ https://static1.squarespace.com/static/51bd298be4b09566e1107784/t/5e6d29426089275b7c505c25/1584212362878/Foam+printing+facilitation+guide.pdf
About This Article

To block print, start by getting a linoleum block printing kit from your local art supply store, which is great for beginners. Then, on a piece of paper, draw a design that you want to print. Keep in mind that the final print will be a mirror image of your design, so you'll want to draw the design backwards. When you're finished, use transfer paper to transfer your design to the linoleum block you'll be carving. Next, use a linoleum carving tool to carve out your design. Finally, coat your block with a layer of ink and press paper or fabric over it to make a print. To learn how to block print with a sponge, scroll down!