X
This article was co-authored by Yaffet Meshesha. Yaffet Meshesha is a Computer Specialist and the Founder of Techy, a full-service computer pickup, repair, and delivery service. With over eight years of experience, Yaffet specializes in computer repairs and technical support. Techy has been featured on TechCrunch and Time.
The wikiHow Tech Team also followed the article's instructions and verified that they work.
This article has been viewed 21,713 times.
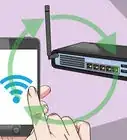
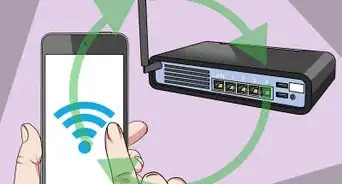
This wikiHow teaches you how to prevent your computer from automatically connecting to a Wi-Fi network you've previously saved, using a computer.
Steps
Method 1
Method 1 of 2:
Using Windows
-
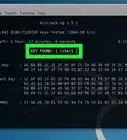
1Get the network name or SSID you want to block. Click the Wi-Fi icon on the taskbar in the lower-right corner of your screen, and note down the network name you want to block.
-
2Click the search icon on the lower-left corner. This button looks like a magnifier icon next to the Start menu button. It will open your search panel.
- If you're using Cortana, you'll see a white circle instead of a magnifier icon here.
Advertisement -
3Enter cmd into the search. Matching results will appear as you type. Command Prompt should be the best match at the top of the results.
-
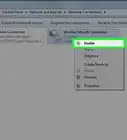
4Right-click Command Prompt on the list. This will open your right-click options on a drop-down menu.
-
5Select Run as administrator on the right-click menu. This will open Command Prompt in a new window, and allow you to execute admin processes.
-
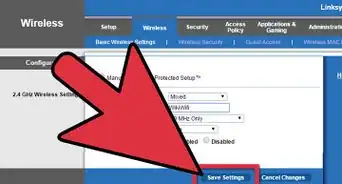
6Type netsh wlan add filter permission=block ssid="Network Name" networktype=infrastructure in Command Prompt. This command will allow you to block a Wi-Fi network from connecting to your computer.
- Replace "Network Name" in the command with the name of the Wi-Fi network you want to block.
-
7Press ↵ Enter on your keyboard. This will execute the command, and add this network to your blacklist filter. It will no longer appear in your network list.
- If you want to remove the block and add the network again, just replace add filter in the command with delete filter.
- For an easier approach, try clicking the Network icon in the lower right corner of your screen. Click Network and Internet settings, then Wi-Fi settings. Under Manage known networks, click the network you want to delete, then click Forget.[1]


Advertisement
Method 2
Method 2 of 2:
Using Mac
-
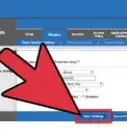
1Open the System Preferences menu on your Mac. The System Preferences app looks like a gray gear icon. You can find it in your Applications folder.
- Alternatively, you can click the Apple icon in the upper-left corner of your screen, and click System Preferences here.
-
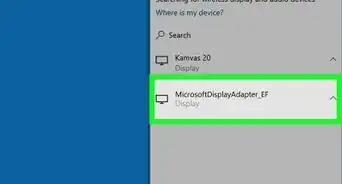
2Click Network in System Preferences.[2] This option looks like a gray globe icon on the third row of System Preferences.
-
3Select your Wi-Fi connection on the sidebar. Find Wi-Fi on the left sidebar, and click on it. This will open your Wi-Fi settings on the right-hand side.
-
4Click the Advanced button on the bottom-right. This will open your advanced Wi-Fi settings in a new window.[3]
-
5Click the Wi-Fi tab at the top. This button is in the upper-left corner of the Advanced window. You will find a list of all your "Preferred Networks" on this page.
-
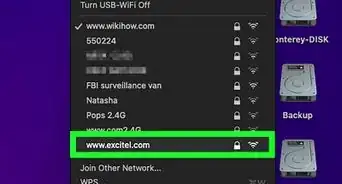
6Select the network you want to block on the "Preferred Networks" list. Scroll down the list, and click on the network you want to block.
-
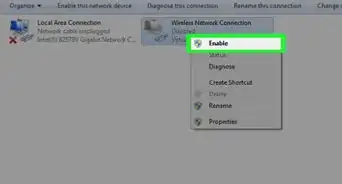
7Click the – button below the "Preferred Networks" list. This will remove the selected Wi-Fi network from the list, and prevent your computer from automatically connecting to this network in the future.
- You can also uncheck the Auto Join box next to the Wi-Fi network, if you prefer.[4]


Advertisement
Expert Q&A
Did you know you can get expert answers for this article?
Unlock expert answers by supporting wikiHow
-
QuestionHow can I stop automatically connecting to a network on Mac?
 Yaffet MesheshaYaffet Meshesha is a Computer Specialist and the Founder of Techy, a full-service computer pickup, repair, and delivery service. With over eight years of experience, Yaffet specializes in computer repairs and technical support. Techy has been featured on TechCrunch and Time.
Computer SpecialistChoose System Preferences under the Apple menu, then click Network. Select Wi-Fi in the list on the left. Click the Advanced button, which will pull up a Wi-Fi pane with a list of known networks. Click the remove button (―) beneath the list or uncheck the Auto Join box next to the Wi-Fi network you wish to wish to not automatically to. Finish by clicking OK.
Support wikiHow by unlocking this expert answer.
Advertisement


References
- ↑ Yaffet Meshesha. Computer Specialist. Expert Interview. 22 September 2020.
- ↑ Yaffet Meshesha. Computer Specialist. Expert Interview. 22 September 2020.
- ↑ Yaffet Meshesha. Computer Specialist. Expert Interview. 22 September 2020.
- ↑ Yaffet Meshesha. Computer Specialist. Expert Interview. 22 September 2020.
About This Article

Yaffet Meshesha
Computer Specialist
This article was co-authored by Yaffet Meshesha. Yaffet Meshesha is a Computer Specialist and the Founder of Techy, a full-service computer pickup, repair, and delivery service. With over eight years of experience, Yaffet specializes in computer repairs and technical support. Techy has been featured on TechCrunch and Time. This article has been viewed 21,713 times.
How helpful is this?
Co-authors: 3
Updated: October 7, 2020
Views: 21,713
Categories: Wi Fi
Advertisement