This article was co-authored by Alberto DeJesus. Alberto DeJesus is a Construction Specialist and the CEO of DeJesus Industries. With more than four years of experience, he specializes in high-end real estate development and construction. Alberto and DeJesus Industries have been featured on NBC News and have worked with numerous well-known companies, including Mazda, Amazon, and CVS. Alberto holds a Bachelor’s degree from Boston University.
There are 16 references cited in this article, which can be found at the bottom of the page.
This article has been viewed 85,226 times.
Custom-made shed doors are a great way to add some personality to your shed and save some money in the process. To create shed doors, you'll need to get wood paneling or plywood to create the door itself, then reinforce the door with a wooden frame. If done correctly, you can create a stylish but sturdy door for your shed!
Steps
Gathering Materials for Your Door
-
1Measure and mark the size of your doorframe. Measure from one side of the door frame to the other side of the frame and subtract 12 millimetres (0.47 in) to each side. This extra space is needed so that you can properly open the door. Write down the length and the width of the doorframe on a piece of paper. Most shed doors will be somewhere between 25–45 inches (64–114 cm) wide and 5.5–7 feet (1.7–2.1 m) tall.[1]
-
2Choose and purchase material for your door. You can use a T1-11 siding, which resembles wood paneling, or you can use plywood sheathing to construct the door.[2] Another option is purchasing bead boards, which are boards that can interlock with one another. Use a material that blends in with the siding on the shed so that the door matches the aesthetic of your structure.[3]
- T1-11 siding and beadboards are sturdier than plywood sheathing.
- Get paneling or plywood that is at least 1.5 inches (3.8 cm) thick.
Advertisement -
3Purchase 3 1 by 4 inches (2.5 cm × 10.2 cm) boards for your frame. Purchase 3 1 by 4 inches (2.5 cm × 10.2 cm) boards that are as long as the height of the door. Purchase boards that are a foot or 2 longer than the height of your door and cut them down later to ensure that you have enough wood to construct the entire frame.
-
4Buy 2 1 by 8 inches (2.5 cm × 20.3 cm) boards. These boards will act as the top and bottom of the frame that will go on top of your door. Get boards that are as long as the width of your door.


Constructing the Door
-
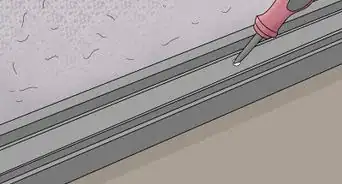
1Draw an outline of your door on your wood paneling. Measure and mark an area on your wood paneling that corresponds with the measurements that you took, minus 12 millimetres (0.47 in) to each side. Use a flat edge to draw the lines that will serve as a guide as you cut the material to size.[4]
- Hold a level up against the lines to make sure that they are not on an angle.
-
2Cut the material to size. Use a saw and cut along the lines using a flat edge to guide as you cut. If you want more precise cuts, you can use circular saw or miter saw to cut out your door. If you are using interlocking beadboards, make sure to cut away the uneven edges on the boards so that they are straight on all sides of the door.[5]
-
3Cut 1 by 4 inches (2.5 cm × 10.2 cm) boards to the height of your door. Take your 1 by 4 inches (2.5 cm × 10.2 cm) strips of wood and use a circular saw or handsaw to cut them to the height of your door. Cut out 2 pieces of wood for each side of your door and lay them on the floor.[6]
-
4Glue the strips to the left and right edges of your door. Squeeze wood glue in a back and forth motion to apply wood glue. Put glue all the way down the length of the 1 by 4 inches (2.5 cm × 10.2 cm) boards, then line up both boards with the right and left edge of the door and lay them on top of it. Press down on the boards so that they lay flat on the door’s surface.[7]
-
5Screw 1.25 inches (3.2 cm) long screws into the frame. Use an electric screwdriver to drive screws into the corners of the frame. Start from one end of the frame and place 2 screws about .25 inches (0.64 cm) away from both edges of the frame. Continue your way down the length of the frame, spacing the screws about 6 inches (15 cm) apart. This will secure the sides of the frame to the door.[8]
-
6Measure the space in between the two side frames. Use a tape measure and record the amount of space in between the two side frames. If you’ve squared everything up correctly, the space should be the same on the top and bottom of your door.[9]
-
7Cut a 1 by 8 inches (2.5 cm × 20.3 cm) board to fit in between the frame. Measure and mark a 1 by 8 inches (2.5 cm × 20.3 cm) so that it’s long enough to line up flush with the side parts of your frame. Draw a line to help you cut a straight. Use a handsaw or electric saw to cut the piece of wood to size.[10]
-
8Glue the boards onto the top and bottom of your door. Apply glue to the back of the boards like you did with the side frame pieces. Press the boards in between the side frame and line up the top of the board with the top of the door. Repeat the process on the bottom of the door.[11]
-
9Screw the 1 by 8 inches (2.5 cm × 20.3 cm) boards in. While the glue is still wet, use 1.25 inches (3.2 cm) long screws and place the screws in all four corners of the board. Place additional screws 6 inches (15 cm) apart down the length of the board to secure it.[12]
-
10Mark a 1 by 4 feet (0.30 m × 1.22 m) board diagonally on the door. The board that runs diagonally will help support your door and improve its stability as well as prevent it from racking. Lay the board diagonally over the frame and use a flat edge to draw lines that line up with the edges of the frame on each end of the board. This should create an angled line that you can cut from your diagonal board.[13]
-
11Cut the board to fit the outer frame. Use a handsaw or electric saw to cut the angled edge. The board should now be able to fit diagonally on top of the door’s surface.[14]
-
12Glue and nail the diagonal board in place. Repeat the process that you used for the rest of the frame and glue and nail the diagonal board onto the surface of the door. If you cut everything correctly, the edges on the end of the wood should lay flush with the rest of the frame. Your door now has a frame that will help keep it together.[15]


Attaching Hinges to Your Door
-
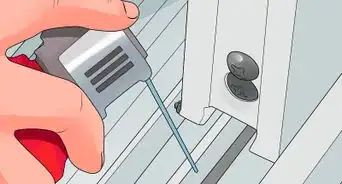
1Measure and mark where the hinges will go on your shed. Use a tape measure and mark 7 inches (18 cm), down, from the top of the door frame and 11 inches (28 cm) up from the bottom of the doorframe. If you already have hinges installed on your shed, you can skip this step.[16]
-
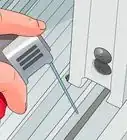
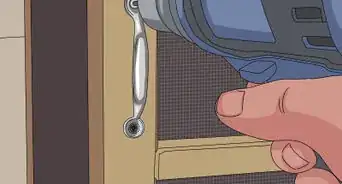
2Screw the hinges into the shed with 1.5 inches (3.8 cm) lag screws. Screw in 1.5 inches (3.8 cm) lag screws into the holes on the hinge and into the frame itself. This should secure the hinges to your shed.[17]
-
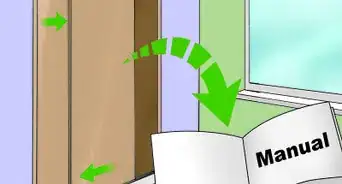
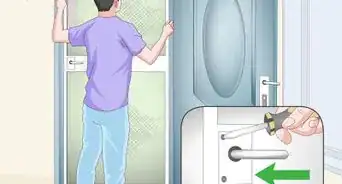
3Line the door up into the doorframe. Have a friend help you hold the door in place. Use a level to make sure that the door is straight, then open the hinge so that it rests over the surface of your door. Make sure that there is a 12 millimetres (0.47 in) gap in between the door and the shed’s door frame so that the door can properly open.[18]
-
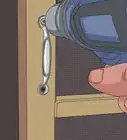
4Screw the hinges into the door. While your friend continues to the hold the door in place, use a screwdriver to drive 1.5 inches (3.8 cm) lag screws through the holes in the top hinge and into the door. Then, repeat the process with the bottom hinge. Make sure that the screws are tight and the door feels secured to the shed’s door frame.
-
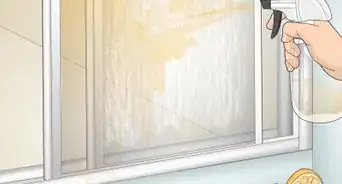
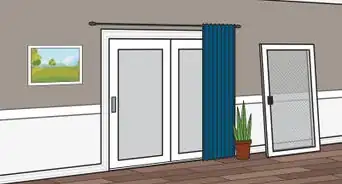
5Open and close your door to test if it works. You should now have a door that can open and close on your shed. If the door is getting stuck on the frame when you try to open it, you may have to sand down the edges of the door with a 36 to 100 grit sandpaper to slightly reduce the door’s size.


Things You'll Need
- Measuring tape
- Hand saw, circular saw, or miter saw
- T1-11 siding, beadboards, or plywood sheathing.
- 3 1 by 4 inches (2.5 cm × 10.2 cm) boards (longer than the height of your door)
- 2 1 by 8 inches (2.5 cm × 20.3 cm) boards (longer than the width of your door)
- Flat edge
- Wood glue
- 1.25 inches (3.2 cm) long screws
- 1.5 inches (3.8 cm) lag screws
- Hinges


References
- ↑ https://www.buildeazy.com/newplans/shed_door_install_4_06.html
- ↑ https://www.homeadvisor.com/r/t1-11-siding/
- ↑ https://www.thisoldhouse.com/ideas/6-tips-shopping-beadboard
- ↑ https://www.youtube.com/watch?v=mY6GkLC-rHo&feature=youtu.be&t=1m27s
- ↑ https://www.youtube.com/watch?v=I17Ez3V3LYE&feature=youtu.be&t=1m36s
- ↑ https://www.youtube.com/watch?v=kUcRm1vp8UA&feature=youtu.be&t=1m22s
- ↑ https://www.youtube.com/watch?v=I17Ez3V3LYE&feature=youtu.be&t=3m26s
- ↑ https://www.youtube.com/watch?v=kUcRm1vp8UA&feature=youtu.be&t=1m53s
- ↑ https://www.youtube.com/watch?v=kUcRm1vp8UA&feature=youtu.be&t=2m25s
- ↑ https://www.youtube.com/watch?v=kUcRm1vp8UA&feature=youtu.be&t=2m29s
- ↑ https://www.youtube.com/watch?v=kUcRm1vp8UA&feature=youtu.be&t=2m43s
- ↑ https://www.youtube.com/watch?v=kUcRm1vp8UA&feature=youtu.be&t=2m29s
- ↑ https://www.youtube.com/watch?v=I17Ez3V3LYE&feature=youtu.be&t=5m8s
- ↑ https://www.youtube.com/watch?v=I17Ez3V3LYE&feature=youtu.be&t=5m20s
- ↑ https://www.youtube.com/watch?v=I17Ez3V3LYE&feature=youtu.be&t=5m37s
- ↑ https://www.gardenbuildingsdirect.co.uk/resource/installing-a-shed-door/
- ↑ https://www.gardenbuildingsdirect.co.uk/resource/installing-a-shed-door/
- ↑ https://www.youtube.com/watch?v=rr324YpqWxc&feature=youtu.be&t=48s
About This Article

To build a door for a shed, start by cutting a piece of wood paneling or TI-11 siding to the size of the door opening, minus 1/2 inch on each side. Next, cut boards to frame the top, bottom, and sides of your door, then glue them in place using wood glue. You can also add a diagonal board from a top corner to the opposite bottom corner for more support. Once the glue is dry, add long screws to secure the boards to the door. Then, screw hinges into the door frame with lag screws, and attach the hinges to the edge of the door. For tips on how to use bead boards to build a shed door, read on!