This article was co-authored by wikiHow staff writer, Hunter Rising. Hunter Rising is a wikiHow Staff Writer based in Los Angeles. He has more than three years of experience writing for and working with wikiHow. Hunter holds a BFA in Entertainment Design from the University of Wisconsin - Stout and a Minor in English Writing.
There are 14 references cited in this article, which can be found at the bottom of the page.
wikiHow marks an article as reader-approved once it receives enough positive feedback. In this case, 94% of readers who voted found the article helpful, earning it our reader-approved status.
This article has been viewed 532,535 times.
Learn more...
If you want to cast metal into different shapes, you need to have a furnace that gets hot enough to melt the metal. While you can buy premade furnaces, you can also make your own using an insulated garbage can. Start by cutting the garbage can down to size and lining it with heat-resistant insulation. Once you have the furnace built, insulate the lid so it retains heat and vents built-up pressure. After you attach a heat source to the furnace, you’ll be able to use it for casting!
Steps
Making the Furnace Body
-
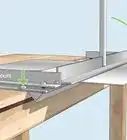
1Cut a steel garbage can with an angle grinder so it’s 18 in (46 cm) tall. Look for a steel garbage can that’s at least 18 inches (46 cm) tall and has a diameter of 16 inches (41 cm). If the garbage is taller than 18 inches (46 cm), put a metal-cutting blade on an angle grinder and turn it on. Carefully cut around the outside of the garbage can to trim it down to size.[1]
- Wear safety glasses while working with an angle grinder so you don’t get any metal scraps in your eyes.
- Be careful of the cut edges on the garbage can since they may be sharp and could cut you easily.
- If you don’t have an angle grinder or you just want a smaller forge, you can also use a 10 US qt (9.5 L) steel bucket that’s 11 in (28 cm) tall.
-
2Drill a hole in the side of the garbage can that’s 4 in (10 cm) up from the bottom. Attach a 1 in (2.5 cm) hole saw attachment to the end of a drill and tighten it until it’s secure. Line the hole up on the side of the bucket so it’s slightly off-center and about 4 inches (10 cm) up from the bottom of the can. Cut completely through the side of the garbage can.[2]
- The side hole will be where air or gas enters your forge to circulate the heat.
- Don’t put the hole directly along the bottom of the garbage can or else it could get plugged up if there’s a spill inside the furnace.
Advertisement -
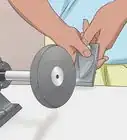
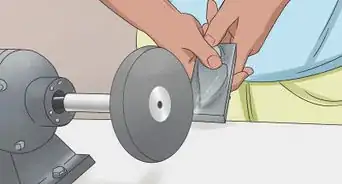
3Line the inside of the can with 2 in (5.1 cm) of ceramic fiber wool. Ceramic fiber wool is a heat- and fire-resistant style of insulation that works well for homemade furnaces. Use a utility knife to cut a circular piece of ceramic fiber wool that’s the same size as the bottom of the garbage can. Push the piece of wool tightly against the bottom of the can. Then wrap the wool around the inner sidewalls of the garbage can as tightly as you can.[3]
- You can buy ceramic fiber wool from home improvement stores or online.
- Ceramic fiber wool may cause irritation if it comes into contact with bare skin. Wear long sleeves and work gloves to help protect yourself.
Warning: The dust produced by cutting ceramic fiber wool can be harmful if it enters your lungs, so always wear a dust mask when you’re handling it.[4]
-
4Cut out the wool covering the hole in the side of the garbage can. Find the hole you made in the side of the garbage can and poke through it with a craft knife. Guide the knife around the edge of the hole so you cut through the wool lining the side of the garbage can. Once you cut around the edge, pull the piece of wool out from the hole.[5]
-
5Spray a rigidizer on the wool and let it set for 24 hours. Rigidizer is a chemical compound that activates the particles in the ceramic fiber wool so it solidifies and holds its shape. Pour the rigidizer compound into a spray bottle, and apply it to all exposed sides of wool. Allow the rigidizer to air-dry for at least 24 hours so it can set and harden the wool.[6]
- You can buy rigidizer online.
- Label the spray bottle you use for your rigidizer so you don’t mix it up with other bottles you have.
- Some ceramic fiber wool is pre-treated with rigidizer and will start to harden when it’s exposed to air. Check the packaging on the wool to see if there are any special instructions.
-
6Paint the surface of the wool with furnace cement and let it set completely. Mix the furnace cement with a stir stick to make sure it’s thoroughly combined. Then use a 2 in (5.1 cm) paintbrush to spread the cement on top of the wool. Make sure all of the exposed surfaces are completely covered so heat doesn’t escape. Let the cement cure for at least 24 hours before using your furnace.[7]
- You can buy premixed furnace cement from home improvement stores or online.
- You don’t need to use furnace cement, but it can help prolong the life of your furnace and create a smooth, clean surface.


Insulating the Lid
-
1Drill a 2 in (5.1 cm) vent in the top of the garbage can lid. Use the lid that came with the garbage can you’re using for the main body of the furnace. Attach a 2 in (5.1 cm) hole saw attachment on your drill and tighten it until it’s secure. Position the vent hole 3–4 inches (7.6–10.2 cm) to one side of the lid’s handle and use the saw to cut through the metal.[8]
- Be sure to use a hole saw attachment made for metal or else you may damage the bit.
- Never use a lid that doesn’t have a vent hole or else pressure could build up inside the furnace and cause it to explode or fail catastrophically.
-
2Fill in the bottom of the lid with 2 in (5.1 cm) of ceramic fiber wool. Cut out a circular piece of ceramic fiber wool that has a diameter that’s 1–2 inches (2.5–5.1 cm) larger than the bottom of the lid. Push the wool into the bottom of the lid so it presses against the sides and holds firmly in place. Continue adding layers of ceramic wool until it’s 2 inches (5.1 cm) thick to provide the best heat resistance.[9]
- Wear long-sleeved clothing and a dust mask that’s rated N95 or better while cutting and working with the wool since it can cause irritation and itchiness.
- Always check the MSDS label on the ceramic wool you’re working with and follow any safety precautions listed on it.
- If the wool doesn’t stick to the bottom of the lid, you can spray a heat-resistant adhesive on the lid before pushing the wool onto it. You can buy heat-resistant adhesive from hardware stores or online.
-
3Cut a hole in the wool that lines up with the lid’s hole. Flip the lid so the handle faces up and locate the hole you drilled early. Poke a craft knife along the edge of the hole so it goes completely through the wool. Saw back and forth along the edge of the hole to remove the section of wool covering it.[10]
- Don’t leave the wool over the hole or else your furnace won’t vent properly.
Tip: If you have trouble cutting through the wool with a craft knife, then try using a serrated bread knife since it may cut through the wool easier.
-
4Apply a rigidizer to the wool and leave it to cure for 24 hours. Put your rigidizer compound in a spray bottle, and apply it directly to the ceramic fiber wool on the lid. Make sure to coat all of the exposed surfaces with the rigidizer or else it won’t effectively harden. Once you’ve put the rigidizer on all of the wool, let it set in a well-ventilated room for at least 24 hours so it can set.[11]
- You can apply rigidizer with a paintbrush if you don’t have a spray bottle handy.
-
5Brush furnace cement on all of the exposed wool to insulate it more. Mix your furnace cement with a stir stick to make sure it’s thoroughly combined. Use a 2 in (5.1 cm) paintbrush to coat the exposed surfaces of the wool. Smooth out the cement with the brush before letting it set for at least 24 hours.[12]
- Put cardboard or shop cloths down before you apply the cement so you don’t accidentally get it on anything.


Providing a Fuel Source
-
1Feed a steel pipe or burner through the side hole of the furnace. The kind of pipe you use depends on what you want to use for your fuel source. If you want to use charcoal inside of your furnace, then put a 12 in (30 cm) steel pipe that has a diameter of 1 in (2.5 cm) through the hole. Make sure the pipe extends at least 1 inch (2.5 cm) past the inside wall of the furnace. If you want to use propane, place a burner inside of the furnace and feed the valve end of the pipe through the side hole. Position the end of the burner inside your furnace so it points off-center.[13]
- You can buy a furnace propane burner online.
- Don’t use a regular steel pipe for propane since you won’t be able to control the flame as easily.
-
2Attach an air blower to the end of the pipe with a coupler if you want to use charcoal. A coupler allows you to attach pipes together without welding the pieces together. Slide the end of the coupler onto the end of the steel pipe that’s outside of the furnace. Slide the other end of the coupler over the end of an air blower to force air through the furnace so it heats better.[14]
- You can buy couplers from your local hardware store.
- If you don’t have an air blower, you can use an old hair dryer on the highest fan setting to move the air.
-
3Connect a propane tank to the other end of the burner if you’re using gas. Attach an air supply hose between the valve on your propane tank and the control port on the end of the burner. Make sure the valves are completely closed while you aren’t running the furnace so you don’t waste your fuel or create a fire hazard.[15]
- You can attach any propane tank to your furnace, but small tanks will run out faster while you’re running your furnace.
-
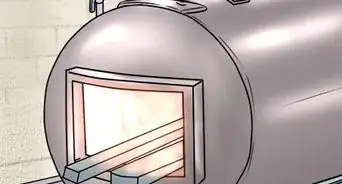
4Light your furnace so it can heat up. If you’re using charcoal, fill the bottom of the furnace with 2–3 inches (5.1–7.6 cm) of briquettes and use a lighter to light them. Turn on the air blower on its lowest setting to help the furnace heat up further. If you’re using propane, open the valves on the tank and the burner. Reach a striker into the middle of your furnace and squeeze it to ignite the propane. Put the lid on top of the furnace so the heat doesn’t escape.[16]
- Use the valves on the propane tank and burner to control the size of the flame it produces.
- The flames from your furnace may come out from the vent hole you made in the lid, so use caution while you’re handling it.
- Charcoal furnaces can usually reach a temperature of about 1,200 °F (649 °C) while propane can reach 2,300 °F (1,260 °C).
-
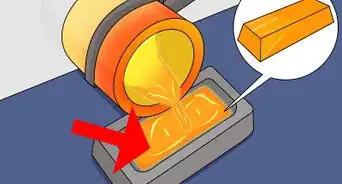
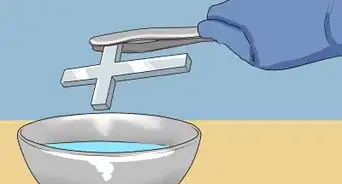
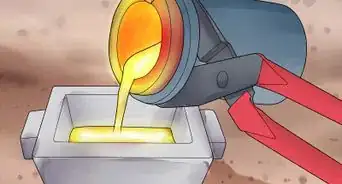
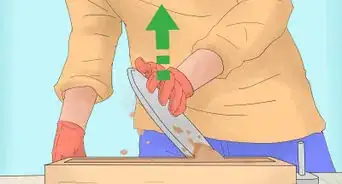
5Use a crucible when you want to melt metal. A crucible is a metal container that you put inside of your furnace that holds the metal you’re melting. Put the metal you want to melt inside the crucible and use a pair of fire tongs to set it in the middle of your furnace. Allow the furnace to heat the crucible and melt the metal before taking it out with tongs for casting.[17]
- This furnace will melt low-temperature metals, such as aluminum and brass.


Community Q&A
Did you know you can get answers researched by wikiHow Staff?
Unlock staff-researched answers by supporting wikiHow
-
QuestionWhat metals can you melt at home?
 wikiHow Staff EditorThis answer was written by one of our trained team of researchers who validated it for accuracy and comprehensiveness.
Staff AnswerwikiHow Staff EditorStaff AnswerIn a home-made melting furnace, you should be able to melt cast iron, aluminum, lead, silver, gold, and copper. You will likely need a more powerful furnace to melt alloys like steel or bronze.
Support wikiHow by unlocking this staff-researched answer.
-
QuestionCan you melt diamonds?wikiHow Staff EditorThis answer was written by one of our trained team of researchers who validated it for accuracy and comprehensiveness.
Staff AnswerwikiHow Staff EditorStaff AnswerIt’s possible, but you need specialized equipment that isn’t generally available outside of a lab. Under normal conditions, diamonds start to burn at around 1,292° F (700° C).Support wikiHow by unlocking this staff-researched answer.
-
QuestionWhat is the easiest metal to melt?wikiHow Staff EditorThis answer was written by one of our trained team of researchers who validated it for accuracy and comprehensiveness.
Staff AnswerwikiHow Staff EditorStaff AnswerOf the metals that you’re likely to use for casting, lead is among the easiest to melt. There are other metals with even lower melting points, such as mercury (which is liquid at room temperature) and gallium (which will melt in your hand).Support wikiHow by unlocking this staff-researched answer.
Warnings
- Dust from ceramic fiber wool can cause irritation if it touches your skin or gets in your lungs. Always be sure to wear a dust mask that’s rated N95 or better, long-sleeved clothing, and work gloves while cutting it.[18]⧼thumbs_response⧽
- Always make sure the valves on your propane tank are closed when you’re not using your furnace or else the fuel will leak and create a fire hazard.⧼thumbs_response⧽
- Furnaces for melting metal can reach temperatures above 2,000 °F (1,090 °C), so be extremely careful while you’re running them.⧼thumbs_response⧽
- Keep a fire extinguisher near your furnace in case there’s an emergency.⧼thumbs_response⧽
Things You’ll Need
- Safety glasses
- N95 dust mask
- Work gloves
- Steel garbage can with lid
- Angle grinder
- Drill with hole saw attachment
- Ceramic fiber wool
- Utility knife
- Craft knife
- Rigidizer
- Furnace cement
- Paintbrush
- Steel pipe or propane furnace burner
- Coupler
- Air blower
- Charcoal
- Propane tank
- Air hose
- Striker
- Crucible
- Fire tongs
- Fire extinguisher


References
- ↑ https://youtu.be/RFbYWyDQs2c?t=85
- ↑ https://sciencing.com/diy-smelter-8500229.html
- ↑ https://youtu.be/jDPz3pe-rsQ?t=136
- ↑ https://youtu.be/y2RYYBRFu1A?t=299
- ↑ https://youtu.be/jDPz3pe-rsQ?t=167
- ↑ https://youtu.be/jDPz3pe-rsQ?t=415
- ↑ https://youtu.be/jDPz3pe-rsQ?t=640
- ↑ https://youtu.be/y2RYYBRFu1A?t=182
- ↑ https://youtu.be/y2RYYBRFu1A?t=94
- ↑ https://youtu.be/y2RYYBRFu1A?t=182
- ↑ https://youtu.be/jDPz3pe-rsQ?t=440
- ↑ https://youtu.be/jDPz3pe-rsQ?t=644
- ↑ https://sciencing.com/diy-smelter-8500229.html
- ↑ https://youtu.be/hHD10DjxM1g?t=244
- ↑ https://youtu.be/jDPz3pe-rsQ?t=807
- ↑ https://sciencing.com/diy-smelter-8500229.html
- ↑ https://youtu.be/y2RYYBRFu1A?t=233
- ↑ https://youtu.be/y2RYYBRFu1A?t=299
About This Article