This article was co-authored by wikiHow staff writer, Christopher M. Osborne, PhD. Christopher Osborne has been a wikiHow Content Creator since 2015. He is also a historian who holds a PhD from The University of Notre Dame and has taught at universities in and around Pittsburgh, PA. His scholarly publications and presentations focus on his research interests in early American history, but Chris also enjoys the challenges and rewards of writing wikiHow articles on a wide range of subjects.
There are 9 references cited in this article, which can be found at the bottom of the page.
wikiHow marks an article as reader-approved once it receives enough positive feedback. In this case, 95% of readers who voted found the article helpful, earning it our reader-approved status.
This article has been viewed 358,269 times.
Learn more...
Lead has a relatively low melting point, so it is ideal for casting into shapes of your choosing. That said, melting lead must be done with extreme caution and diligence, because it presents major burn, fire, and poisoning hazards. Always work in a safe space with proper safety gear and tools, and keep kids out of the area. From there, heat the lead until it melts, skim away any impurities, carefully pour it into your chosen mold, and let it cool before unmolding it.
Steps
Gearing up Safely
-
1Select an airy, dry, fire-safe area to work in. Always melt lead in a well-ventilated area that’s at least 8 ft (2.4 m) clear of flammable materials, as the process can create dangerous fumes and present a serious fire hazard. An isolated outdoor patch of dry dirt, sand, or concrete is a good choice.[1]
- Do not melt lead indoors, especially if it’s connected in any way to living space. The risk of lead fumes, lead dust, and fire is simply too great.
- Keep children and pregnant or nursing women out of the area. Exposure to lead fumes or dust can be particularly harmful to the development of fetuses, infants, and small children.
-
2Choose a heat source as well as equipment used only for melting. A cast-iron skillet, aluminum slotted spoon, and aluminum ladle make a good starter set for DIY lead melting, but make sure you use them only for this task—never for cooking food! Since lead melts at 621 °F (327 °C), you also need a powerful yet reasonably safe heat source. Popular options include:[2]
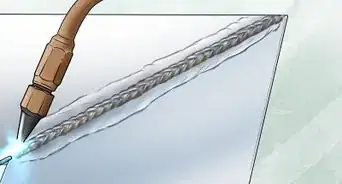
- A handheld kitchen blowtorch. These are relatively safe and easy to use for the average DIYer, but using one means you’ll only have one free hand throughout the process. You can pick one up for roughly $20-$50 USD.
- A propane burner, like those used for outdoor turkey fryers. Turkey fryer models typically integrate the burner into a built-in stand, which makes it easy to rest the melting pan on top. You’ll have less immediate heat control than with a blowtorch, though. Expect to pay around $50-$100 USD.
- An electric melting pot. These are designed specifically for melting metals like lead and don’t use an open flame, but take longer to do the job than open flame options. They usually cost in the $50-$100 USD range.
Advertisement -
3Put on breathing and fire safety gear before melting anything. There are several potential hazards involved in melting lead, including an open flame or high heat, molten metal, lead fumes, and lead dust. Do not take any shortcuts when it comes to protecting yourself! Your safety gear should include the following:[3]
- A breathing mask rated for use when melting metals like lead.
- Eye protection or, even better, a full face shield.
- Thick leather gloves designed for high-temperature applications like melting metals.
- Long, thick sleeves and pants, and sturdy shoes. Also, consider putting on a disposable zip-up suit to keep lead dust off your clothes and body.
- A hat, hair net, or some other method for keeping any long hair you may have from dangling near the heat source.


Melting the Lead
-
1Add the scrap lead to your cast iron pan or electric melting pot. Estimate how much lead you need by weight, then add that amount plus at least another 20% to the vessel. You’ll need this overage amount because some of the lead will be lost to impurities and solidification on the vessel and your tools. Do not, however, fill the vessel more than 75% full for safety reasons—instead, choose a larger vessel if necessary.[4]
- You might, for instance, melt down 5 lb (2.3 kg) of lead pieces from a scrapyard in order to fill molds to make 4 lb (1.8 kg) of lead fishing sinkers.
-
2Apply direct heat to the pan until the lead melts completely. If you’re using a handheld torch, light it up according to the product instructions and wave the flame back and forth right over the lead in the pan. For a propane burner, light it according to its instructions and set it to high heat under the pan. With an electric melting pot, plug it in and set it to the appropriate temperature based on the product instructions.[5]
- The melting time can vary widely based on the heat applied, any impurities in the lead, and other factors. A good general estimate is 5-10 minutes.
-
3Skim off floating impurities (“dross”) with an aluminum slotted spoon. Maintain the heat over or under the molten lead and watch for solid bits of material (dross) to float to the surface. Use the slotted spoon to skim these off the surface. Put the dross in a discard vessel made of aluminum—a large coffee can is a good choice.[6]
- Choose a discard vessel with a lid that you can put on when you’re done. This will limit the amount of lead dust created by the dried dross.
- Make sure the slotted spoon and discard vessel are completely dry before using them. Molten lead can cause water droplets to vaporize immediately, potentially causing the lead to spray all over you.
-
4Stir in 1-2 wax tea light candles, if desired, to “flux” the lead. This iron purification step is optional for nearly all DIY applications. It creates a lot of smoke and potentially dangerous flames on the surface of the molten metal. Unless you absolutely need extra purified lead, just skip this step.[7]
- If you do choose to flux the lead, keep applying heat to the pan or pot. Put a tea light candle on the slotted spoon and stir it into the molten lead. Keep stirring while the smoke bellows and the flames kick up from the surface. After approximately 1-2 minutes, the smoke and flames will die down.
- For even more purification, stir in a second tea light candle after using the slotted spoon to skim off and safely discard the dross produced by the first candle.
-
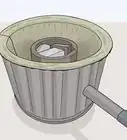
5Put the lid on your discard vessel and dispose of it safely after it cools. As soon as you’re finished skimming dross from the molten lead, place the lid on the discard vessel. Make sure you have your safety gear on, because it will be hot! After the exterior of the discard vessel has cooled to the touch, bag it up separately and keep it outside your home to be disposed of with your household trash.[8]


Pouring and Unmolding the Lead
-
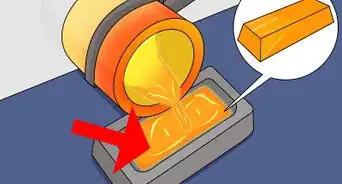
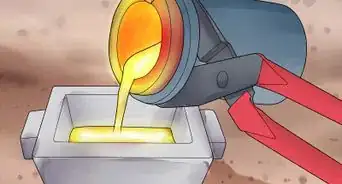
1Ladle or pour the molten lead into your chosen mold. Turn off the heat source and work quickly to put the lead into the mold before it cools and solidifies. If your cast iron pan has a spout built into the lip, you can try to carefully pour the metal directly into your chosen mold. You may find it easier to use an aluminum ladle to scoop the molten lead into the mold, however.[9]
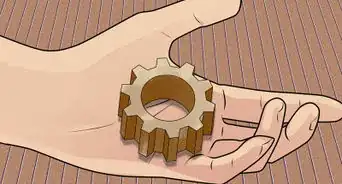
- You can use a pre-made mold to cast items like fishing sinkers, or you can use an aluminum muffin pan to make ingots (puck-shaped pieces of lead) for later use.
- Swirl the mold gently after adding the metal to help any air bubbles escape.
- Even with heat-resistant gloves on, don’t put your hands (and any other body parts) directly above the opening to the mold. Hot gasses from the molten lead present a burn risk.
- Make sure the mold is completely dry before putting any lead into it.
-
2Allow the lead to cool in the mold for around 10 minutes. The lead will likely solidify within 2-3 minutes. For your safety and for better results, though, wait at least 10 minutes before trying to remove the lead from the mold.[10]
-
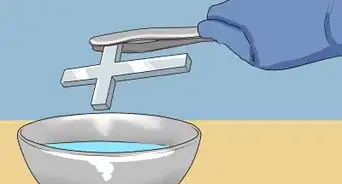
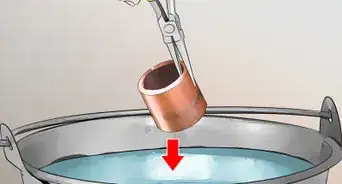
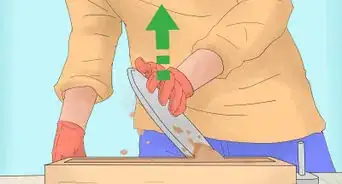
3Remove the lead from the mold once it cools to the touch. Lead does not adhere well to other metals, so you should have little problem freeing it from the mold. Make sure to keep your gloves on, even once the mold is cool to the touch, because the lead may still be hot enough to burn you.[11]
- For a 2-piece mold used to make things like fishing sinkers, unscrew the wingnuts on the bolts that hold the 2 halves together. The cast lead should pop right out.
- Simply turn an aluminum muffin pan over and tap it on a solid surface to free cast lead ingots.
-
4Clean your body, clothes, tools, and workspace to remove lead dust. Use a wet-dry vacuum fitted with a HEPA filter to suck up any lead dust that has accumulated on your tools or workspace. Remove your clothes in a garage or somewhere else outside your home, if possible, bag them up, and wash them separately. Take a shower and wash your hair and body thoroughly.[12]
- Exposure to lead dust can have serious health consequences and can be especially damaging to the brain development of fetuses, infants, and young children.
- Any molten lead that has spilled and hardened on the floor of your work area can be scraped up with a chisel or flat-head screwdriver.


Community Q&A
-
QuestionCan I use lead to mold Easter eggs?
 Community AnswerIf you wish to make an artificial egg for decorative purposes, then yes, you could. If you mean using a mold made of lead to make chocolate eggs, that's a resounding no. You should not use anything made from lead to craft anything edible, as lead is highly toxic.
 -
QuestionWill hot lead stick to cold lead?Community AnswerNo. If you try to make a large lead weight and don´t pour it all at once, it will separate once you try to take it out of the mold.
-
QuestionWhat should the final mold container be?
 Community AnswerCast iron or aluminum molds are readily available as used by the firearms industries for casting ingots and bullets. You can use old, large cast iron skillets to melt and purify the lead (skimming the surface 'dross' off and putting it in recyclable metal container) and then either pour into ingot mold (Lee Precision, RCBS, and others) or a bullet mold (same suppliers). Just remember, never reuse a cast iron cooking item that has cast lead for food preparation again as it can poison the food.
Warnings
- Do not attempt to melt lead in a container made from pure tin, as tin has a lower melting point than lead.⧼thumbs_response⧽
- Melting lead or any other metal at home is risky work, so always work with extreme caution.⧼thumbs_response⧽
Things You'll Need
- Heat source
- Respirator
- Eye protection or facemask
- Heat-resistant gloves
- Cast iron pan or other melting vessel
- Aluminum slotted spoon
- Aluminum ladle
- Aluminum coffee can or other discard vessel
- Aluminum muffin pan or other mold


References
- ↑ http://www.dph.illinois.gov/sites/default/files/publications/lead-safety-fishermen-041516.pdf
- ↑ https://youtu.be/UUdqCtdSzlE?t=60
- ↑ https://goneoutdoors.com/melt-lead-weights-6396152.html
- ↑ https://youtu.be/UUdqCtdSzlE?t=60
- ↑ https://youtu.be/UUdqCtdSzlE?t=75
- ↑ https://youtu.be/iE7wNaw-9yA?t=120
- ↑ https://youtu.be/iE7wNaw-9yA?t=165
- ↑ https://youtu.be/iE7wNaw-9yA?t=225
- ↑ https://youtu.be/iE7wNaw-9yA?t=270
About This Article