X
wikiHow is a “wiki,” similar to Wikipedia, which means that many of our articles are co-written by multiple authors. To create this article, volunteer authors worked to edit and improve it over time.
This article has been viewed 52,326 times.
Learn more...
This 1 foot (0.3 m) long coffin was scaled from a full size version.
Steps
-
1Know what the objective is. You will be building this Mini Coffin.
- The overall size will be as shown.
-
2Cut the 5 ½” wide board to 1 foot (0.3 m) in length. Repeat so you have two identical pieces. Measure and mark a vertical center line (2 ¾” from edge) on one of the pieces. Use this centerline to measure off the top and bottom cuts.Advertisement
-
3Next, measure and mark a horizontal line (2 ¾” from top) for the intersection point. Connect points to outline the coffin top and bottom.
-
4Since the top and bottom need to be identical, attach the boards together before cutting. Nails can be used on the portions that you plan to remove.
-
5Cut the boards to match the outline. This project used a miter saw with a laser site. However, these cuts could be made with a table, circular or handsaw. At this point, unless you are an expert woodworker, you will notice that the length of the sides doesn't match the drawing exactly. Don't worry, this isn't critical.
-
6Cut strips of wood to 1 ¾” wide. You will need enough wood to match the perimeter of the coffin.
-
7Start with the bottom side. Set the miter saw to an angle of 40.8 degrees (90 – 49.2). Cut one chamber. Reverse the work piece and cut the same chamfer on the other side. Cut it long and then make a few extra cuts until you match the bottom length.
-
8Without touching the angle on the saw, cut two matching pieces for the long sides. Cut the 40.8 degree angle on one side – leave the work piece long since you will be cutting a different angle on the other end. Do a fit check at this point. The bottom side and long side should mate nicely when positioned on the bottom work piece.
-
9Cut the top side using the same process as above. Angle should be 36.8 degrees. Again, match the side length to the bottom length.
-
10Without touching the angle on the saw, cut two matching pieces for the short sides. Cut the 36.8 degree angle on one side – leave the work piece long since you will be cutting a different angle on the other end. Again, do a fit check.
-
11Set the saw to 12.5 degrees and cut the remaining angles for the long and short sides. For reference, marked a number on the bottom and the matching side since each length could be slightly different.
-
12Do a dry fit of the pieces to make sure everything will go together cleanly. If not, adjust as needed. Attach the sides to the bottom and to the other sides. Use glue and clamps. Wood filler could be used at this point.
-
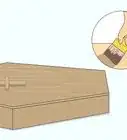
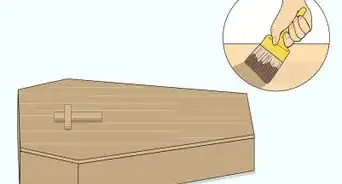
13Sand wood and stain or paint as desired.
-
14Final Product will be made as desired.


Advertisement
Things You'll Need
-
Tools:
- Miter Saw
- Table Saw
- Sander
- Wood Clamps
- Tape Measure
- Pencil
-
Materials:
- Wood: 5 ½” x ½” x 3 foot (0.9 m) long
- Wood: 2 ½” x ½” x 3 foot (0.9 m) long
- Glue
- Wood Filler (optional)
- Screws or Nails (optional)
- Paint or Stain (optional)


References
- Published with permissions: http://www.instructables.com/id/Mini-Coffin/
About This Article
Advertisement