This article was co-authored by wikiHow staff writer, Nicole Levine, MFA. Nicole Levine is a Technology Writer and Editor for wikiHow. She has more than 20 years of experience creating technical documentation and leading support teams at major web hosting and software companies. Nicole also holds an MFA in Creative Writing from Portland State University and teaches composition, fiction-writing, and zine-making at various institutions.
The wikiHow Tech Team also followed the article's instructions and verified that they work.
This article has been viewed 75,397 times.
Learn more...
This wikiHow teaches you how to cancel an upcoming payment for an app or service you've purchased through the Apple App Store. You can do this on your iPhone, iPad, or Mac by cancelling your subscription to the app or service. You'll also learn how to submit a refund request for a payment that has already been submitted.
Steps
Canceling a Subscription on iPhone or iPad
-
1Open your iPhone or iPad's Settings . It's the gray gear icon on your home screen or in your app library.[1] Cancelling a subscription will prevent you from being charged in the future for that app or service.
- If you have an Apple TV and want to cancel a subscription before your payment is due, you can use this method. Just make sure you're signed in using the same Apple ID on your iPhone or iPad that you used to make the purchase on your Apple TV.
-
2Tap your name at the top of the screen. This opens your Apple ID settings.Advertisement
-
3Tap Subscriptions. It's in the first group of settings.
-
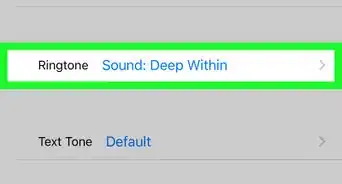
4Tap the subscription you want to cancel. Information about your current plan and next payment will appear.
- If you don't see the upcoming payment you're looking for, you may have made the purchase using a different Apple ID, or by paying directly to the app or service in question.
-
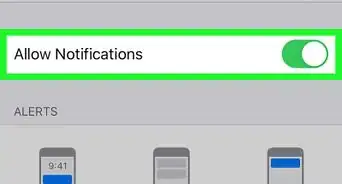
5Tap Cancel Subscription. It's the red text near the bottom of the page. A confirmation message will appear.
- If you don't see a Cancel option, this means you have no upcoming payment and will not be charged again for this service.
-
6Tap Confirm to continue. Now that you've canceled the subscription, you will not be charged again for the selected app or service.
- You can continue using the app or service's features until the final date of your billing cycle, which appears at the bottom of the screen.


Canceling a Subscription on a Mac
-
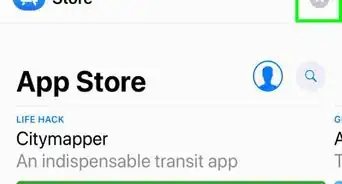
1Open the App Store on your Mac. It's the blue icon with a white "A" on the Dock.
-
2Click your name in the bottom-left corner. If you don't see your name, click the profile icon instead, and then log in with your Apple ID.
- If you have an Apple TV and want to cancel a subscription before your payment is due, you can use this method. Just make sure you're signed in using the same Apple ID on your iPhone or iPad that you used to make the purchase on your Apple TV.
-
3Click View Information. It's the round blue icon with an outline of a person inside. You may be asked to re-enter your password at this point.
-
4Scroll down and click Manage under "Subscriptions." It's toward the bottom of the page.
-
5Click Edit next to the subscription you want to cancel. Information about your current plan and next payment will appear.
- If you don't see the upcoming payment you're looking for, you may have made the purchase using a different Apple ID, or by paying directly to the app or service in question.
-
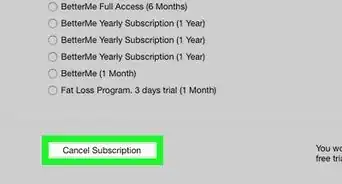
6Click Cancel Subscription. A confirmation message will appear.
- If you don't see a Cancel option, this means you have no upcoming payment and will not be charged again for this service.
-
7Click Confirm to continue. Now that you've canceled the subscription, you will not be charged again for the selected app or service. You can continue using the app or service's features until the final date of your billing cycle, which appears at the bottom of the screen.


Requesting an App Store Refund
-
1Go to https://reportaproblem.apple.com. This is the official website for requesting refunds from the App Store. This includes any other purchases you've made with your Apple ID, including on your Mac and Apple TV.
-
2Sign in with your Apple ID. Be sure to use the same Apple ID and password you used to make your payment.
-
3Select Request a refund from the first drop-down menu. It's at the top of the page. Additional options will expand, as will a list of your recent App Store purchases.
-
4Select a reason under "Tell us more." Apple may refund you for purchases made accidentally, those made by your child, or for services you did not receive.
-
5Click the Next button. This adds radio buttons to the right of each qualifying purchase.
-
6Select the app or service for which you want a refund. To do so, just click the checkbox next to that app or service.
- If you don't see the charge, that means the payment hasn't yet gone through. You can't submit a refund request until the charge is processed.[2]
-
7Click Submit. It's at the top-right corner of the page. This submits your refund request. Apple will generally respond to your request within 48 hours.[3]
- If your refund is approved, the funds will be applied to the account you used to make the payment.
- After the refund is approved, it may take several days for the amount to appear back into your banking or credit card account.


References
About This Article

1. Open Settings.
2. Tap your name.
3. Tap Subscriptions.
4. Select the subscription.
5. Tap Cancel Subscription.
6. Tap Confirm.