This article was co-authored by Lauren Kurtz and by wikiHow staff writer, Danielle Blinka, MA, MPA. Lauren Kurtz is a Naturalist and Horticultural Specialist. Lauren has worked for Aurora, Colorado managing the Water-Wise Garden at Aurora Municipal Center for the Water Conservation Department. She earned a BA in Environmental and Sustainability Studies from Western Michigan University in 2014.
There are 12 references cited in this article, which can be found at the bottom of the page.
This article has been viewed 50,992 times.
Roses are a lovely addition to your yard or home, but they can be tricky to keep healthy. You can care for outdoor roses by providing regular care and pruning your roses before the new growing season. If you have indoor roses, make sure they get lots of sun and regular watering. Cut roses will stay fresh longer if you trim their stems and use a floral preservative.
Steps
Providing Regular Care to Outdoor Roses
-
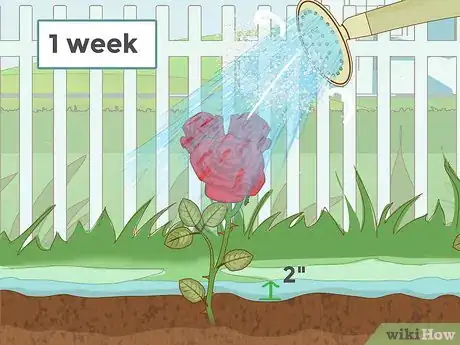
1Water your roses every morning during growing season. Roses need a lot of water, so it’s unlikely they’ll get it all from rain. Morning is the best time to water your roses because the sun will evaporate any water left on the leaves. If the water sits on the leaves, it can lead to mold or fungus.[1]
- To keep water off the leaves and roses, pour the water at the base of the plant.
- Provide 1 to 2 inches (2.5 to 5.1 cm) of water each week. If it’s dry outside, water the roses more. Check that the surface of the soil feels moist to the touch.
- During fall and winter, you can water your roses less often. Water them once a week during fall, but stop watering during the winter.[2]
-
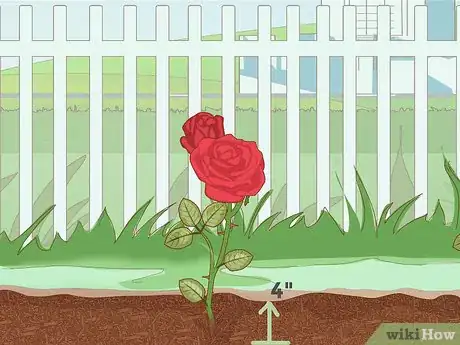
2Apply 2 to 4 in (5.1 to 10.2 cm) of fresh mulch at the start of growing season. This will make sure your roses retain moisture and will prevent weeds. Mulch is great for your rose bed. It will keep the plant moist between waterings, protect the plant from the cold, and minimize weed growth. Spread your mulch around the plant base and over the entire plot.[3]
- You can find mulch at a local gardening store or online. The best mulches for roses include wood chips, straw, and cut grass. However, you can also use shredded hardwood bark or cocoa bean hulls if you want to add a decorative touch to your plot.
- Add more mulch throughout growing season as needed to maintain your plot.
Advertisement -
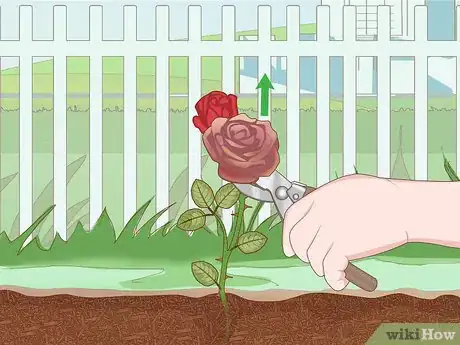
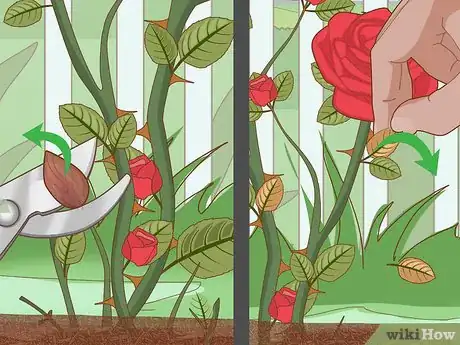
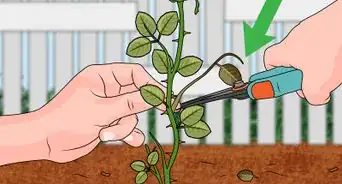
3Deadhead your blooms as soon as they start to fade. When the bloom starts to lose its color or become wilted, use scissors or pruning shears to remove it. Position your scissors on the stem just above the leaves. Make a 45 degree cut to remove the bloom.[4]
- This will cause the rose bush to produce more blooms.
- If you don’t deadhead the roses, they produce seeds instead of more blossoms.
- If you want to harvest rosehips or like how rosehips look on your plant in the winter, don't deadhead the faded blossoms on your plant.
- Stop deadheading 3 to 4 weeks before the first frost so you won’t have fresh blossoms.[5] You can find the expected date of your first frost by checking with your local or national weather service or by using this helpful tool from the Almanac: https://www.almanac.com/gardening/frostdates#.
-
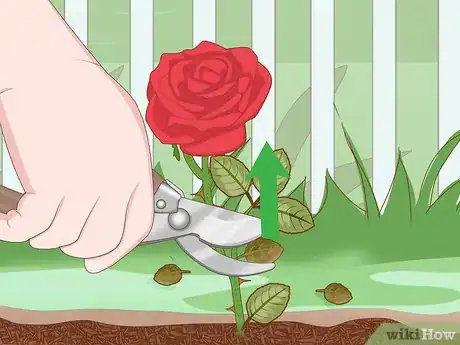
4Use scissors to cut off dead leaves to keep your plant healthy. Dead leaves make your roses vulnerable to disease, such as fungus. Additionally, they limit new growth on the plant.[6]
- You can also use a small pair of pruning shears.
- Check your plant regularly for dead leaves.
-
5Weed the soil to maintain a healthy plot. Using mulch will cut down on weed growth, but you may still see some weeds. Simply pull the weeds to remove them from the plot. As an alternative, dig out their root system with a hand shovel or spade. Make sure you remove all of the root pieces.[7]
- It’s best to avoid using an herbicide around your roses.
-
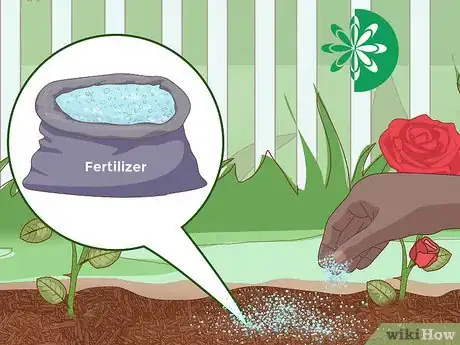
6Fertilize your roses with a multi-purpose fertilizer in spring and summer. It’s best to fertilize the flowers three times a year. Add the first dose of fertilizer in the early spring, then give more fertilizer once the rose bush starts to bloom. Apply your final round of fertilizer during mid summer.[8]
- Follow all of the directions on your fertilizer.
- You can also find fertilizers formulated specifically for roses.
- If you want an easy natural fertilizer, you can add used coffee grounds to your soil, which will provide nutrients for your roses.[9]
- Banana peels are also a great fertilizer, as they contain calcium, sulfur, magnesium, and phosphates. You can lay the banana peels at the base of the plant or bury a mushy banana at the base.
-
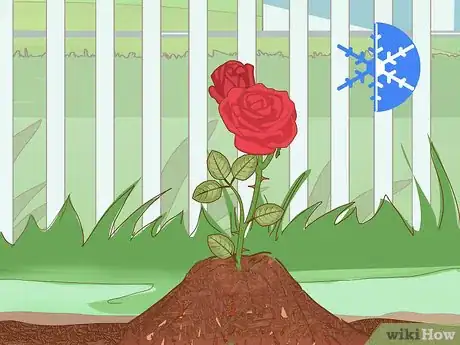
7Protect your plants by covering them with mulch during the winter. Clean your flower bed as winter approaches to reduce the risk of disease. Pile at least 4 inches (10 cm) of mulch around the bottom of the plant after the first few frosts occur but before the ground freezes. Using more mulch will provide added protection, so pile the mulch as high as you can.
- If your area stays below freezing during winter, wrap mesh around your plant, then fill it with mulch to protect the roses.[10]
Pruning Your Outdoor Roses
-
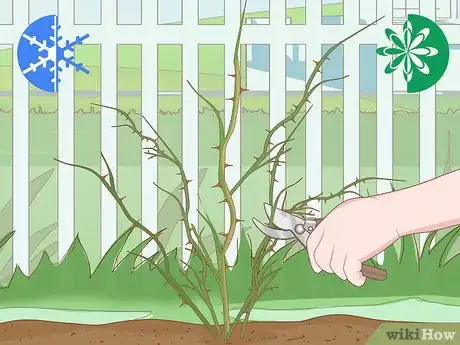
1Prune roses in late winter or early spring before growing season. It’s best to prune back your plant before new growth starts. Cutting down the plant to its base stems will help encourage plentiful new growth.[11]
- Some varieties may need more pruning, so always check the growing instructions for your breed of roses.
- Pruned roses may seem very bare, but this is necessary for the roses to grow new foliage and blossoms.
-
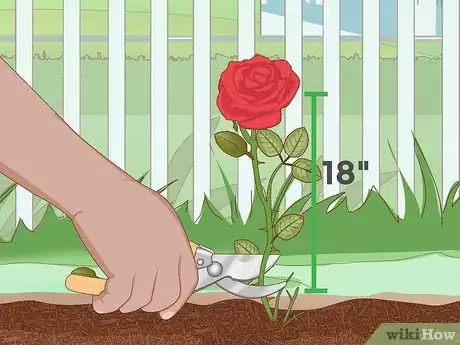
2Cut your roses back to about 18 inches (46 cm) tall or to live growth. How much you prune will depend on your climate. If a lot of live growth survived the winter, don’t cut this away. However, you may need to chop it down close to the ground if there isn’t much live growth.[12]
- In some cases, your rose bush will die down to about 8 inches (20 cm) tall if the winter has been rough. Keep cutting until you've removed all of the dead parts of the roses.
- You can safely cut your rose bush down to about 6 inches (15 cm) tall if necessary.
-
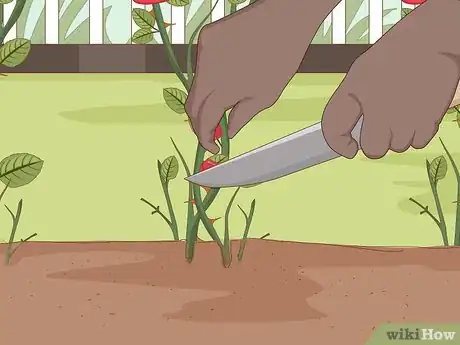
3Remove any shoots that appear to come from the roots, not the stems. Cut the shoots at the ground level with your scissors or pruning shears. In many cases, these shoots are suckers that will take nutrients from the root system. This can weaken your rose bush.[13]
- If you let these shoots grow, they’ll put too much demand on the root system.
- It's best to do this before the new growing season starts. However, you can remove suckers during the growing season if you think they're weakening your plant.
-
4Trim your shrubs rather than cutting them back. Shrubs don’t need as much pruning as other rose plants. Each spring, use your pruning shears or scissors to shape your shrub as you desire. Then, simply deadhead faded blooms and remove dead leaves.[14]
- Always make 45 degree cuts when you're pruning your rose bushes. Additionally, cut above an outward facing node to encourage your roses to grow outwardly.
- Prune away dead, diseased, damaged, or crossed branches.
- You can also trim roses in the fall. Stop deadheading blooms 8 to 10 weeks before the first frost, then wait until after the first frost passes to prune branches, canes, and foliage.
Growing Indoor Roses
-
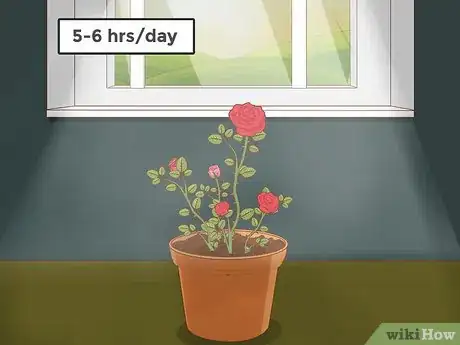
1Make sure your roses get 6 to 8 hours of sun each day. Place your roses on a south-facing windowsill or near a window.[15] Check that the sunlight reaches your roses. If they don’t get enough sun, the plant will slowly wilt, eventually dying.[16]
- It’s best to keep your roses on a porch or patio. You can also replant it in your garden. It may not live long in your home, as roses need full sun.[17] If you keep your roses on the patio, it's safe to bring them inside during the winter to protect them from the harsh cold.
- You can supplement sunlight with a grow lamp if your plant isn’t getting enough sun.
-
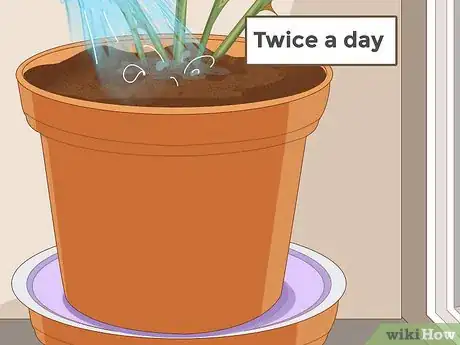
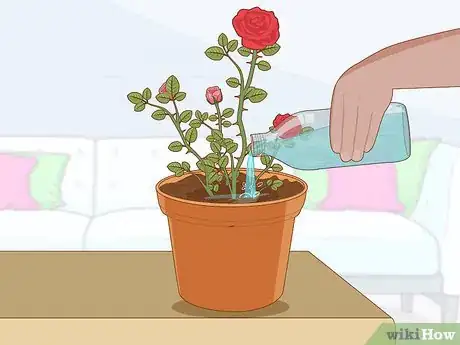
2Water your roses once or twice a day if the soil feels dry. Use your finger to check if the soil is moist or dry. If it feels moist, wait another day to water the roses. If it feels dry, thoroughly water the plant.[18]
- Don’t get water on the plant’s leaves, as it could cause mold or fungus to develop on the plant.
- Excess water should drain away from the plant. If your container doesn’t have drainage holes, replant the roses in a new pot with holes or poke holes in the bottom of your pot.
-
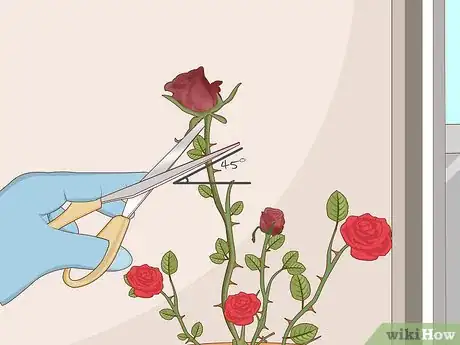
3Cut off faded blooms at a 45 degree angle using sharp scissors. As soon as a blossom loses its color or starts to wilt, cut it off. This encourages the plant to make more blossoms rather than seeds. It will keep your plant blooming.[19]
- Don’t pull off the buds, which can damage the stem.
-
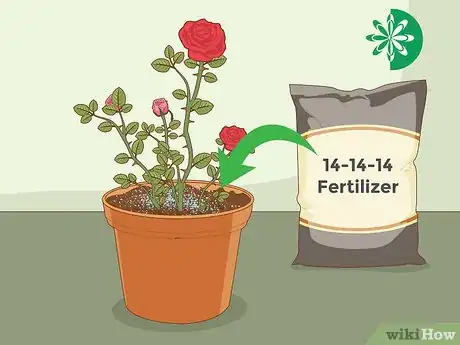
4Add a balanced, slow-release fertilizer to the soil in the spring. Choose a 14-14-14 fertilizer or look for one that’s labeled for miniature roses. Follow all of the instructions on the fertilizer to apply it to the soil.[20]
- You might also add fertilizer in the mid-summer, which is about halfway through the growing season.
-
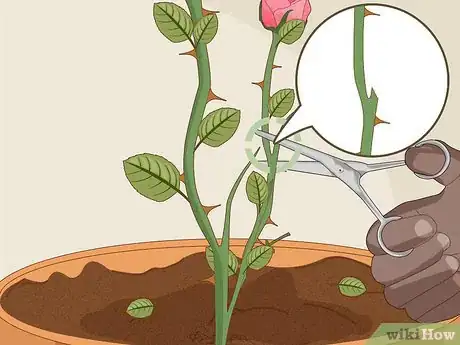
5Prune dead branches and crossing branches using sharp scissors. Dead branches can spread disease or sap nutrients from the root system. Crossing branches can rub against each other, damaging the branches.[21]
- Don’t crush or pull the stems, as this can damage the plant and increase its risk of disease.
- You can also use a pair of small pruning shears, if you have them.
-
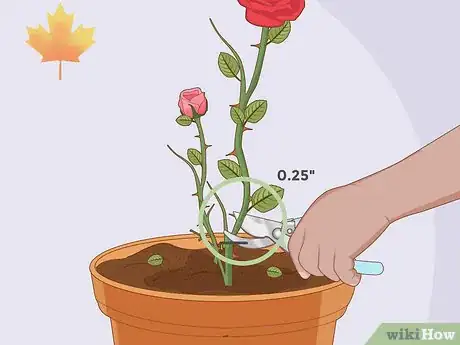
6Cut back your plant in the late fall using sharp scissors or shears. Indoor roses still need to be pruned back during the fall. Make 45 degree cuts to the stems about .25 inches (0.64 cm) above a leaf axil. This encourages your miniature roses to grow back in the spring.[22]
- Roses grown indoors may not come back the next growing season because the conditions are not ideal. However, pruning them gives them a better chance for re-growth.
-
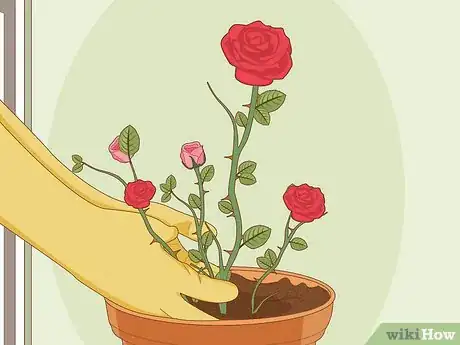
7Repot plants in the late fall, if necessary. If your miniature roses have outgrown their container, the best time to move them to a new pot is late fall. Fill the new pot with soil. After you prune the plant, gently remove it from its container and place it in the new pot. Cover the plant with fresh soil.[23]
- You can loosen the roots of the plant by tapping the sides of the pot or squeezing the pot, if it’s plastic.
- Signs that you need to repot your plant include soil that dries out too quickly, roots that are very compacted or protruding out of the drainage holes, and foliage that appears too big for the pot.
- Choose a new pot that allows at least 2 inches (5.1 cm) of space between the existing root ball and the sides of the pot. When in doubt, choose the bigger pot.[24]
-
8Allow your plant to rest in a cool spot during the winter. Roses hibernate over the winter, even if you keep them inside. The leaves and stems will dry up, and the plant will stop producing buds. However, the plant isn’t dead; it’s just dormant.[25]
- Water your plant when the soil feels completely dry during the winter.
- If you’d like, you can move your plant to a garage or basement during the winter months.
Keeping Cut Roses Fresh
-
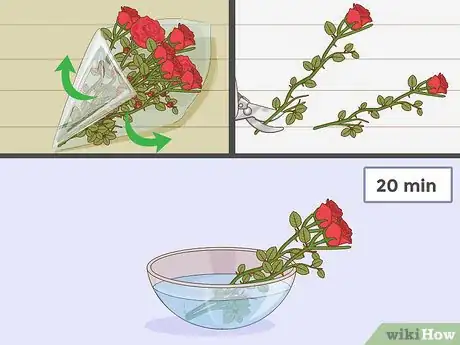
1Remove the wrap around the bouquet as soon as possible. If your roses are wrapped in paper or plastic, take the wrap off as soon as you can. The wrap can cause the roses to wilt.
- If your roses don’t have a wrap, you can skip this step.
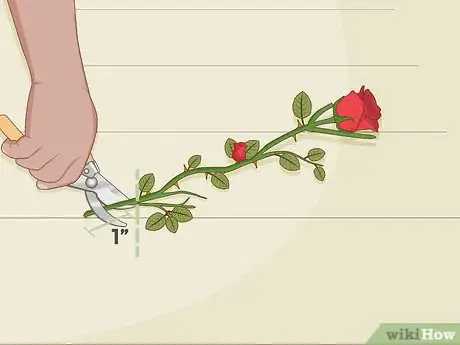
- If your roses are already looking wilted, cut 1 inch (2.5 cm) off the end of the stem and soak the entire rose in a pan of warm water for about 20 minutes. The rose should revive after soaking.
-
2Cut the bottom 1 inch (2.5 cm) off of the stem so it can take up water. Fresh cuts will take up more water, so it’s best to trim the stems right before you put them in a vase. Whenever you change the water, you’ll need to trim the stems again. Otherwise, the roses won’t take up as much water, making them wilt faster.
- Use a pair of sharp scissors to trim the stems.
-
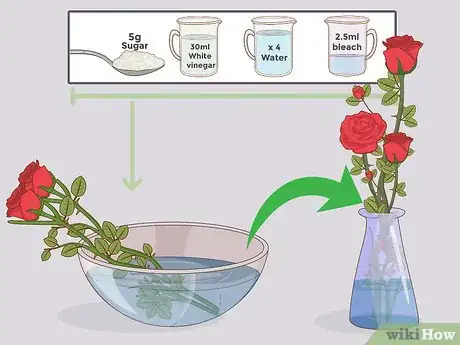
3Add floral preservative to the water to extend their freshness. Many bouquets come with a floral preservative either attached to the flowers or already in the water. If yours didn’t include a preservative, you can make your own. Mix 2 tablespoons (30 mL) of white vinegar, 1 tsp (5 g) of sugar, and .5 teaspoons (2.5 mL) of bleach to 4 cups (0.95 L) of water. Add it to your vase.
- If you change out your water, add more floral preservative. However, you don’t need to add more preservative every time you add water.
-
4Check the water level every day and add more water as necessary. Fresh, clean water will keep the flowers from wilting. Make sure all of the stems are below the waterline. If necessary, add more water.
- If the water is cloudy, pour out the water and replace it with fresh water. When you change your water, cut another 1 inch (2.5 cm) off the bottom of the stem.
- Your flowers will last longer if you change the water every other day, adding floral preservative each time. Cut the stems at least .25 inches (0.64 cm) each time you change the water.[26]
-
5Make sure the water is free of leaves. Cut away leaves that are below the waterline in the vase. Pick loose leaves out of the water to prevent them from decaying. Decayed leaves will make the roses wilt faster.
- Check the water daily to make sure leaves haven’t fallen into it.
-
6Put your roses in a cool spot out of direct sunlight. Cool temperatures will extend the life of your cut flowers. On the other hand, light and heat will make them wilt sooner.
- Don’t put the roses directly under a draft, as it may cause the flower to wilt faster.
- If you put your flowers in the refrigerator while you’re not home, they’ll live even longer. However, don’t put them around rotting fruit, especially apples.
Community Q&A
-
QuestionWhat if your rose doesn't grow for several weeks?
 Danielle HusbandCommunity AnswerRoses normally grow during the spring and summer. It's normal for them to be dormant during the fall and winter. They may even completely lose their blossoms and leaves during the winter. If your roses are not growing during the spring and summer, you can try adding fertilizer to give them more nutrients.
Things You'll Need
- Roses
- Water
- Watering Can
- Sharp scissors or pruning shears
- Mulch
- Fertilizer
- Pot (optional)
- Grow lamp (optional)
- Floral preservative (for cut flowers)
- Vase (for cut flowers)
References
- ↑ https://www.bobvila.com/articles/2477-how-to-care-for-roses/
- ↑ https://www.almanac.com/plant/roses#
- ↑ https://hortnews.extension.iastate.edu/1991/5-22-1991/roses.html
- ↑ https://hortnews.extension.iastate.edu/1991/5-22-1991/roses.html
- ↑ https://www.almanac.com/plant/roses#
- ↑ https://www.bhg.com/gardening/flowers/roses/basic-rose-care/
- ↑ https://www.almanac.com/content/weed-control-techniques
- ↑ https://hortnews.extension.iastate.edu/1991/5-22-1991/roses.html
- ↑ https://www.backyardboss.net/coffee-grounds-in-garden/
- ↑ https://www.almanac.com/plant/roses#
- ↑ https://www.bhg.com/gardening/flowers/roses/prune-your-roses-right/
- ↑ https://www.bhg.com/gardening/flowers/roses/prune-your-roses-right/
- ↑ https://www.bhg.com/gardening/flowers/roses/prune-your-roses-right/
- ↑ https://www.bhg.com/gardening/flowers/roses/prune-your-roses-right/
- ↑ https://davesgarden.com/guides/articles/growing-miniature-roses-indoors
- ↑ https://www.almanac.com/plant/roses#
- ↑ http://www.guide-to-houseplants.com/growing-miniature-roses.html
- ↑ https://www.mygardenlife.com/garden-plus/care-tips-for-fabulous-miniature-roses
- ↑ http://www.guide-to-houseplants.com/growing-miniature-roses.html
- ↑ https://davesgarden.com/guides/articles/growing-miniature-roses-indoors
- ↑ http://www.guide-to-houseplants.com/growing-miniature-roses.html
- ↑ http://www.guide-to-houseplants.com/growing-miniature-roses.html
- ↑ http://www.guide-to-houseplants.com/growing-miniature-roses.html
- ↑ https://www.finegardening.com/article/how-to-repot-container-plants
- ↑ http://www.guide-to-houseplants.com/growing-miniature-roses.html
- ↑ https://www.womansday.com/home/how-to/a4695/how-to-make-fresh-flowers-last-longer-103671/
- ↑ https://www.bhg.com/gardening/flowers/roses/basic-rose-care/
- ↑ https://www.almanac.com/plant/roses#
About This Article
If you want to properly care for your outdoor roses, make sure to water them every morning during spring and summer so they get 1 to 2 inches of water each week. If it’s dry outside, water them more often because roses need a lot of water. At the start of the growing season, lay out 2 to 4 inches of fresh mulch to keep weed growth down and help your plants retain moisture between waterings. The best mulches you can use for roses are wood chips, straw, or cut grass. As soon as a bloom starts to lose its color or wilt, remove it with pruning shears to produce more blossoms. For the best results, cut at a 45-degree angle on the stem just above the leaves. For more tips from our Horticulturist co-author, like how to protect your roses during the winter, read on!
