This article was co-authored by wikiHow staff writer, Darlene Antonelli, MA. Darlene Antonelli is a Technology Writer and Editor for wikiHow. Darlene has experience teaching college courses, writing technology-related articles, and working hands-on in the technology field. She earned an MA in Writing from Rowan University in 2012 and wrote her thesis on online communities and the personalities curated in such communities.
This article has been viewed 108,902 times.
Learn more...
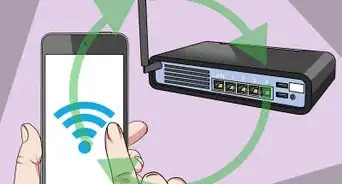
This wikiHow will teach you how to switch from an Ethernet connection to a Wi-Fi connection by unplugging your Ethernet cable or changing the priority order for network adapters in Control Panel (Windows 10) or System Preferences (macOS) if you want to continue with an Ethernet cable plugged in but want to use Wi-Fi instead.
Steps
Switch from Ethernet to Wi-Fi
-
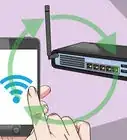
1Make sure you have a Wi-Fi network set up. In order to connect to a Wi-Fi network, you need to have access to one. You can either create your own with the help of How to Set up a Wireless Network (WiFi) Connection or use one that's available to you (like the free Wi-Fi at Starbucks).
-
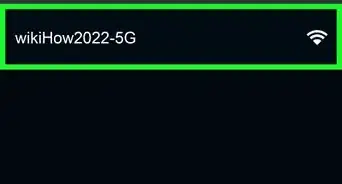
2Connect to the Wi-Fi network (without your Ethernet plugged in). If you want to make the switch from your Ethernet cord to Wi-Fi a little more seamless, then connecting to your Wi-Fi network at least once will make the process for your computer automatic when the Ethernet cable is removed (your network will become a network that your computer can remember and connect to again without you needing to turn on your Wi-Fi, click your network name from the list of available networks, then enter the network password).
- Make sure Wi-Fi is turned on. You can do this by clicking the network icon or in the system tray along the bottom or top of your screen.
Advertisement -
3Plug in the Ethernet cable. When you're stationary, for example, at your desk, an Ethernet connection tends to be more reliable than a wireless connection.
-
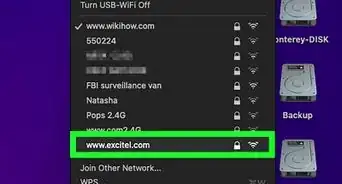
4Unplug the Ethernet cable. With the Ethernet connection unavailable, your computer's Wi-Fi should begin scanning for available networks. If you've already connected to the local Wi-Fi, you shouldn't have to do anything as the connection should be automatic.
- If you haven't previously connected to the Wi-Fi network, you'll need to open a list of all the available networks (click the network or Wi-Fi icons in your system trays either at the top or bottom of your screen), click your network, and enter your password (if your network has one).[1]


Changing Priority Order in Windows 10
-
1
-
2
-
3Click Change adapter options. You'll see this under the "Change your network settings" header.
- If you don't see this option, you might need to click Status from the menu on the left side of the window.
-
4Right-click the adapter you want to prioritize. In this instance, you want to right-click the Wi-Fi adapter.
-
5Click Properties. You'll see this at the bottom of the menu.
- A new window will pop-up.
-
6Click to select Internet Protocol Version 4 (TCP/IPv4). You'll see this in the list below "This connection uses the following items:"
- The row will highlight blue to indicate that it is selected.
-
7Click Properties. You'll see this under the box inside which you selected "Internet Protocol Version 4" in the middle of the window.
- Another window will pop-up.
-
8Click Advanced. You'll see this at the bottom of the window on the right side.
- An "Advanced TCP/IP Settings" window will pop-up.
-
9Click to uncheck the box next to "Automatic Metric." The automatic metric box will automatically assign this network adapter's priorities.
- The text field underneath switches from inactive (greyed out) to active (dark grey).
-
10Enter a number in the "Interface Metric" field. The lower the number, the higher the priority. For example, if you set your Wi-Fi interface metric to 1, your Wi-Fi will be the default internet connection no matter what you have connected.[2]
-
11Click OK. The "Advanced TCP/IP Settings" window will close.
-
12Click OK. The "Internet Protocol Version 4 (TCP/IPv4)" window will close.
-
13Click OK. The "Wi-Fi Properties" window will close.
- If you set the Wi-Fi network adapter to 1, your computer will automatically use Wi-Fi instead of a plugged-in Ethernet cord to connect to the internet.


Changing Priority Order in Mac
-
1
-
2Click Network. You'll find this next to a globe with lines on it.
-
3
-
4Click Set Service Order. You'll see this in the second grouping of the drop-down menu.
- A new window will pop up that shows you every network connection type available to you, such as Ethernet, Wi-Fi, and Bluetooth.
-
5Drag and drop Wi-Fi to the top of the list. If you want to connect to Wi-Fi even if you have an Ethernet cable plugged in, make sure Wi-Fi is higher on that list than Ethernet.[3]
-
6Click OK. You'll see this blue button in the bottom right corner of the window.
-
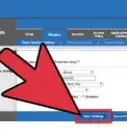
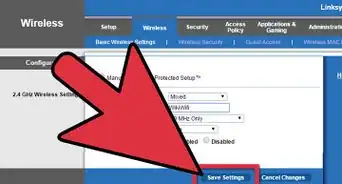
7Click Apply. When you're ready to apply the changes, you can click "Apply."


References
About This Article

1. Make sure you have a Wi-Fi network set up.
2. Connect to the Wi-Fi network (without your Ethernet plugged in).
3. Plug in the Ethernet cable.
4. Unplug the Ethernet cable.