This article was co-authored by wikiHow Staff. Our trained team of editors and researchers validate articles for accuracy and comprehensiveness. wikiHow's Content Management Team carefully monitors the work from our editorial staff to ensure that each article is backed by trusted research and meets our high quality standards.
There are 10 references cited in this article, which can be found at the bottom of the page.
This article has been viewed 165,356 times.
Learn more...
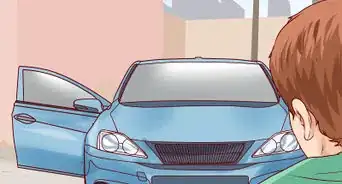
A nice clean paint job can seem like a magnet for bugs. Crushed critters tend to accumulate quickly when you’re driving at high speeds, reducing visibility and making for an unsightly vehicle. Sometimes a simple flip of the windshield wipers just won’t cut it. That’s when you should turn to a more heavy-duty solution, like washing, waxing and using specialty items to avoid crusty, stuck-on messes.
Steps
Washing Your Vehicle
-
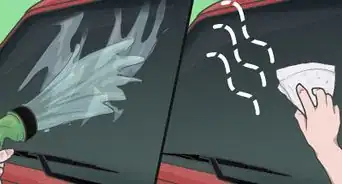
1Soak the affected area with a hose. Rather than blasting your car with a high-pressure stream, which could potentially damage the paint, wet troublesome spots thoroughly, then leave them to sit for several minutes. This will rinse off loose debris and help soften dried residue.[1]
- If you only have a smattering of insects stuck to your car, a light soak may be all you need to get rid of them.
-
2Apply a generous amount of car wash soap. Combine one part soap with three parts water in a large bucket until it’s sudsy. Dip a soft sponge or absorbent cloth into the soap solution and spread it across the car’s exterior. The mild surfactants in the soap should begin to dissolve the bugs right away.[2]
- Use a specialty car wash product, not household soaps or cleaners. These contain compounds that can easily damage your vehicle’s paint.[3]
- It’s a good idea to go ahead and wash your whole car, just in case there are a few spots you’ve missed.
Advertisement -
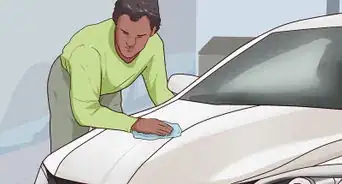
3Scrub away the gunk. Use smooth circular motions to coax out the worst of the crusty mess. Rewet the sponge as needed and continue scrubbing until your paint or windshield is spotless. Make sure to check for insects in less noticeable areas, like the grill, headlights, mirrors and the base of the windshield.[4]
- Picking at difficult spots with a fingernail or plastic scraper can help dislodge them.
- Use a separate cloth or sponge to clean your wheels. This will help you avoid transferring substances like sand, brake fluid and grease to your car’s exterior.[5]
-
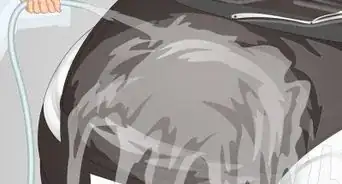
4Rinse and dry your vehicle. Once you’ve washed your car, spray it off with the hose to remove any remaining traces of soap or debris. Wipe away standing water with a microfiber towel or squeegee, then let the vehicle air dry. Afterwards, it should look as good as new![6]
- Don’t skip the final wipedown—hard water can leave behind stains that can eventually become permanently etched into your car’s paint.


Protecting Your Vehicle's Finish with Wax
-
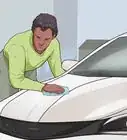
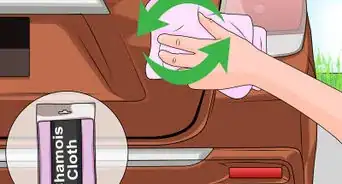
1Wash and dry your vehicle. Before you apply a wax or polish to your car, it’s important that it be completely clean. It’s also recommended that you work somewhere that’s not in direct sunlight, as this can make it harder for the wax to set properly.
- Speed the drying process along by going over the exterior with an absorbent chamois.[7]
- Waxing a dirty car will just trap dirt and debris against the paint.
-
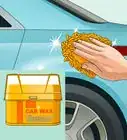
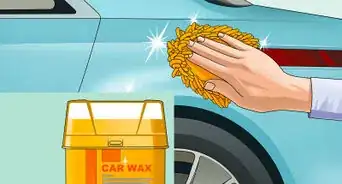
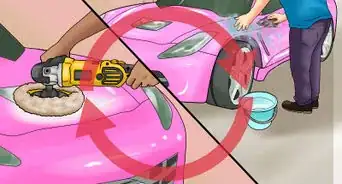
2Rub on a coating of wax. Dab a small amount of wax onto a clean buffer pad and spread it over the area you’re waxing. Then, leave the wax to sit for a few minutes. As it dries, it will begin to grow cloudy, which is how you’ll know it’s time to wipe it off.
- Car waxes typically come in one of two forms: a liquid or a thick paste. Both types of wax can be applied using the same techniques.
- Wax should only be used on the painted areas of your vehicle’s exterior, not the windshield, wheels or other parts.
-
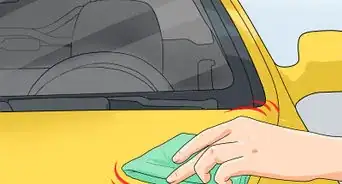
3Wipe away the wax. Use a non-abrasive cloth, like a microfiber or terry cloth towel, to buff out the dried wax. Doing so will leave your car with a clear, polished shine. A coat of wax will also act as a defensive barrier that makes crushed bugs easier to wipe away in the future.[8]
- Buff with short, circular strokes to avoid leaving streaks.
- For maximum efficiency, concentrate on a single section at a time until you’ve gone over your entire vehicle.
-
4Wax your car every 2-3 months. The wax will begin to wear down and lose its effectiveness within a month. You can maintain your car’s armor by regularly applying a fresh coat of wax. Not only will this keep it looking good, it will also make it less likely to attract bugs and other roadway messes.[9]
- If you dread the time and labor involved in waxing your vehicle yourself, consider taking it to have it done by a professional.


Spot-Cleaning with Miscellaneous Items
-
1Treat stubborn spots with Ivory soap. While most varieties of household soaps are a poor fit for automobiles, Ivory soap is designed to be especially gentle. It contains mild acids that will eat away at sun-baked splatters without harming the paint underneath.[10]
- Ivory soap is available in liquid or bar form, and can be found at most major supermarkets or drug stores.
- To treat your car’s finish with a solid bar of soap, rub the soap into damp cloth until it begins to bubble, then use the cloth to scrub the affected area.
-
2Spot clean with baking soda. Mix a couple tablespoons of baking soda with water to form a paste. Spread the paste over small areas littered with dried insects and leave it to sit for 5-10 minutes. Once time is up, wipe away the baking soda paste with a microfiber towel, then rinse and dry.[11]
- Baking soda is another item most people keep in their homes that can be used to safely and effectively lift stains on a vehicle’s exterior.
-
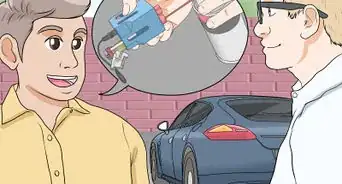
3Use WD-40 to loosen insect grime. Spray the spot very lightly with WD-40 and leave it to take effect for 1-2 minutes. You can then simply wipe away the insects using a clean cloth. This makes a handy solution for busting bug spots when you’re unable to give your car a proper wash or wax.[12]
- Oils like WD-40 are formulated to cut through grease and other types of resilient residue, which makes it perfect for dealing with crusty gunk.
- As an added bonus, WD-40 is useful for reducing the appearance of scratches in a car’s paint.[13]
-
4Scour heavy buildup with steel wool. If insects are piled on so thick that other methods fail to remove them, or they’ve had a long time to become cemented into place, you can use a very fine steel wool (#000 grade is optimal) to wear them down. This will require you to work slowly and cautiously, but with a steady hand it’s practically guaranteed to erase even the most maddening messes.[14]
- Focus on a small area and use as little pressure as possible.
- This is only recommended as a worst case scenario solution. If you’re not careful, you could easily leave scratches on your car.


Warnings
- Avoid using any products that haven’t been approved for cleaning vehicle exteriors. The majority of cleaners are made with harsh chemicals that can easily ruin your car’s paint.⧼thumbs_response⧽
Things You'll Need
- Water
- Car wash soap
- Car wax
- Ivory soap
- Baking soda
- WD-40
- Fine steel wool (0000 grade recommended)
- Soft microfiber or terry cloth towel
- Absorbent sponge
- Squeegee
- Chamois

References
- ↑ http://driving.ca/auto-news/news/heres-the-right-way-to-clean-bugs-off-your-car
- ↑ http://www.consumerreports.org/car-repair-maintenance/how-to-wash-your-car/
- ↑ http://www.housecleaningcentral.com/en/cleaning-tips/tip/car-cleaning-tip.html
- ↑ http://www.autogeek.net/remove-bugs-and-tar.html
- ↑ http://www.consumerreports.org/car-repair-maintenance/how-to-wash-your-car/
- ↑ http://www.popularmechanics.com/cars/how-to/g99/10-tips-to-clean-and-detail-your-car-like-a-pro/
- ↑ https://www.youtube.com/watch?v=85i-0Nu749M
- ↑ http://thewirecutter.com/reviews/how-to-wash-wax-and-detail-your-car-like-a-pro/#waxing-and-polishing
- ↑ http://thewirecutter.com/reviews/how-to-wash-wax-and-detail-your-car-like-a-pro/#waxing-and-polishing
- ↑ http://driving.ca/auto-news/news/heres-the-right-way-to-clean-bugs-off-your-car
- ↑ http://www.almanac.com/content/household-uses-baking-soda
- ↑ https://www.autoevolution.com/news/how-to-remove-dead-bugs-off-your-car-1373.html
- ↑ https://diyprojects.com/fixing-car-scratch-using-wd40/
- ↑ https://www.autoevolution.com/news/how-to-remove-dead-bugs-off-your-car-1373.html
About This Article

It can be frustrating when insects get on your car’s exterior, but fortunately, you can clean them off with some basic household cleaners. First, rinse the dirty area with a light stream from a hose. Then, mix car soap with warm water and rub it onto your car with a soft sponge or cloth. You can also spray a little WD-40 onto the insect grime to break it down. Or, rub on a baking soda and water paste instead. When you’re finished, rinse your car again to get rid of any insect residue. For more tips, including how to protect your vehicle’s finish with wax, read on!