This article was co-authored by Jonas Jackel and by wikiHow staff writer, Eric McClure. Jonas Jackel is the Owner of Huckleberry Bicycles, a bicycle retail store based in San Francisco, California. Jonas has over 20 years of experience managing bicycle retail stores and has operated Huckleberry Bicycles since 2011. Huckleberry Bicycles specializes in servicing, repairing, and custom building road, cross, gravel, touring, folding, and e-bikes. Jonas was also previously sat on the Board of Directors for Bike East Bay, a bicycle-advocacy non-profit organization based in Oakland, California.
There are 16 references cited in this article, which can be found at the bottom of the page.
This article has been viewed 9,995 times.
Your bike’s cassette is the sequence of cogs on the back wheel that allows your bike to change gears. If you want to keep your ride smooth and avoid malfunctions, it's best to clean the cassette every 2-5 years. You need to remove the bike's rear wheel to access the cassette, but don't worry—the process is quick and easy.[1] Be sure to grab a few pipe cleaners so you can scrub the tightest spots with ease!
Steps
Removing the Back Wheel
-
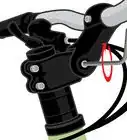
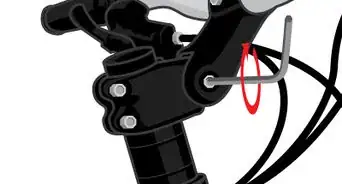
1Shift to the lowest gear and disengage the rear brake. Set your bike on a bike stand or use the kickstand to stabilize it on the ground.[2] Use the gearshift on your right handle to shift to the lowest gear available, which will loosen the chain. Unlock your rear brake by pulling down on the metal bracket that holds the brake cable in place.[3]
- On some bikes, you can disengage the rear brake by twisting a lever on the side of the brake.
- You can also unscrew the brake pad itself by loosening the nut on top of the pad with an Allen wrench as well.
-
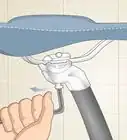
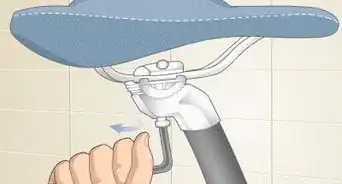
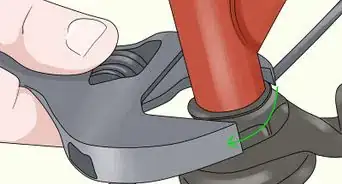
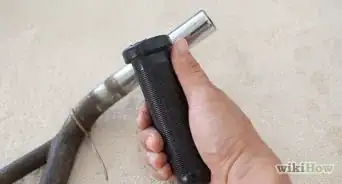
2Turn the release skewer counterclockwise to remove the rear wheel. The release skewer is the metal lever located in the center of the hub. Grab the release skewer and turn it counterclockwise 5-10 times until you don’t feel any resistance as you turn it. Then, hold the frame of the bike with one hand and the wheel with your other hand. Lift the frame up while sliding your rear wheel out to remove it.[4]
- As you’re lifting the bike up, you may need to slide the chain and the rear bracket to the side to clear the cassette.
Advertisement -
3Grab a rag and sit down with the wheel between your legs. You can use any type of cloth or rag for this. Set a chair out and sit down with your legs spread. With the cassette facing out and away from you, slide the wheel in between your legs. Wrap your knees and shins around the rubber tire to hold the wheel in place.[5]
- The cassette is an especially strong part of your bike. It experiences a lot of friction and movement from the chain every time that you ride, so you don’t need to use a microfiber cloth or anything like that.
- The cassette is kind of difficult to remove and reassemble. It’s a lot easier to clean it without removing it from the wheel.
Tip: You can soak the cloth in a degreaser if the cassette hasn’t been cleaned in decades, but it’s usually unnecessary. A little oil or grease is healthy for these pieces anyway, since you don’t want the cogs to rub against one another without being lubricated.
-
4Set a large towel down underneath the wheel if you’re inside. Grab a towel that you don’t mind getting dirty. Spread it out in front of you and set the wheel on top of it. There may be a lot of nasty gunk built up in the cassette, and the towel will keep the oil, dirt, dust, and buildup from getting all over your floor.[6]


Scrubbing Between the Cogs
-
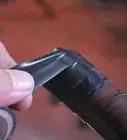
1Pull a side of the cloth taut and slide it under the first cog. Grip a long length of the cloth with both hands and pull it tight so that you have a 6–8 in (15–20 cm) length of fabric pulled taut. Starting with the smallest cog on the front of the cassette, slide the length of cloth under the cassette and work it in between the first and second cog on the assembly.[7]
- If the cloth won’t slide in between the individual cogs, get a thinner cloth. It shouldn’t be too hard to slide the cloth into place, though.
- Cleaning in between the cogs with a cloth will remove any debris that’s sitting in between the individual components of the cassette. The cleaner these pieces are, the less resistance there will be when you pedal your bike.
-
2Pull the cloth up and to the right until your left hand is next to the cog. Use your right hand to drag the cloth up and away from the cog at a 35- to 45-degree angle. Let your left hand guide the cloth through the cog roughly 3–6 inches (7.6–15.2 cm). Stop moving the cloth once your left hand is 1–2 inches (2.5–5.1 cm) from the edge of the cassette.[8]
- The cassette will rotate while you do this. The cassette rotates clockwise towards the front of the bike when pressure is applied in this direction. This is how your chain generates torque when you pedal your bike.
Tip: If you’re left-handed, you still have to use your right hand to pull the cloth up. Since the cogs don’t rotate counterclockwise, you can only rotate them in one direction.
-
3Slide the cloth back to its original location under the cassette. After pulling the cloth up and rotating the cog, drag the cloth to the left. Pull the fabric back to its original position with the cloth resting under the cog. This is the movement that actually wipes the dust and residue off of the cogs, so keep the cloth as tight as possible to remove any debris resting in between them.[9]
- When done quickly, this is basically the same motion that you use to floss your teeth.
-
4Continue moving the cloth back and forth another 5-10 times. Continue sliding the cloth back and forth between the 2 cogs. Drag the fabric to the right and pull it back to the left. Every time that you move the cloth to the right, the cassette will rotate. This will allow you to clean every portion of the cogs. Do this 5-10 times to rotate the cassette a total of 3-4 times and clean each portion of the cogs.[10]
- You can do this as fast or slow as you’re comfortable with. If you have a pretty good grip on the movement and you can get into a solid rhythm, feel free to move the cloth quickly. You’ll still get the cogs clean if you take your time, though.
-
5Repeat this process on each cog to remove all of the debris. After you’ve cleaned in between the first 2 cogs on the cassette, pull your cloth out and slide it in between the second and third cogs in the assembly. Clean these cogs the same exact way that you cleaned the first set of cogs. Do this for every set of cogs to clean out the gunk in between the individual components of the cassette.[11]
- On the last and biggest cog, pull the cloth out away from the wheel as you slide it back and forth. There isn’t a surface behind the last cog for you to slide the cloth against, so you need to rely on outward force to turn the cassette.


Deep-Cleaning with a Pipe Cleaner
-
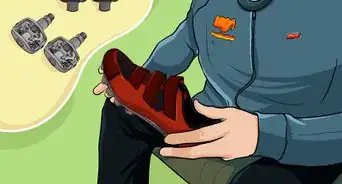
1Swap your cloth out for a pipe cleaner to get deep into the cassette. Set the cloth aside and grab a pack of pipe cleaners. The standard pipe cleaners that you use for arts and crafts are perfect for this. While the cloth works to wipe down the flatter sections of the individual cogs, it doesn’t do a great job cleaning the hard-to-reach areas where the axle meets each individual piece. A pipe cleaner is perfect for these areas, though.[12]
- You can use a shoelace instead if you don’t have pipe cleaners.
-
2Scrub in between the cogs the same way you used the cloth. Hold the pipe cleaner by both ends and slide it in between the first and second cogs from underneath. Drag the pipe cleaner back and forth like you’re flossing. Do this 5-10 times before moving on to the second set of cogs. Continue cleaning in between the cogs while pulling the pipe cleaner up a little to clean the area around the axle out.[13]
- The pipe cleaner will get much deeper than the cloth, so don’t be surprised if a lot more gunk falls out of the cassette. Don’t worry—this isn’t a sign that you did the first part incorrectly!
- Swap your pipe cleaner out for a fresh one whenever it gets extremely filthy.
-
3Slide your pipe cleaner in between a groove on the outside of the first cog. The exterior rim of each circular cog is filled with small grooves. Grab a fresh pipe cleaner and hold it by both ends. Starting on your first cog, either bend the pipe cleaner outwards a little to rest it on top of a grove, or slide the fresh pipe cleaner on top of the groove and pull it to the side to hold it in place.[14]
- These grooves latch on to the chain and generate traction when you pedal.
-
4Drag the pipe cleaner back and forth to scrub the groove. Simply move the pipe cleaner back and forth 1–2 inches (2.5–5.1 cm) at a time to gently clean the groove. It’s good to have a little oil on these grooves, so you don’t need to scrub especially hard to clean them out. Drag the pipe cleaner over the groove 4-5 times to gently remove any gunk or buildup.[15]
-
5Repeat this process on all of the other grooves on your cogs. Use this same process to clean out all of the grooves on the front cog. Then, repeat the process on your second cog. Continue doing this until you’ve cleaned out all of the grooves on the cassette.[16]
- Depending on the number of grooves that you have, this part of the cleaning process can easily take 20-30 minutes. This isn’t particularly hard to do, but each cog can have 5-15 grooves.
- Cleaner grooves will grip the chain more effectively than dirty grooves. This will reduce the likelihood that you slip a chain in the future.
-
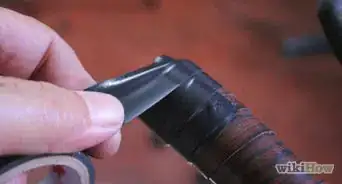
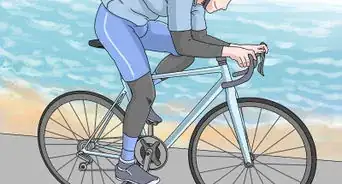
6Clean your chain to keep the cassette from getting dirty in the future. Spray your chain with a degreaser and wipe it down thoroughly with a microfiber cloth. Use an Allen wrench to tighten the individual links in the bicycle chain. Then, re-lubricate your bike using a bike chain oil. Pour a few drops of your oil into a cloth and rub the cloth into your chain.[17]
Tip: Cleaning your chain once every 1-2 months will dramatically increase the lifespan of your cassette. If you maintain your chain, you may not need to scrub cassette for 4-5 years.
-
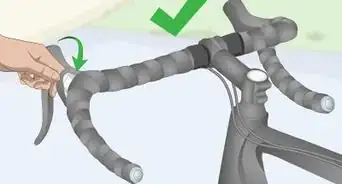
7Reattach your rear wheel to the bike and slide the chain back on. Slide your back wheel back into the frame and rest the end of the seat bars on the axle. Wrap your chain back over the lowest gear on your bike and reattach the brake assembly. Tighten the release skewer by turning it clockwise until you can’t turn it any further.[18]


Things You’ll Need
- Allen wrench
- Cloth
- Towel
- Pipe cleaner
- Microfiber cloth
- Degreaser
- Bike oil
References
- ↑ Jonas Jackel. Owner, Huckleberry Bicycles. Expert Interview. 18 February 2020.
- ↑ Jonas Jackel. Owner, Huckleberry Bicycles. Expert Interview. 18 February 2020.
- ↑ https://www.madegood.com/bikes/remove-a-rear-wheel-with-quick-release-skewer/
- ↑ https://www.madegood.com/bikes/remove-a-rear-wheel-with-quick-release-skewer/
- ↑ https://youtu.be/LrsSKQjxmt8?t=85
- ↑ https://youtu.be/LrsSKQjxmt8?t=115
- ↑ https://youtu.be/LrsSKQjxmt8?t=93
- ↑ http://slocyclist.com/how-to-clean-your-road-bikes-cassette-without-taking-it-off/
- ↑ http://slocyclist.com/how-to-clean-your-road-bikes-cassette-without-taking-it-off/
- ↑ https://youtu.be/LrsSKQjxmt8?t=113
- ↑ https://youtu.be/LrsSKQjxmt8?t=146
- ↑ https://youtu.be/LrsSKQjxmt8?t=168
- ↑ https://youtu.be/LrsSKQjxmt8?t=177
- ↑ https://youtu.be/LrsSKQjxmt8?t=200
- ↑ https://youtu.be/LrsSKQjxmt8?t=203
- ↑ https://youtu.be/LrsSKQjxmt8?t=206
- ↑ https://www.popularmechanics.com/adventure/sports/a9499/quick-bike-preservation-tips-for-the-home-mechanic-15947458/
- ↑ https://www.madegood.com/bikes/remove-a-rear-wheel-with-quick-release-skewer/
- ↑ https://www.bicycling.com/repair/a20014110/5-ways-youre-wrecking-your-drivetrain/
- ↑ https://youtu.be/qcgz3-XyNkI?t=290
About This Article