This article was co-authored by Jonas Jackel and by wikiHow staff writer, Hunter Rising. Jonas Jackel is the Owner of Huckleberry Bicycles, a bicycle retail store based in San Francisco, California. Jonas has over 20 years of experience managing bicycle retail stores and has operated Huckleberry Bicycles since 2011. Huckleberry Bicycles specializes in servicing, repairing, and custom building road, cross, gravel, touring, folding, and e-bikes. Jonas was also previously sat on the Board of Directors for Bike East Bay, a bicycle-advocacy non-profit organization based in Oakland, California.
There are 17 references cited in this article, which can be found at the bottom of the page.
This article has been viewed 37,320 times.
While your bike probably came with a stock saddle, it may feel uncomfortable to sit on if you go on a long ride. Luckily, many bike stores sell after-market saddles with additional support so you don’t get sore, and you can easily install it within a few minutes. There are many styles and shapes to choose from for your saddle, but they’ll all clamp directly to the seat post using hex bolts. Once you have the new saddle attached to your frame, take some time to position it so you have the proper form when you ride!
Steps
Removing the Old Saddle
-
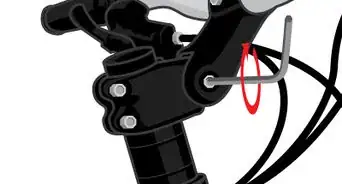
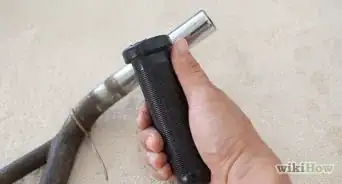
1Unscrew the clamp bolts on the bottom of the saddle. Locate the 1 or 2 hex bolts connected to the metal clamp directly underneath your saddle. Fit a hex wrench into the bolt and turn it counterclockwise by 2–3 rotations. If your saddle has a second bolt, unscrew it evenly with the first one so you don’t strip the threading. Loosen the bolts just enough so you can move the metal clamp around.[1]
- Typically, bike hex bolts are 5 mm, but it may vary depending on your model.
Variation: If you don’t see any bolts on the bottom of the saddle, it may be attached directly to the seat post. Look for a bolt or knob where the saddle connects to the frame and turn it counterclockwise. Once it’s loose, you can lift the saddle up off of the post.
-
2Lift and turn the top clamp to remove the saddle. Look for the thin metal rails that run down from the saddle and go underneath the metal clamp on the seat post. Grab the top piece of the clamp and lift it up so it isn’t touching the saddle rails. Once you move the clamp out of the way, lift your old saddle straight up to remove it.[2]
- If you can’t turn the clamp and it has 2 bolts, you may need to unscrew one of the bolts completely.
Advertisement -
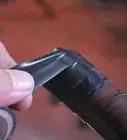
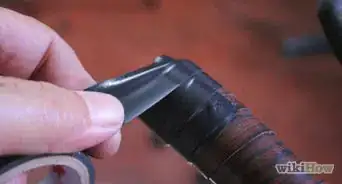
3Clean the dirt and residue off the clamp with a damp paper towel. Wet a paper towel with clean water or isopropyl alcohol and use it to wipe the clamp down.[3] Work the paper towel into the channels along the sides of the clamp so they’re completely clean. Make sure you wipe both the top and bottom pieces of the clamp.[4]
- If dirt or residue gets stuck in the clamp, your saddle may creak or squeak while you’re riding.


Securing the New Saddle
-
1Grease the bolts and new saddle rails with bike lube.[5] Place a fingertip-sized amount of lube on the bolts’ threadings and spread it around with a paper towel. Turn the bolts in the clamp to distribute the lube more evenly. Then, coat the metal rails on the bottom of your new saddle with lube so it doesn’t creak while you’re riding.[6]
- You can buy bike lube online or from a local sporting goods store.
-
2Set the saddle rails in the bottom clamp’s channels. Point the front of the saddle toward your bike’s handlebars so it’s in line with your bike frame. Position the rails so they sit inside of the channels to ensure you can easily move your saddle around later on. Hold the seat in place so it doesn’t turn or move.[7]
- It doesn’t matter how far forward or backward you position the saddle right now since you’ll be able to adjust it later.
Variation: If your saddle doesn’t have rails and connects directly to the seat post, simply slide the post into the hole on the bottom of your saddle.
-
3Reposition the top clamp so it fits over the rails. Hold your new saddle in place with your non-dominant hand. Use your dominant hand to grab the top half of the clamp. Turn the clamp so it wraps around the saddle rails and presses down against the bottom half. Line up the bolt holes on the top with the ones on the bottom so you can screw the bolts back in.[8]
- Keep your hand on the saddle since it’s still loose and could fall off.
-
4Tighten the clamp bolts to hold the saddle in position. Hold the saddle with your non-dominant hand so it doesn’t shift around. Use your hex wrench to turn the clamp bolt clockwise. If the clamp has multiple bolts, tighten them evenly so they don’t get damaged. Screw the bolts in until your saddle doesn’t move around on its own but leave it loose enough where you can still wiggle it around.[9]


Setting the Saddle Height
-
1Find the length of your inseam by measuring from the floor to your groin. Hold a level or ruler between your legs so it’s parallel to the floor. Pull the level up as far as you comfortably can. Ask a helper to measure from the floor to the top of the level to find your inseam measurement. Write down the number so you don’t forget it.[10]
- If you don’t have a helper, stand next to a wall and mark the top of the level with a pencil. Then, measure from the floor to the mark.
Warning: Don’t use the same inseam measurement you would use for clothing since it will be shorter than what you need and could make riding uncomfortable.
-
2Multiply your measurement by 0.887 to find your ideal saddle height. When you’re pedaling, you don’t want to fully extend your leg since it will make your body rock and get uncomfortable. Calculate the new height for your saddle and write down your adjusted measurement.[11]
- For example, if your measurement was 30 inches (76 cm), then your equation would be 30 x 0.887 = 26.61 inches (67.6 cm).
-
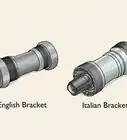
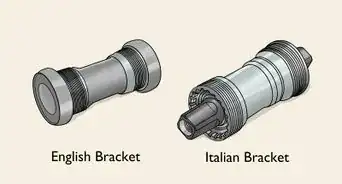
3Measure the seat post from the top of the saddle to the bottom bracket’s axle. The bottom bracket is where the pedals connect to your bike frame. Put the end of your tape measure on the center of the axle and pull it up the seat post. Extend the tape measure until you reach the height measurement you just calculated. Keep your tape measure in place or ask a helper to hold it for you.[12]
- Don’t measure from the ground, or else you’ll set your saddle too low.
-
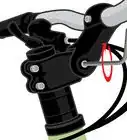
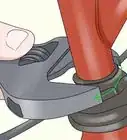
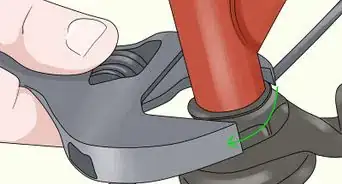
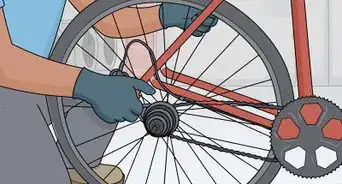
4Loosen the bolt on the seat post. Look for a metal ring or clamp that has a hex bolt where the saddle connects to the bike frame. Turn the bolt counterclockwise with your hex wrench until you’re able to raise and lower the saddle.[13]
- Your seat may drop down to the lowest position when you loosen the bolt.
-
5Position the top of the saddle to your adjusted measurement. Grab the bottom of the saddle so you can easily raise or lower it. Move the saddle until the top lines up with the measurement. Turn the hex bolt clockwise to lock your saddle into place.[14]
- While this should put your saddle in a comfortable position, the saddle height depends on your personal preference and what feels best when you’re riding. You may need to make adjustments to the height again if you feel sore or uncomfortable.


Adjusting the Saddle Position
-
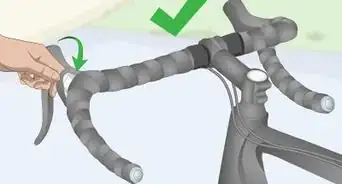
1Tilt the saddle so it’s perfectly horizontal. Park your bike on level ground so you set the angle accurately. Place a level on the saddle so it’s in line with the frame below it. If the saddle isn’t level, loosen the bottom clamp bolts and grab the back side of the saddle. Raise or lower the back of your saddle until the level is horizontal.[15]
- If you set the angle too far forward, you’ll slide forward while you ride and put more pressure on your arms. If the saddle tilts back, your legs won’t be in a good position to pedal.
-
2Slide the saddle forward so the back of your knee lines up with the pedal axle. Sit on your bike and move the pedals around until they’re at the same height. Tie a small weight to a string and hold it against your leg behind your kneecap. Let the string hang straight down and look where it intersects the pedal. If it lines up with the small axle running through the middle pedal, then your seat is in the correct forward position. If not, push the saddle straight forward or back and check again.[16]
- You may need to ask a helper to support you and your bike while you take your measurement.
- If you don’t have the saddle in the right forward position, it may be more difficult for you to pedal.
Tip: Your saddle may have numbers or measurements printed on the rails. Take a picture of your saddle when you have it in the right position so you can use it as a reference later on.
-
3Tighten down the clamp bolts to lock the saddle in place. Turn the bolts clockwise with your hex wrench to screw them back into the top part of the clamp. If your saddle has 2 bolts, be sure to tighten them evenly so you don’t stress or strip them. Once you secure the bolts, you can ride your bike comfortably![17]


Expert Q&A
-
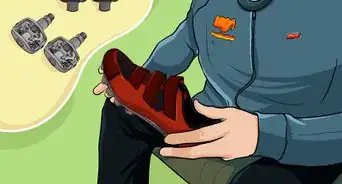
QuestionHow should you install a bike saddle when first learning to ride a bike?
 Jonas JackelJonas Jackel is the Owner of Huckleberry Bicycles, a bicycle retail store based in San Francisco, California. Jonas has over 20 years of experience managing bicycle retail stores and has operated Huckleberry Bicycles since 2011. Huckleberry Bicycles specializes in servicing, repairing, and custom building road, cross, gravel, touring, folding, and e-bikes. Jonas was also previously sat on the Board of Directors for Bike East Bay, a bicycle-advocacy non-profit organization based in Oakland, California.
Owner, Huckleberry BicyclesIt helps to put the seat down kind of low while you're learning so you feel comfortable getting your feet down on the ground. Once you get the hang of it and you can balance okay, then it's a lot easier to set the seat up a little bit higher so you can extend your legs more. As you get more comfortable, you can crank the seat up higher.
Warnings
- If your hips rock back and forth while you’re riding, your seat may be too high and make you uncomfortable on longer rides.[18]⧼thumbs_response⧽
Things You’ll Need
- Hex wrench
- Paper towel
- Bike lube
- Level
- Measuring tape


References
- ↑ https://youtu.be/kd87dP0crnI?t=60
- ↑ https://youtu.be/BfnM0eyjB5Q?t=52
- ↑ Jonas Jackel. Owner, Huckleberry Bicycles. Expert Interview. 18 February 2020.
- ↑ https://youtu.be/UMipWkcQ3Go?t=111
- ↑ Jonas Jackel. Owner, Huckleberry Bicycles. Expert Interview. 18 February 2020.
- ↑ https://youtu.be/UMipWkcQ3Go?t=137
- ↑ https://youtu.be/BfnM0eyjB5Q?t=64
- ↑ https://youtu.be/BfnM0eyjB5Q?t=67
- ↑ https://youtu.be/UMipWkcQ3Go?t=199
- ↑ https://youtu.be/FVu5Zrktm40?t=251
- ↑ https://youtu.be/TxxiIx4yVe4?t=61
- ↑ https://youtu.be/FVu5Zrktm40?t=337
- ↑ https://youtu.be/kd87dP0crnI?t=200
- ↑ https://youtu.be/kd87dP0crnI?t=204
- ↑ https://youtu.be/FVu5Zrktm40?t=143
- ↑ https://youtu.be/ycA1tpSWeqA?t=62
- ↑ https://youtu.be/kd87dP0crnI?t=165
- ↑ https://youtu.be/FVu5Zrktm40?t=177
About This Article