This article was co-authored by wikiHow staff writer, Hannah Madden. Hannah Madden is a writer, editor, and artist currently living in Portland, Oregon. In 2018, she graduated from Portland State University with a B.S. in Environmental Studies. Hannah enjoys writing articles about conservation, sustainability, and eco-friendly products. When she isn’t writing, you can find Hannah working on hand embroidery projects and listening to music.
The wikiHow Video Team also followed the article's instructions and verified that they work.
This article has been viewed 16,088 times.
Learn more...
While they aren’t a kitchen necessity, waffle makers can make any Sunday morning breakfast faster and easier. Cleaning a waffle maker, however, can be tough, especially when burnt bits of batter get stuck in the grooves. Fortunately, you can scrub your waffle maker and soak the burnt pieces off for an easy cleanup. Dry your waffle maker thoroughly and store it upright to keep enjoying homemade waffles time and time again!
Steps
Cleaning Non-Stick Waffle Makers
-
1Unplug the waffle maker and let it cool down. If you were recently using your waffle maker, make sure you turn it off and unplug it. Then, wait about 20 minutes for it to cool down fully so you don’t burn your hands.[1]
- Waffle makers get really hot when you use them, which is why you need to let them cool off for a bit.
-
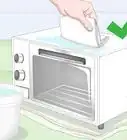
2Brush off any crumbs with a paper towel. Grab a paper towel or a soft-bristled brush and use it to wipe away any large crumbs or burnt areas. This is just an initial wipe-down, so you don’t have to work very hard at it.[2]
- If your waffle maker has removable plates, you can pop them out before you start cleaning to make it easier.
- Never use a steel scrubber on your waffle maker, as it can damage the surface of the plates.
Advertisement -
3Soak up the excess oil with a few paper towels. Fold a paper towel in half and crease the fold so it stays. Use the edge of the paper towel to dig into the crevices of the waffle maker and wipe up any leftover oil.[3]
- This can also help to loosen up any stuck bits of burnt batter.
-
4Mix hydrogen peroxide and baking soda together to form a paste. Pour a 1:1 ratio of hydrogen peroxide and baking soda into a bowl, then mix them together until they form a lumpy paste. The mixture may foam up a bit as you stir it, but that just means it’s working![4]
- Hydrogen peroxide is a foaming agent and baking soda is mildly abrasive, so they both work to remove tough, stuck-on clumps of batter.
-
5Spread the paste onto the grates and let it sit for 2 hours. Use a spoon to spread the paste onto the waffle maker, focusing on the areas that have burnt pieces of batter on them. Set a timer for about 2 hours to let the mixture loosen and absorb the burnt particles.[5]
- The paste will start to turn brown as it absorbs the oil and crumbs from your waffle maker.
-
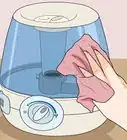
6Wipe the paste off the waffle maker with a clean towel. Use a new, clean rag to gently wipe the hydrogen peroxide and baking soda off your waffle maker. If there are any stubborn stuck-on spots, you can use the rag to scrub them off as much as you can.[6]
- Even if the paste didn’t take off all of the burnt batter, it will have loosened it enough that you can clean it off easily.
-
7Scrape the crevices of the waffle iron with a paper towel. Fold another paper towel and use the creased edge to get in between the crevices of the waffle iron. Try to use the corner of the paper towel to scrape off as much gunk as you can.[7]
- If there are any really hard to get spots, grab a toothpick and use that to scrape out the grooves.
- Again, you should never use a steel brush or scrubber on your waffle maker, as it can scratch the plates.
-
8Dry the waffle maker with a clean towel. Grab a clean, dry towel and use it to wipe off any excess water from the waffle maker. Leave the waffle maker open to dry before you close it and store it upright on a shelf.[8]
- If you were cleaning a waffle iron with detachable plates, dry them off before you snap them back into the waffle maker.


Washing Cast Iron Waffle Makers
-
1Unplug the waffle maker and let it cool for 30 minutes. When you’re done making waffles, turn your waffle maker off and let it sit for 30 minutes, or until it’s fully cool. Try not to let it sit for much longer than that, or it could make it harder to clean in the long run.[9]
- If the waffle maker is too hot, you could burn your hands.
- If you let the waffle maker sit for too long, the batter could get stuck on the grates and be difficult to remove.
-
2Wipe off your waffle maker with soap and a soft-bristled brush. Put a few drops of dish soap on a soft-bristled brush and use it to wipe away any leftover oil or batter. Try to scrub in between the grooves of your waffle maker to really wipe out any leftover pieces.[10]
- Using dish soap on a cast iron waffle maker can wipe away the seasoning. If you don’t want to remove the seasoning from your waffle maker, skip the soap and just use water.
- If your waffle maker plates are removable, you can pop them out and take them over to the sink.
-
3Use a waffle maker iron brush to scrub off burnt bits. An iron brush is a hard-bristled brush that can be used on cast iron without scratching it. Use one of these brushes to scrub off any burnt pieces of batter that are stuck in the grooves of your waffle maker.[11]
- If you got all of the burnt bits off during your first scrub, you don’t have to use a stronger brush.
-
4Dry the plates with a towel. Try to get in between the grooves with a towel to get rid of the majority of the water, then lay the plates out to dry for about 1 hour. Storing wet cast iron plates can cause rust and might shorten the lifespan of your waffle maker.[12]
-
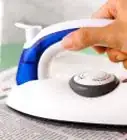
5Coat the plates in butter or oil to season them. If you’d like to, spread a small drop of vegetable oil or butter onto a paper towel. Rub the paper towel into the plates of the waffle maker to season them and add a bit of flavor to your next batch of waffles. Pat up the excess butter or oil with a separate paper towel before you store your waffle maker.[13]
- Seasoning your waffle maker will make your waffles taste better in the future.
- Adding butter or oil also helps moisturize the cast iron plates to keep them from drying out.

Warnings
- Never use soap to clean a non-stick waffle maker, as that can remove the non-stick surface.⧼thumbs_response⧽
Things You’ll Need
Cleaning Non-Stick Waffle Makers
- Cloth
- Paper towels
- Hydrogen peroxide
- Baking soda
- Bowl
- Spoon
- Towel
Washing Cast Iron Waffle Makers
- Dish soap
- Soft-bristled brush
- Iron brush
- Towel
- Paper towels
- Oil or butter (optional)


References
- ↑ https://www.thekitchn.com/how-to-clean-waffle-maker-22942502
- ↑ https://www.thekitchn.com/how-to-clean-waffle-maker-22942502
- ↑ https://www.mrbreakfast.com/ask.asp?askid=25
- ↑ https://www.thekitchn.com/how-to-clean-waffle-maker-22942502
- ↑ https://www.thekitchn.com/how-to-clean-waffle-maker-22942502
- ↑ https://www.thekitchn.com/how-to-clean-waffle-maker-22942502
- ↑ https://www.mrbreakfast.com/ask.asp?askid=25
- ↑ https://www.mrbreakfast.com/ask.asp?askid=25
- ↑ https://www.wafflepantry.com/blog/waffle-iron-tips/
About This Article